Here’s a complete list of materials you’ll need for making a Hobby Horse. Scroll down for detailed information and our recommendations for each item.
- Fabric
- Medium-weight fusible interfacing: For reinforcing fabrics
- Felt for eyes and nostrils, plus white hand embroidery floss or paint (e.g., fabric paint or acrylic paint marker)
- Double-sided iron-on adhesive webbing: For securing small elements
- Material for the mane: Yarn, hair extensions, or faux fur
- Toy filling: For stuffing the horse
- Stick: Maximum diameter of 1.2″ (3 cm), minimum length of 24″ (60 cm).
- Wool, cord, or rope: Approx. 20″ (50 cm) to wrap around the fabric at the stick opening
Quick heads-up, horse lover: Some links on this page are Amazon affiliate links. When you shop through them, we may earn a small commission, at no extra cost to you. This helps us keep creating sewing patterns and tips for your Hobby Horse projects.
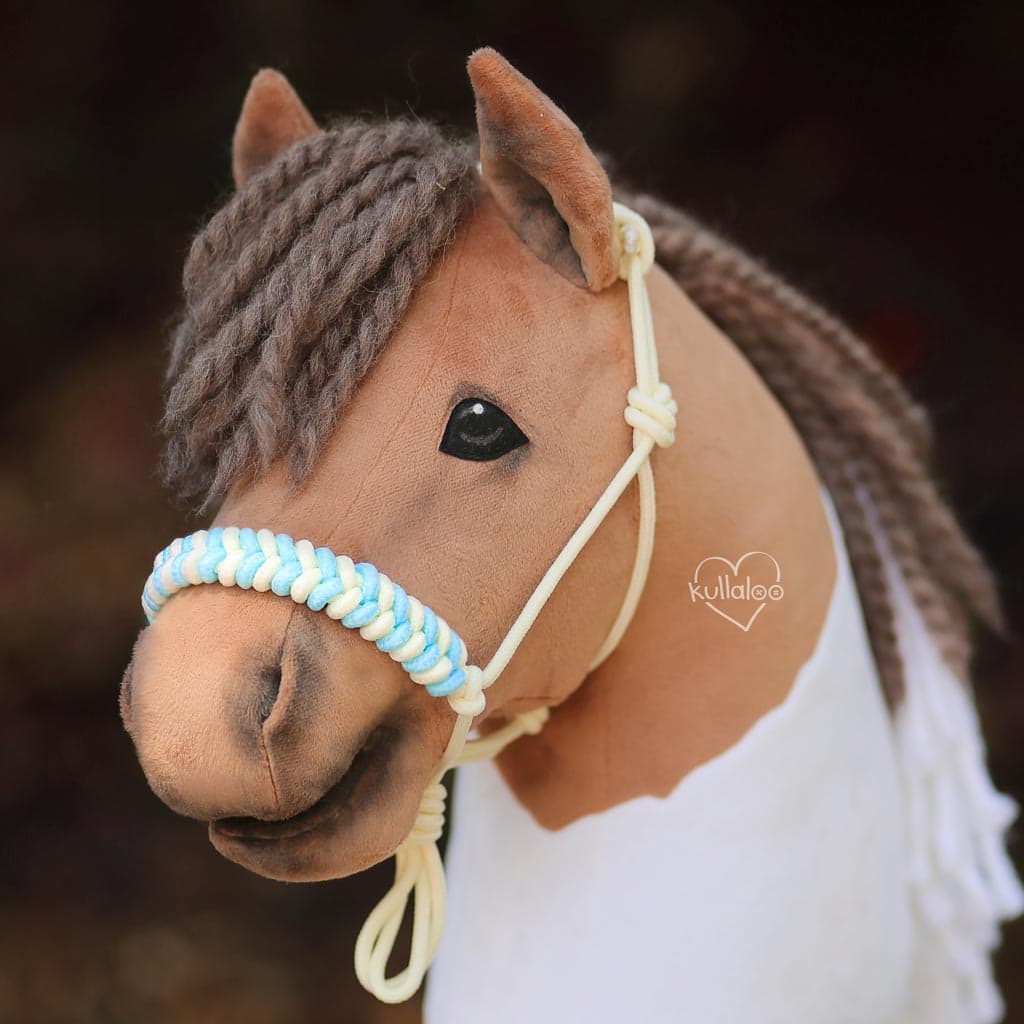
Fabrics for the Hobby Horse
Short-pile, slightly elastic plush fabrics with a pile direction, like minky, are ideal for sewing a Hobby Horse. These fabrics make grooming the horse more fun, and their soft texture feels wonderful to the touch. However, you can also use other types of fabric such as fleece, velour, sweatshirt fabric, or even woven fabrics.

Keep in mind that the thickness and stretch of your chosen fabric will affect the final look and sewing process:
- Thicker fabrics: Make your Hobby Horse appear larger.
- Stretchier fabrics: Require extra effort to achieve a smooth and even shape when stuffing. For very stretchy fabrics like fleece or velour, we recommend ironing on an interfacing to make sewing easier and keep the fabrics from stretching too much when stuffing the horse.
We’ve created a dedicated page with detailed tips on selecting the best fabrics for your Hobby Horse. Follow this link for more details!
Regardless of your fabric choice, we always suggest using a medium-weight fusible interfacing to reinforce certain areas, such as the ears and the inner muzzle. For additional stability, you can also reinforce all fabric pieces with interfacing if desired. Here are some recommendations for the interfacing (affiliate links; see our full disclosure above):

Materials for eyes and nostrils
- Felt: For eyes and nostrils (we recommend stiff felt for better durability).
- White hand embroidery floss: For adding eye twinkles. OR
- Paint: Fabric paint or acrylic paint marker for details.
- Double-sided iron-on adhesive webbing: To secure the elements before sewing.
At kullaloo, we always use felt for small elements like eyes and nostrils. Felt is a fantastic choice because its edges won’t fray, allowing you to use a simple straight stitch to secure it. This makes sewing small details much easier compared to fabrics that require a zigzag stitch to prevent fraying. While a zigzag stitch fully covers the fabric edges, we prefer felt for its simplicity and durability. Stiff felt is our top choice over soft craft felt – it holds its shape better and usually lasts longer, especially for functional toys like Hobby Horses (affiliate links; see our full disclosure above).

As the eyes are the heart and soul of your Hobby Horse, so we recommend adding details like eye twinkles to give it expression and life. For this, white hand embroidery floss works perfectly. If you’d like to add even more personality, try painting the black felt eyes with fabric paint or acrylic paint markers. These tools allow you to create stunning details that bring your horse to life. Visit this page to learn how to paint Hobby Horse eyes.


To make attaching small elements like eyes and nostrils easier, we recommend using double-sided iron-on adhesive webbing. Simply iron the felt pieces onto the fabric first, and then sew them in place. This method prevents shifting and makes sewing much simpler, especially when working with tiny parts.


These are the double-sided iron-on adhesive webbings we usuallly work with (affiliate links; see our full disclosure above):


Material for the mane
Choose one of the following materials to create the a mane for your Hobby Horse:
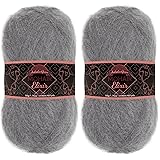
- Ball of yarn: Thick or thin, depending on your desired look
- Hair extensions: Synthetic or real, at least 8″ (20 cm) long
- Faux fur: Great for a foal-like appearance.
The mane of a Hobby Horse is traditionally made from individual strands of yarn. This method offers endless possibilities, from short, upright styles to long strands that are easy to braid and style. Thick, chunky yarn creates a voluminous look with just a few strands, while thinner yarns like mohair allow for tying multiple strands at once for a finer, more delicate mane. For step-by-step instructions and tips on working with yarn, visit our page: Hobby Horse mane made with yarn.


Here are some examples of yarn that might work your Hobby Horse mane (affiliate links; see our full disclosure above):


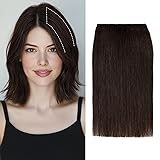
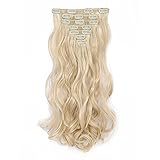
Another creative option is to use synthetic or real hair extensions, often referred to as “wefts.” These come in two main styles:
- Wide wefts: Contain multiple strands of hair attached along their length and width.
- Narrow wefts: Sold as sets in varying widths.


Both types usually include sewn-on clips, making them easy to attach to real human hair. If you’d like to use clip-in hair extensions for your Hobby Horse, check out our guide: Hobby Horse mane with clip-in hair extensions (affiliate links; see our full disclosure above).


For a more unique look, you can sew in jersey straps or doll hair. This requires splitting the mane gusset and attaching the strands as you sew the two gusset pieces together. We used this technique for the colorful mane our unicorn Hobby Horse!

Lastly, faux fur makes an adorable option for creating a soft and fluffy mane, particularly for foals. Its natural texture adds a playful touch to your Hobby Horse.
Materials for attaching the stick to the Hobby Horse
- Stick: maximum diameter of 1.2″ (3 cm) and minimum length of 24″ (60 cm).
- Wool, cord, or rope: approx. 20″ (50 cm) to wrap around the fabric at the stick opening.
- Some toy filling or voluminous batting material
For the stick, a simple wooden broom handle works perfectly. Choose one with a maximum diameter of 1.2″ (3 cm) and a minimum length of 24″ (60 cm). We often use a 54-inch broom handle and cut it in half. After attaching the stick to the horse, you can trim it to the desired length. Ideally, the stick should extend about 12″ (30 cm) behind you when you’re riding the horse, so it doesn’t interfere with jumping over obstacles. Don’t forget to add 8-10″ (20-25 cm) for the portion of the stick that fits inside the horse.
To stabilize the stick and prevent wobbling, you can create a plug using batting. Use fiberfill that comes in layers rather than loose clusters for better results. We explain how to do that in great detail in our Youtube video about sewing our Horse Horse “HOLLY” (jump to minute 1:13:03).


To achieve a polished look and extra stability, wrap rope around the fabric at the stick opening. We recommend synthetic rope made from polypropylene or Paracord, as these materials are both durable and resistant to dirt.


Additional Tools for Attaching the Stick
- Saw: To shorten the broom handle to the desired length.
- Liquid glue or hot glue: For securing the stick inside the horse.
- Drill: For fixing thick rope to the stick securely.
Here are some recommendations for the materials that are needed to attach the stick to the Hobby Horse (affiliate links; see our full disclosure above):


Please note that the craft glue we recommend is solvent-free and contains no toxic substances, that’s why we highly recommend it for making a stick horse toy!
Fiber fill or toy filling for stuffing the horse
We recommend using a fluffy fiber fill for stuffing your Hobby Horse, as it helps create a smooth surface without bumps, especially as a Hobby Horse is rather flat. However, this is a matter of personal preference. Many Hobby Horse makers prefer a firmer, stiffer feel for their horses, in which case a denser, less fluffy filling is the better choice. We love using this fiber fill (affiliate link; see our full disclosure above):

Tools & appliances you need for making a Hobby Horse
For sewing
- Sewing machine (if you prefer sewing by hand, check this link)
- Sewing pins
- Hand sewing needle
- Sewing thread
- Extra strong sewing thread for attaching the mane
- Washable fabric marker (works great on fluffy fabrics!)
- Fabric scissors
- Iron
The following list shows the tools we’ve trusted and used for years. They are just recommendations, as we get a lot of questions about them, especially in the comment section of our Youtube videos. You don’t necessarily need them to sew a Hobby Horse yourself. But they will make it much easier 🙂 (–> affiliate links; see our full disclosure above)