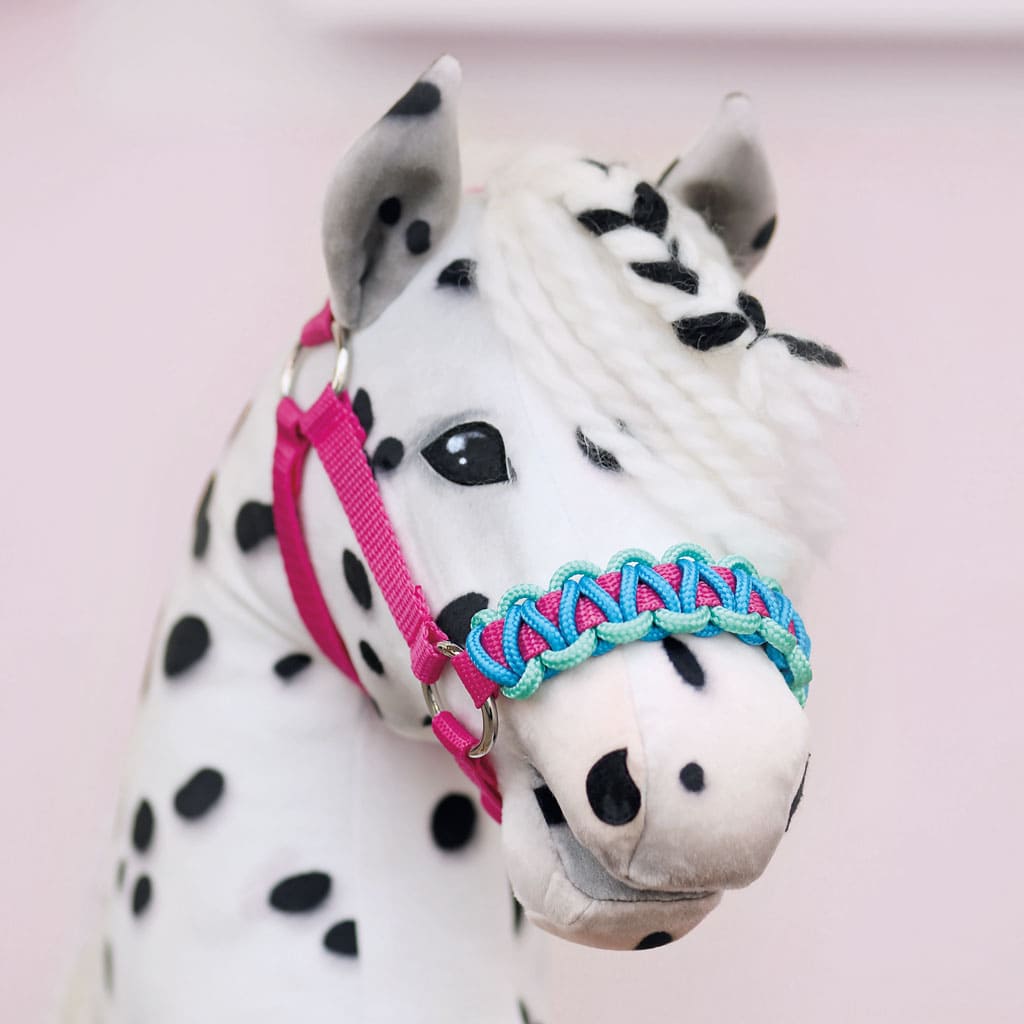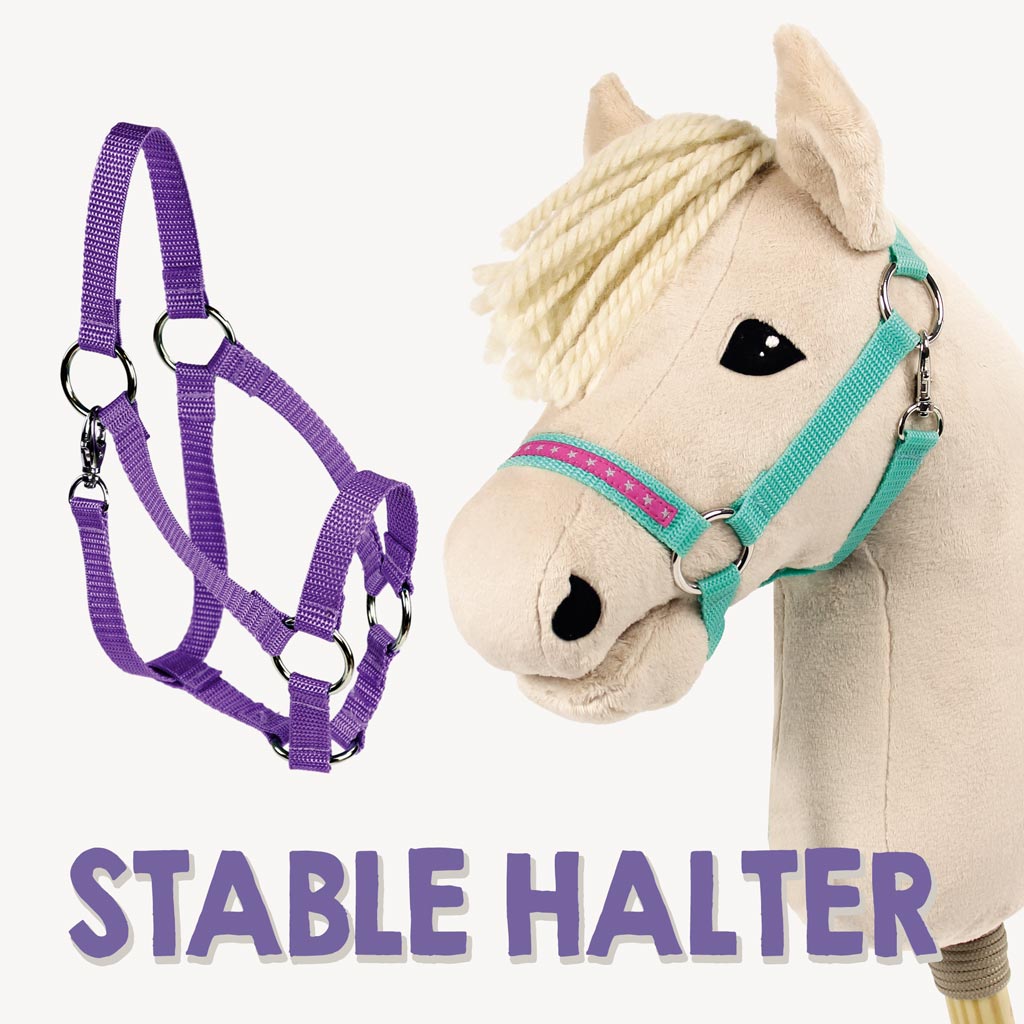
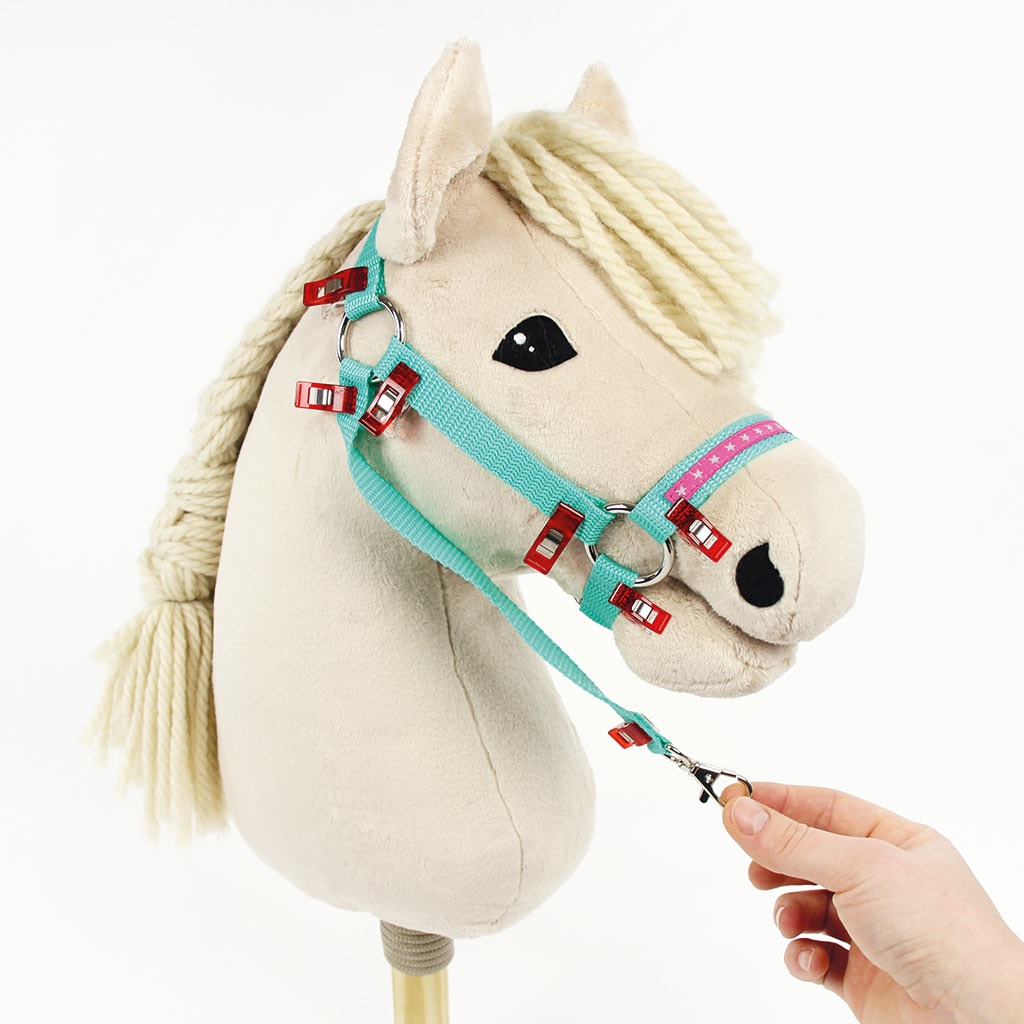
In this Hobby Horse Halter DIY tutorial, we’ll show you how to make a practical, everyday halter for your hobby horse. This type of halter is a real all-rounder for your hobby horse, perfect for daily play, grooming, short walks, or simply as a clean and sturdy accessory. Thanks to the snap hook on the throat strap, the halter can be put on and taken off quickly and easily.
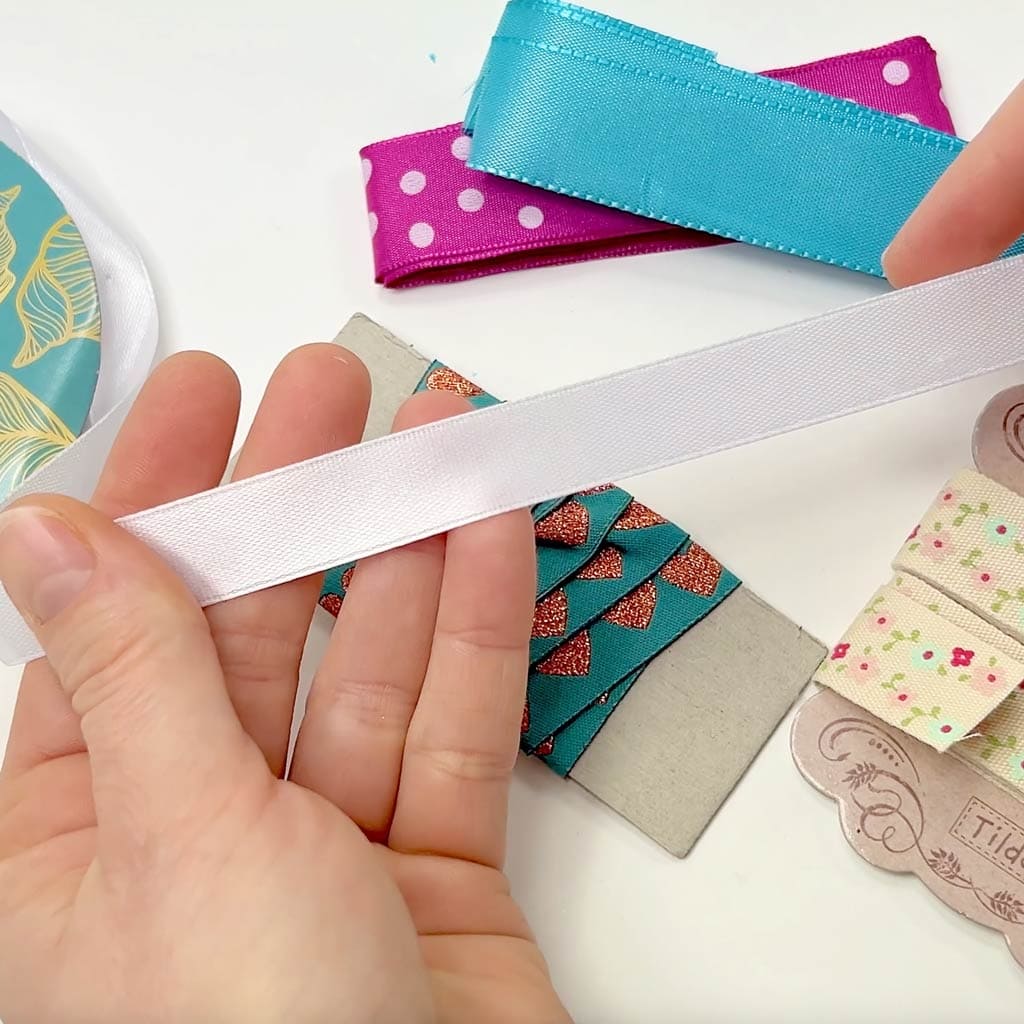
In theory, a halter like this can be made from many materials – for example satin ribbon or woven ribbon. As long as the material is strong enough and doesn’t stretch too much, it will work! For our tutorial, however, we use the materials from our Hobby Horse halter DIY kits. The included bag webbing is made from polypropylene, which makes it especially sturdy and reliable for daily play.
Hobby Horse Halter DIY tutorial: video instructions
Check out this video from our kullaloo Youtube channel on how to make a halter from bag webbing for a stick pony:
🧵 Materials you’ll need for the Hobby Horse halter:
- Bag webbing or ribbon, max. 5/8″ (15 mm) wide, about 60″ (1.5 m) long
- O-rings, max. inner diameter 1″ / 25 mm, 5 pieces
- Snap hook with a D-shaped eye, 1 piece
We like to use bag webbing made from polypropylene or other synthetic webbing for making Hobby Horse halters. It’s sturdy, less prone to dirt, and you can seal the cut ends with a lighter to prevent fraying.
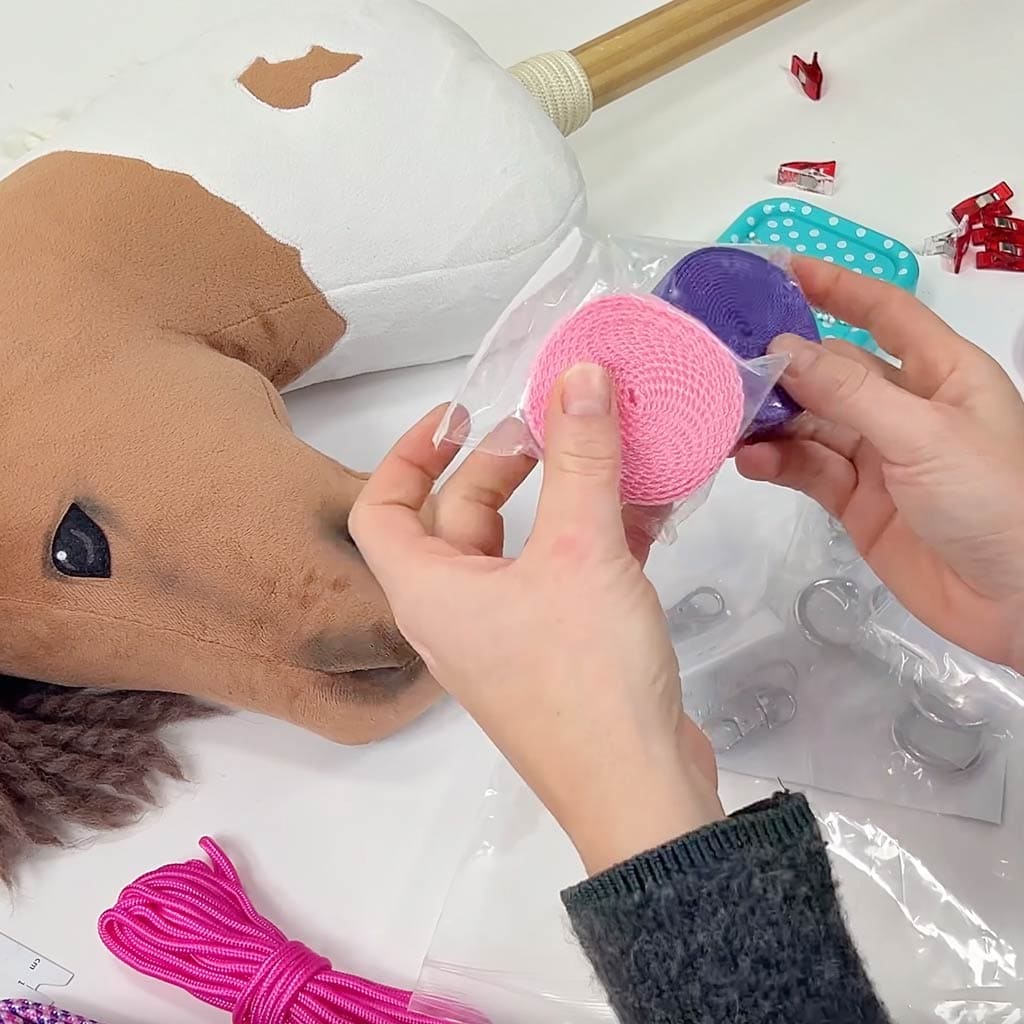
We offer several halter DIY kits that include all the materials you need to make halters, including two different PP bag webbings in each kit for making stable halters with reins.
-
-18%
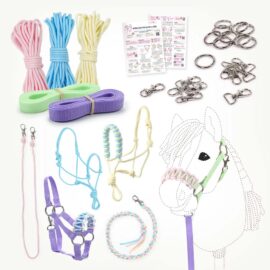
Hobby Horse Halter DIY Kit – Make a hobby horse Halters with Leads | Pastel
Original price was: USD $36.50.USD $29.90Current price is: USD $29.90. Add to cart -
-18%
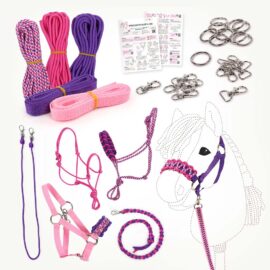
Hobby Horse Halter & lead rope DIY Kit | Purple & Pink
Original price was: USD $36.50.USD $29.90Current price is: USD $29.90. Add to cart -
-18%
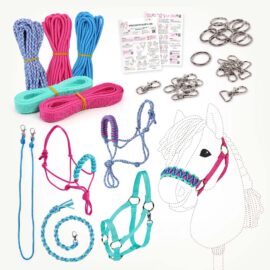
Hobby Horse Halter DIY Kit – Make Halters & Leads | Aqua & Pink
Original price was: USD $36.50.USD $29.90Current price is: USD $29.90. Add to cart
Recommended tools:
- Fabric clips, pins, hair clips or bobby pins
- Sewing machine or glue
- If using bag webbing from polypropylene: lighter for sealing the webbing ends
How to make halter for a Hobby Horse step by step
Please note: The measurements in this Hobby Horse Halter DIY tutorial are designed to fit most stick ponies and are therefore slightly more generous than strictly necessary. This helps ensure the halter works for a wide range of horses. We recommend checking and adjusting the strap lengths directly on your horse before sewing everything in place.
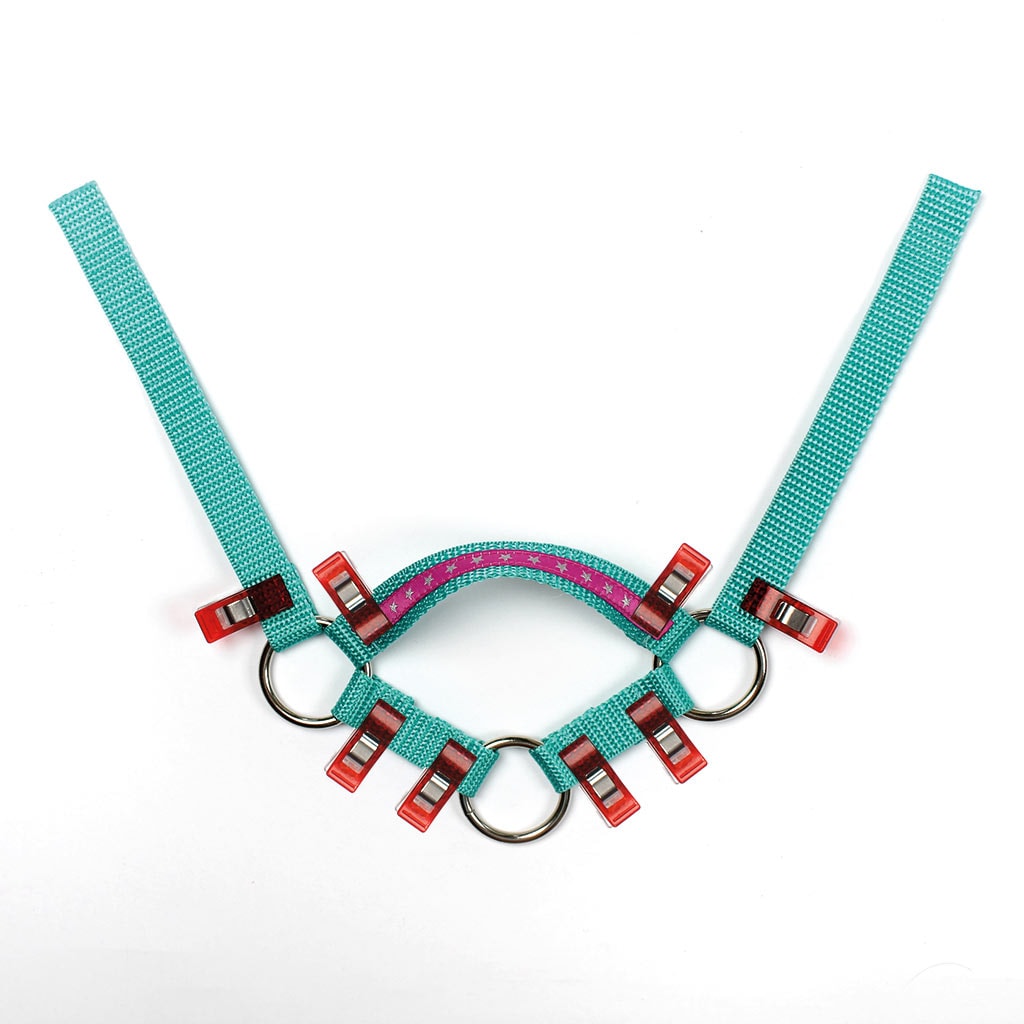
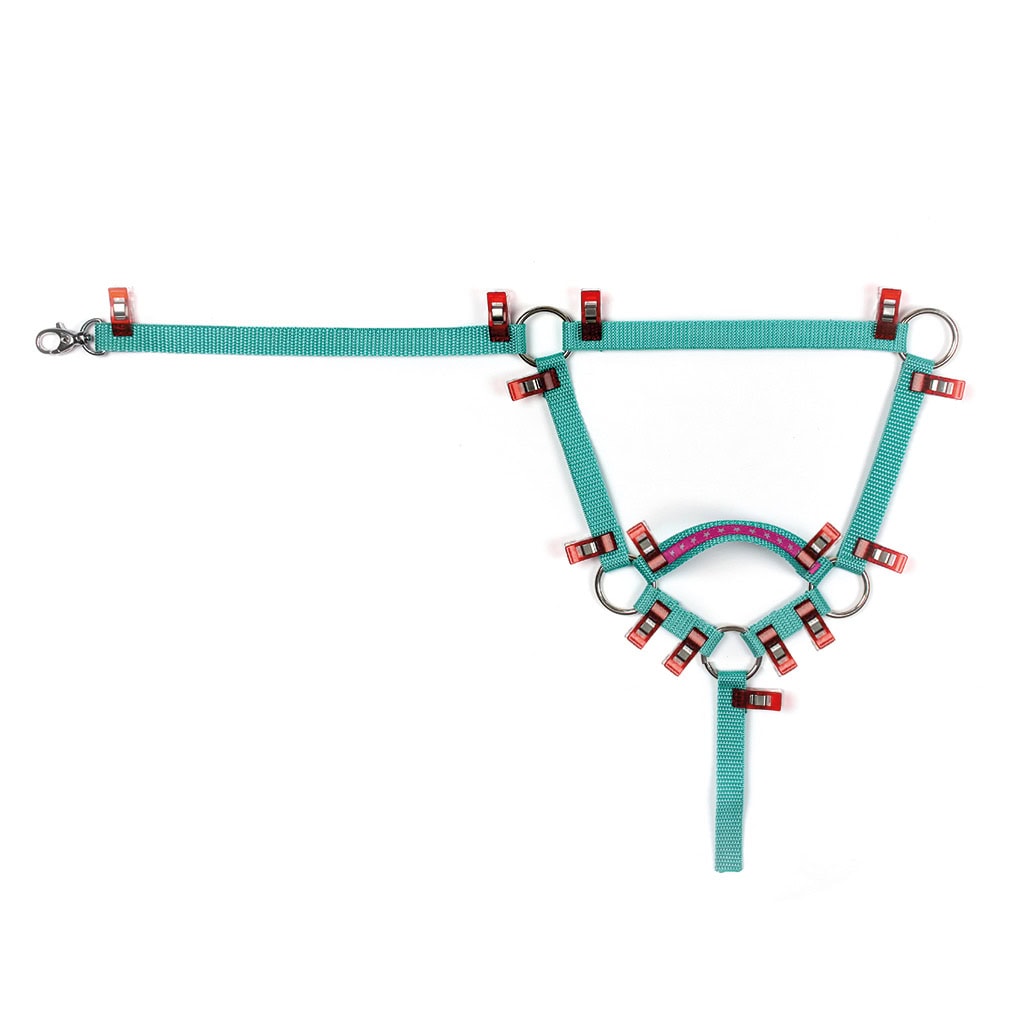
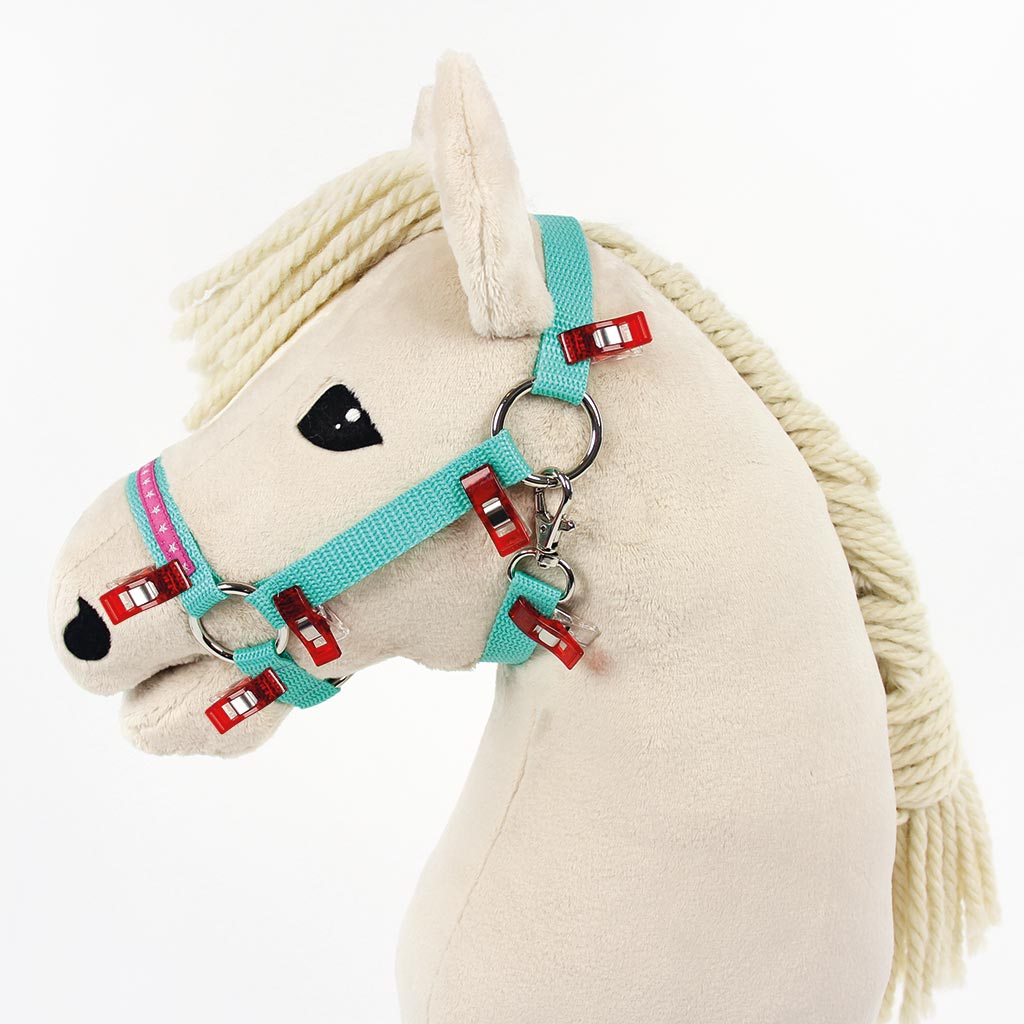
1. Create the noseband
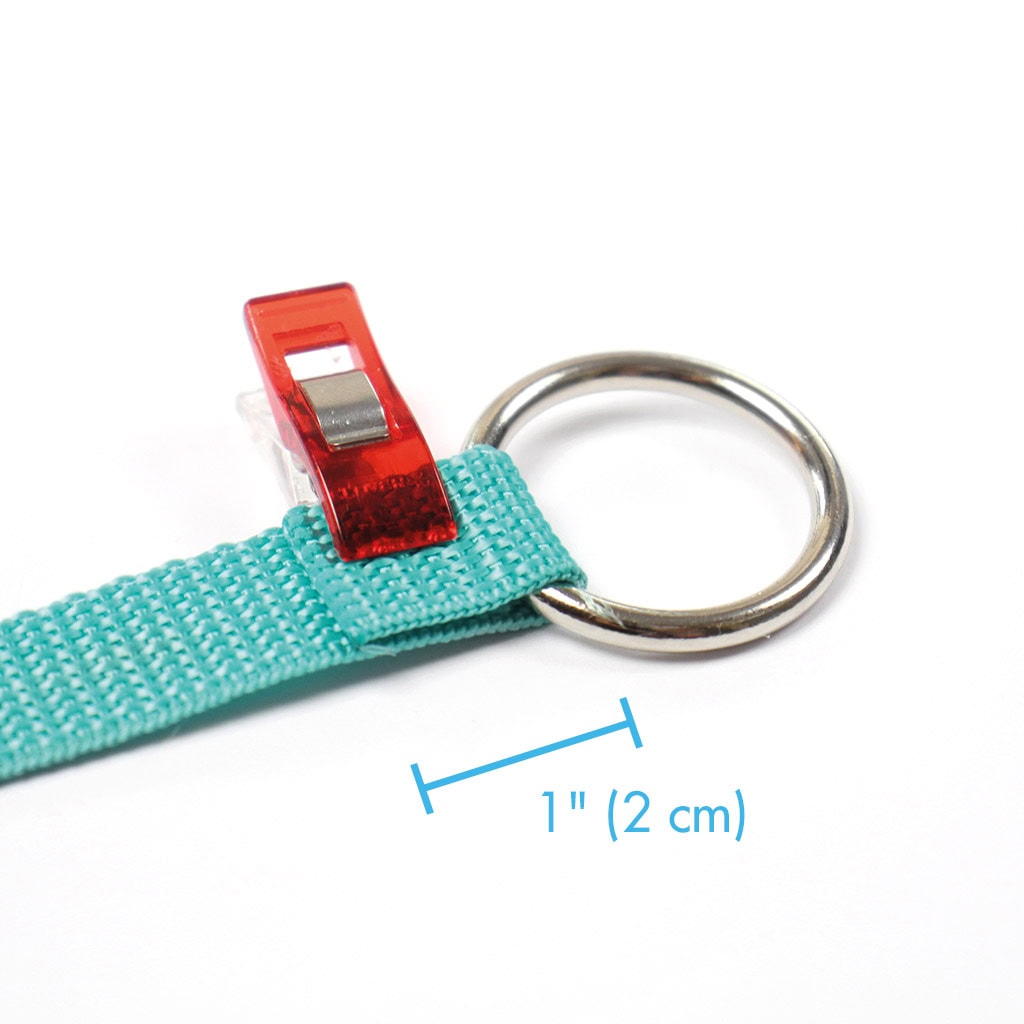
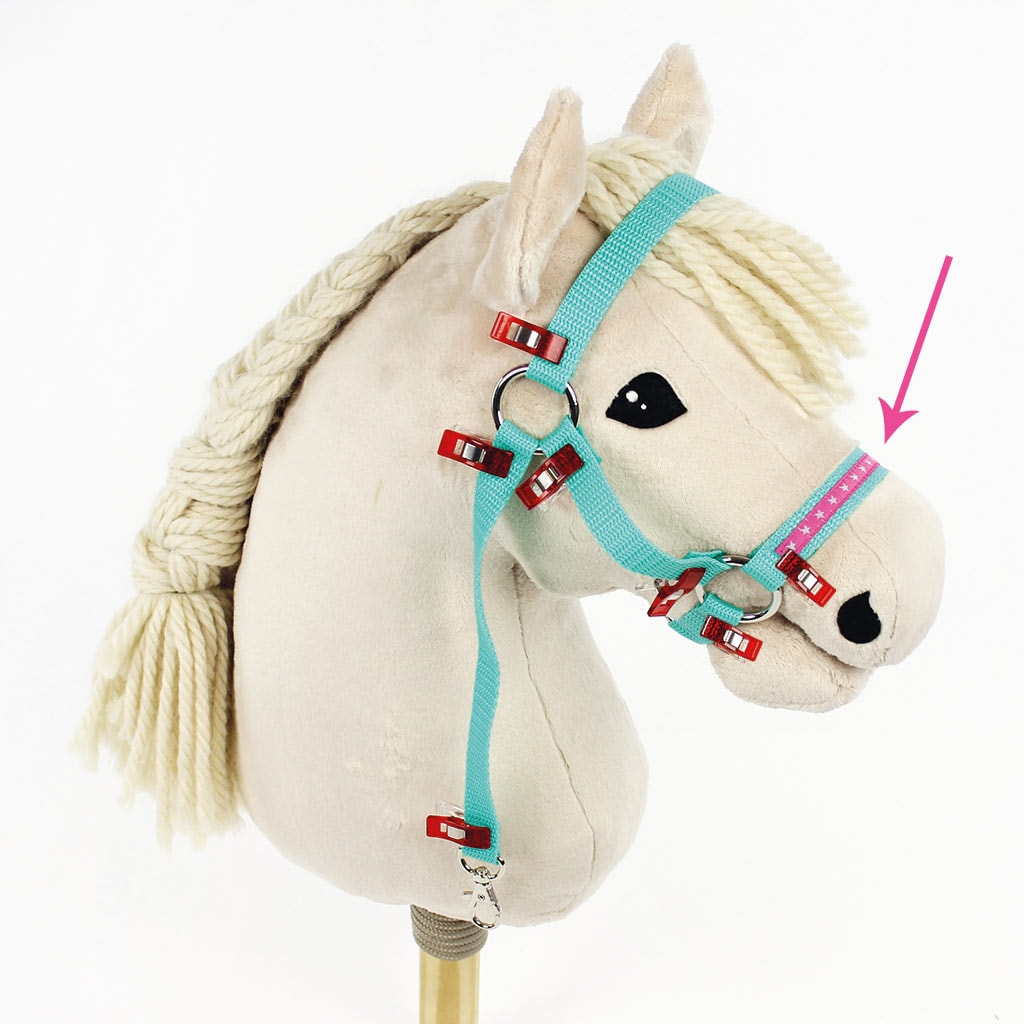
Cut an 8″ (20 cm) piece of webbing and attach an O-ring to each end. To do this, wrap approx. 1″ (2 cm) of webbing around the ring, forming a loop, and secure it with a clip or pin. If you like, you can now sew on a ribbon or use a decorative stitch on your sewing machine to decorate the noseband. This is easier to do now than after the entire halter is finished.
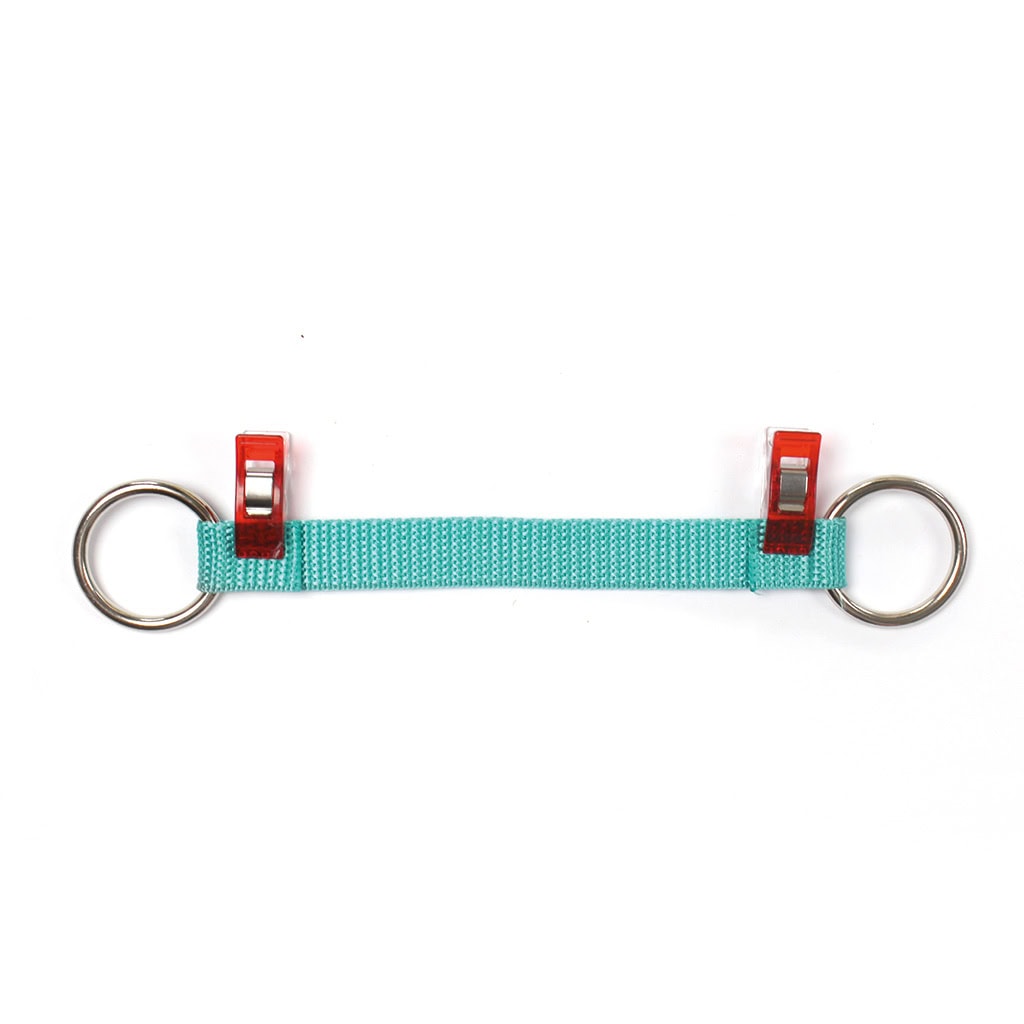
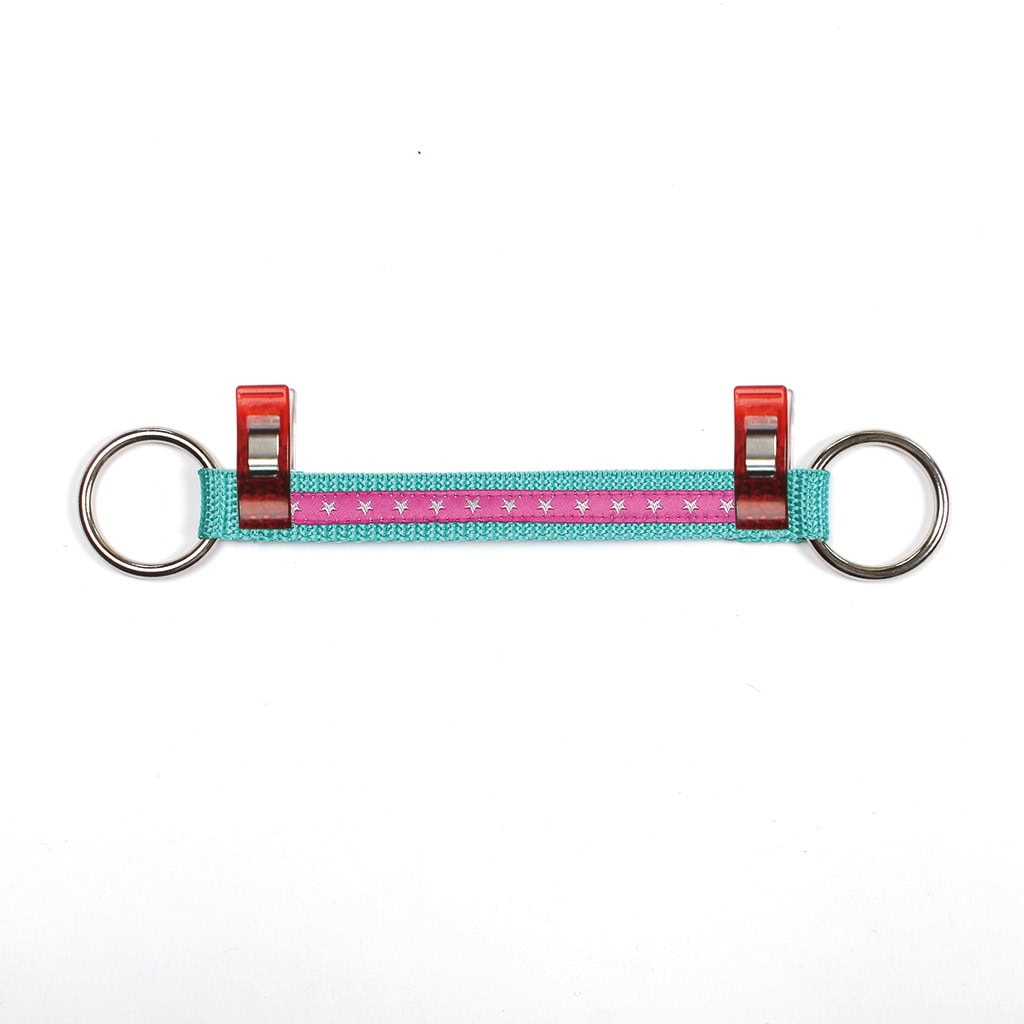
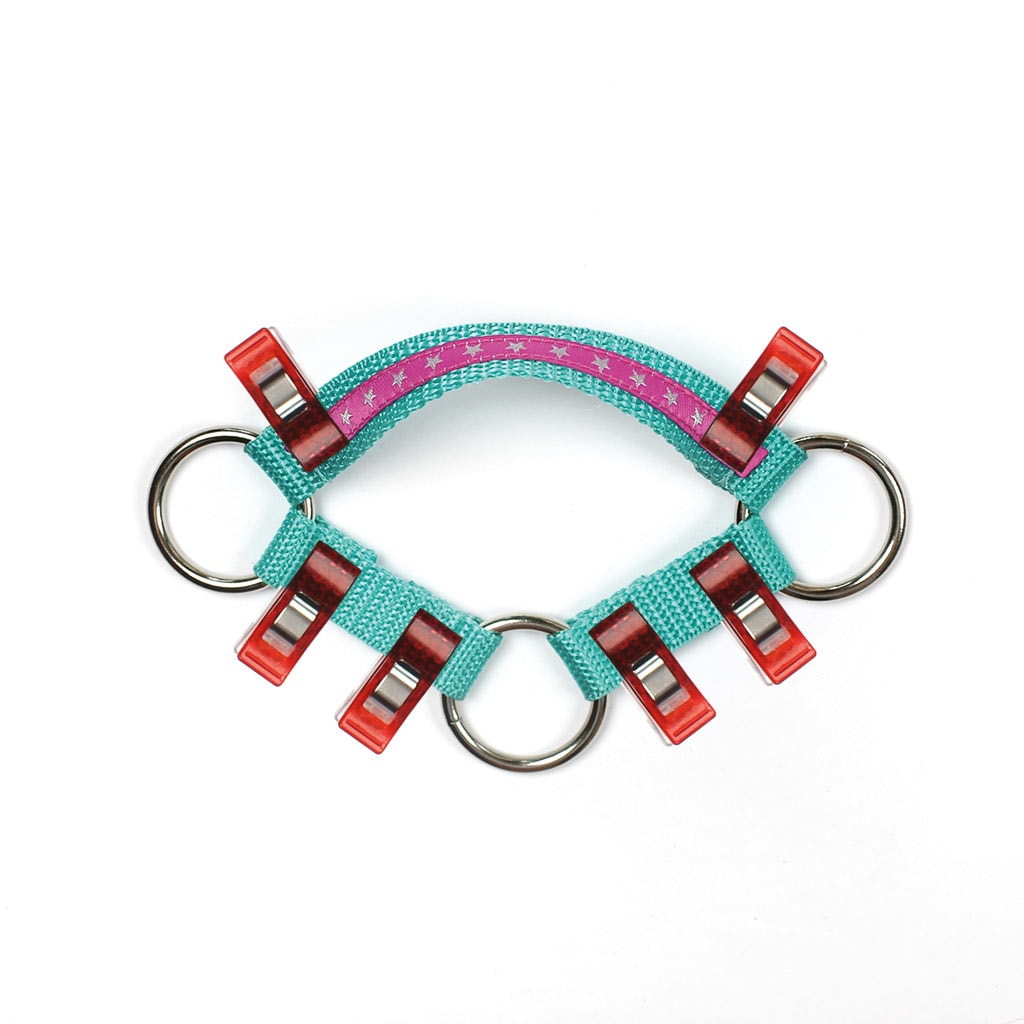
Now attach two 4.5″ (11 cm) pieces of webbing to the noseband O-rings using loops. Connect the two loose strap ends with another O-ring so that a triangle forms. This ring will later sit under the muzzle and can be used to attach a lead rope. Place the noseband over the muzzle and adjust the length so the O-rings sit roughly at the height of the mouth opening.
Then remove the construction. If you like, you can now sew or glue all loops in place. I prefer attaching all straps temporarily first, checking the final fit on the horse, and only fixing everything in place at the very end. But that’s up to you!
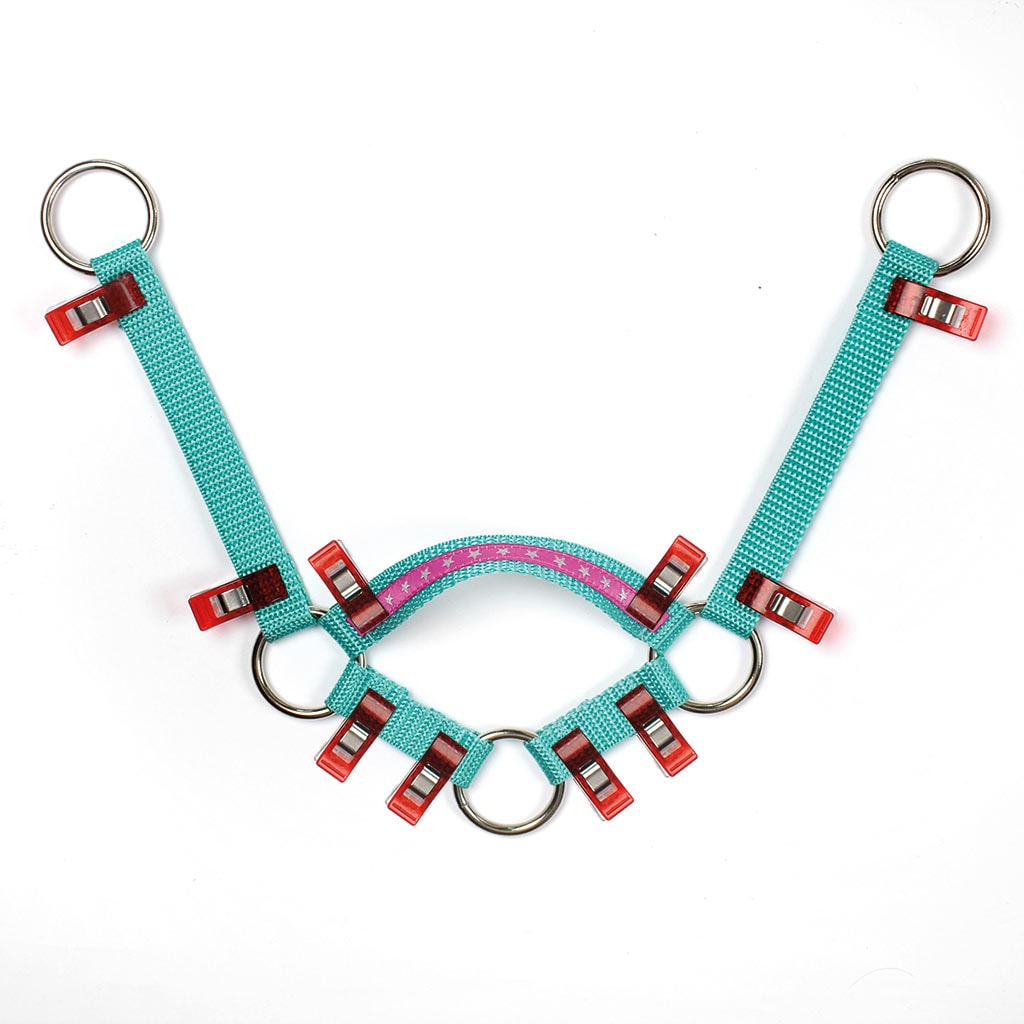
2. Add the cheek straps
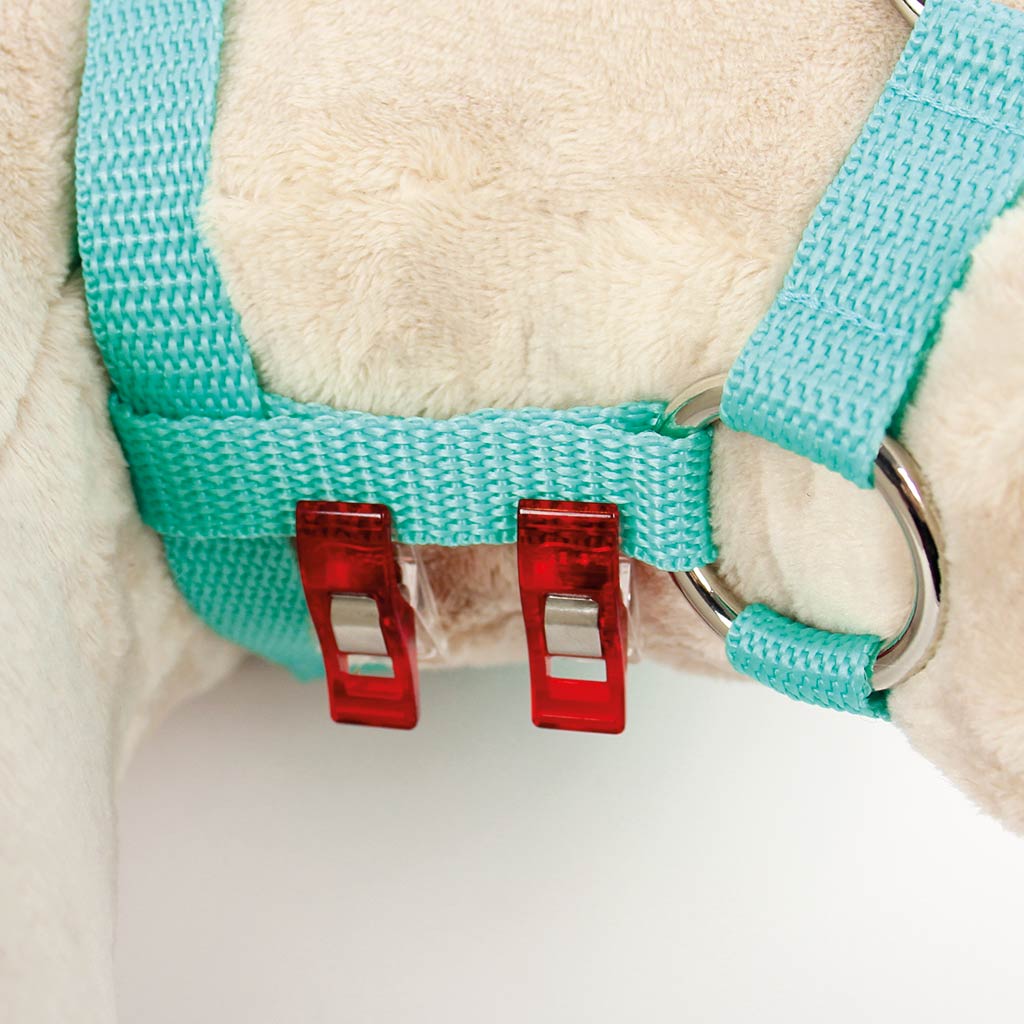
Attach two 7″ (17 cm) pieces of webbing to the left and right noseband O-rings. These form the cheek straps and will later run diagonally upwards toward the ears. Then attach an O-ring to the loose end of each cheek strap.
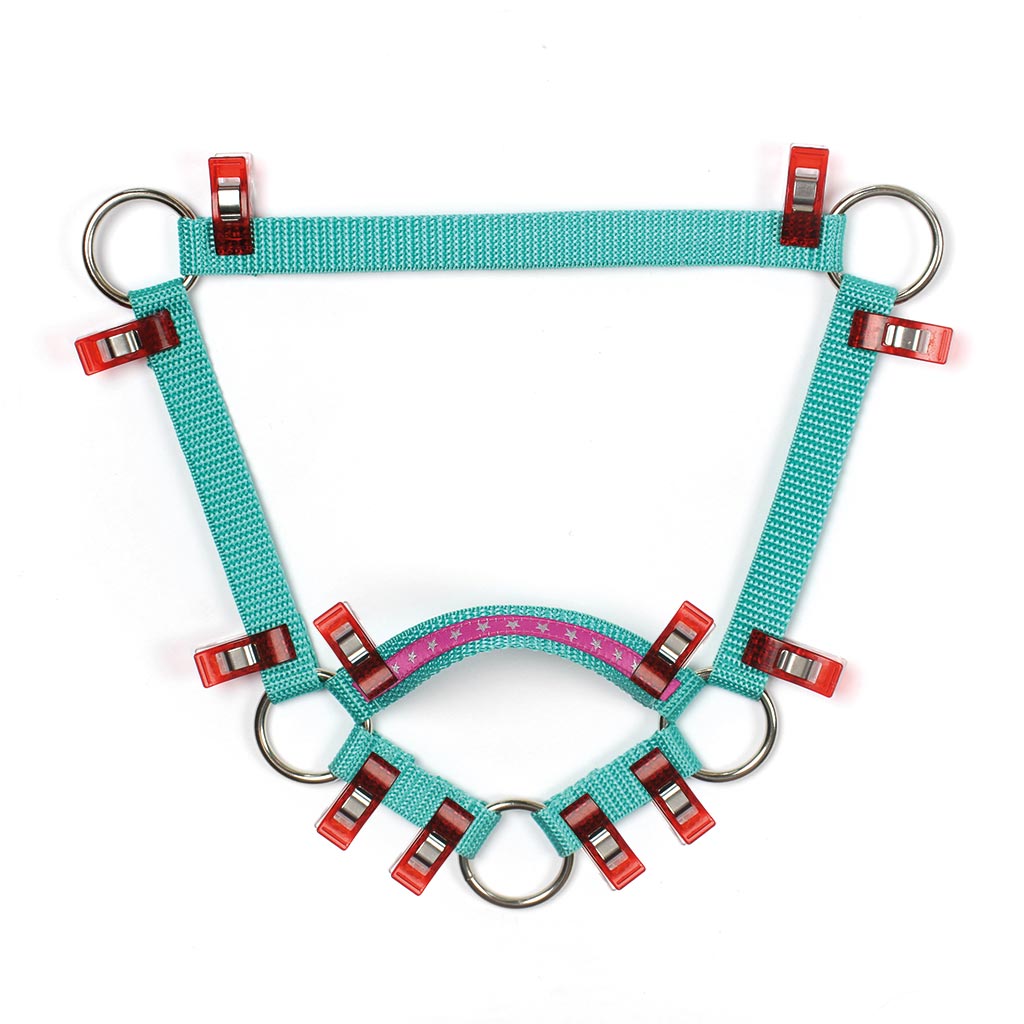
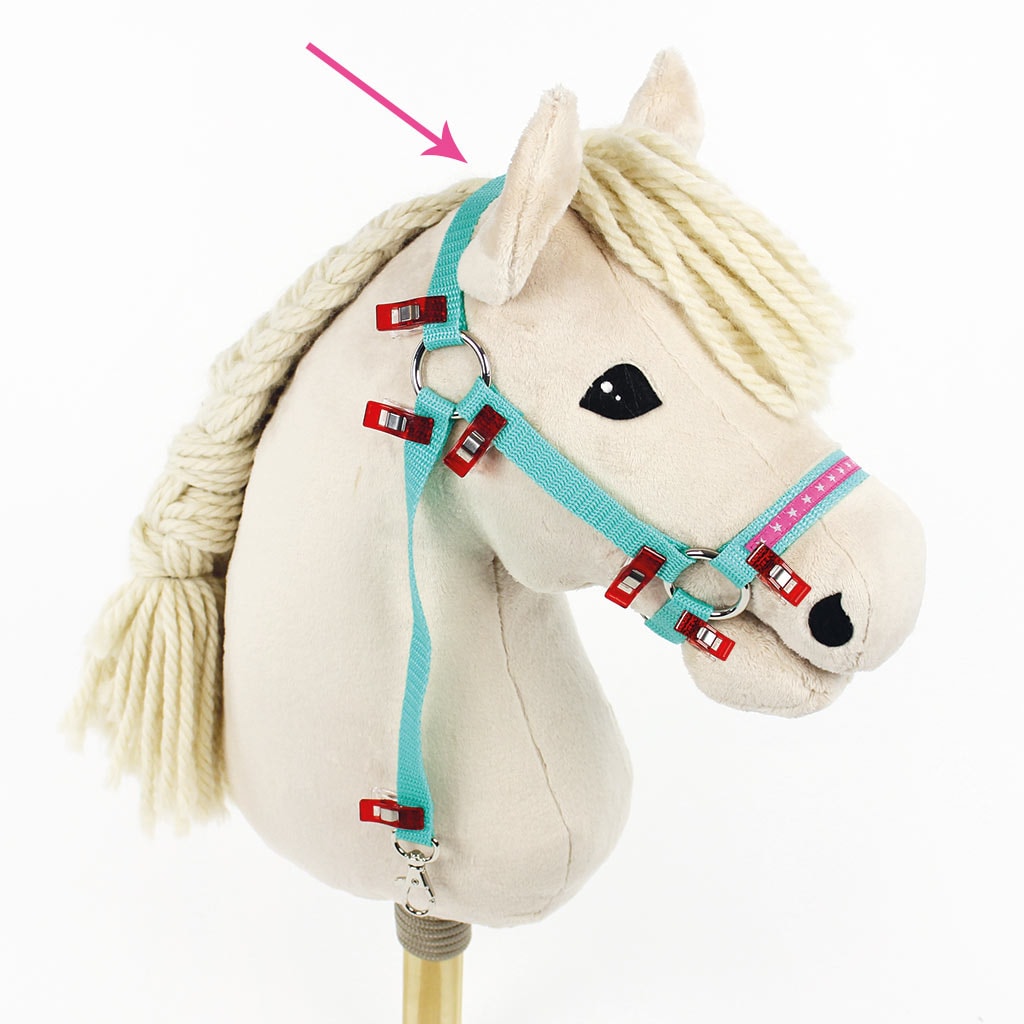
3. Attach the neck, throat and chin strap
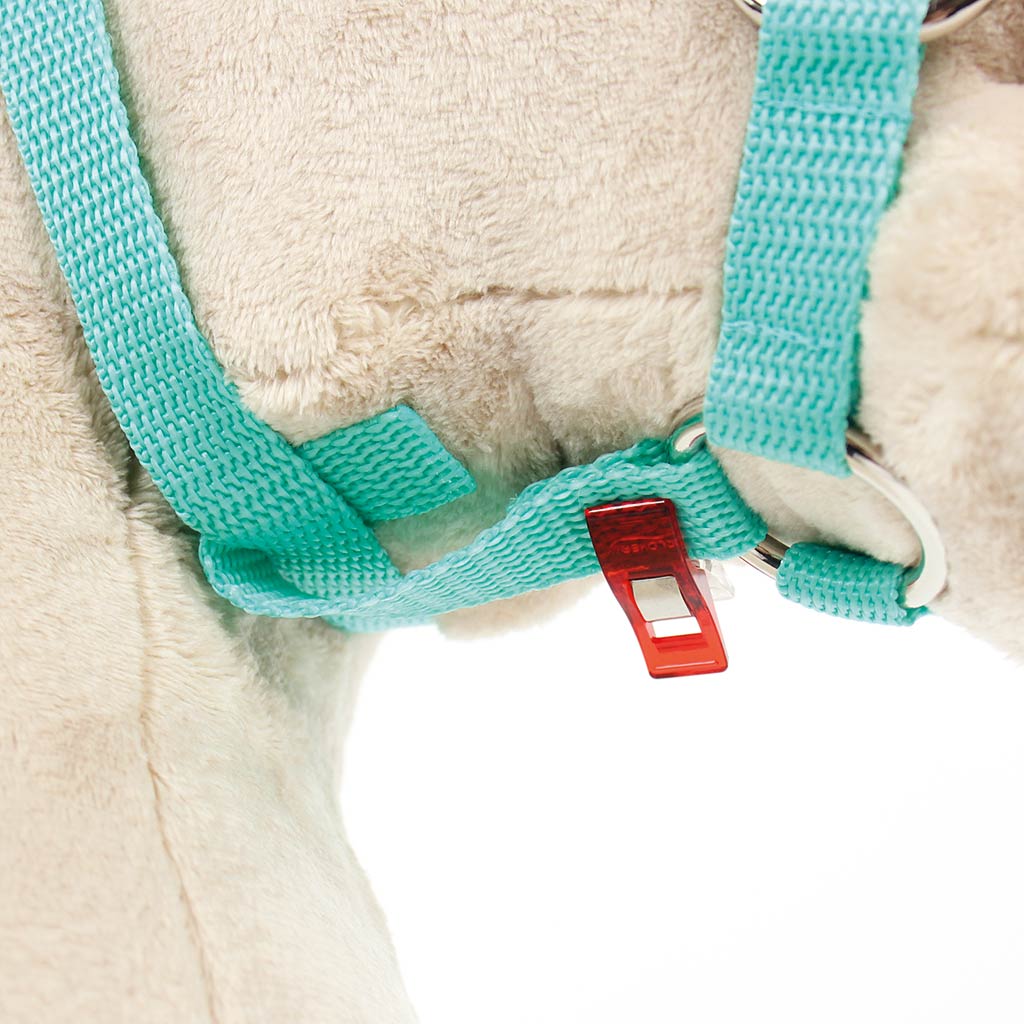
Cut a 9.5″ (24 cm) piece of webbing and connect it between the two O-rings at the top of the cheek straps. This strap will sit behind the ears. Then cut an 11.5″ (29 cm) piece of webbing and attach it to the upper left O-ring that connects the cheek and neck strap. This will form the throat strap. Attach a snap hook to the loose end of the throat strap using a loop. Last but not least, attach a 5.5″ (14 cm) piece of webbing to the lowest O-ring (which will later sit under the muzzle). This will be the chin strap. Leave the other end of this strap loose for now.
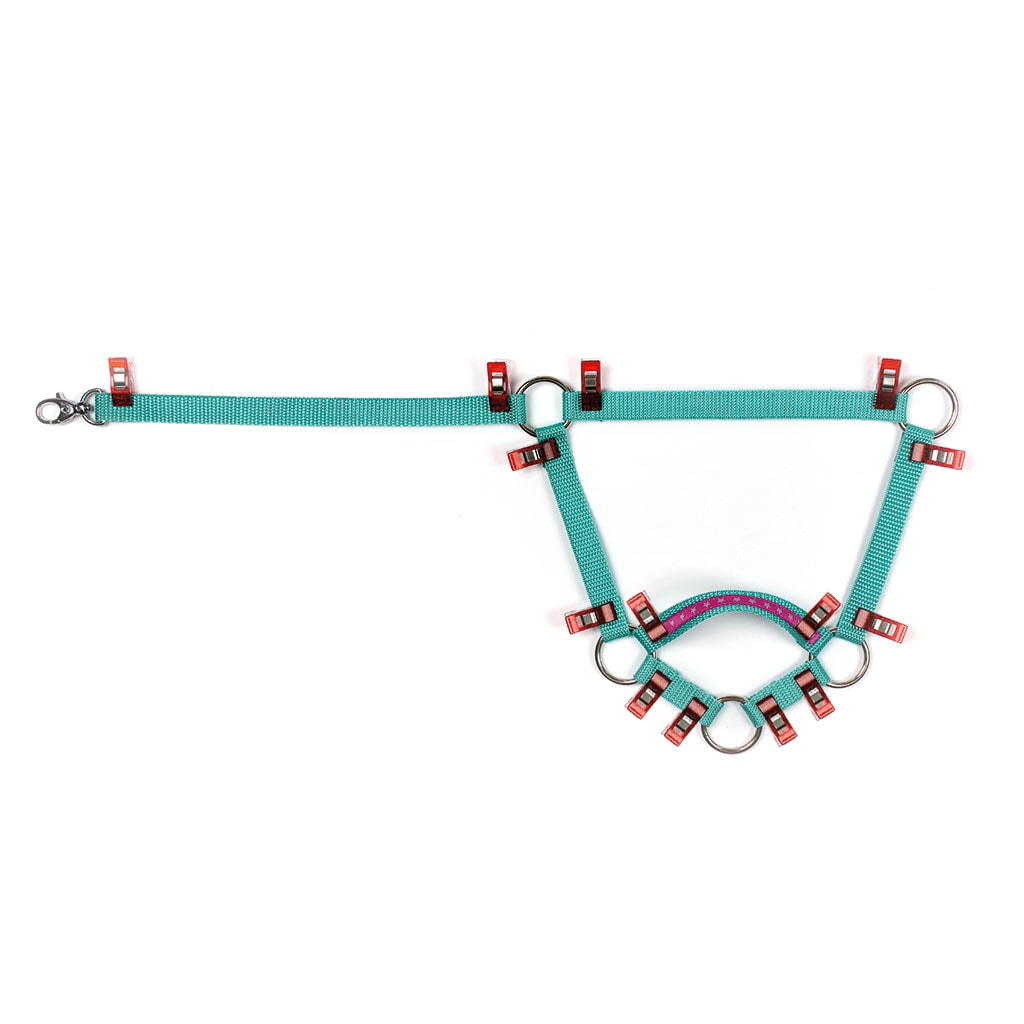
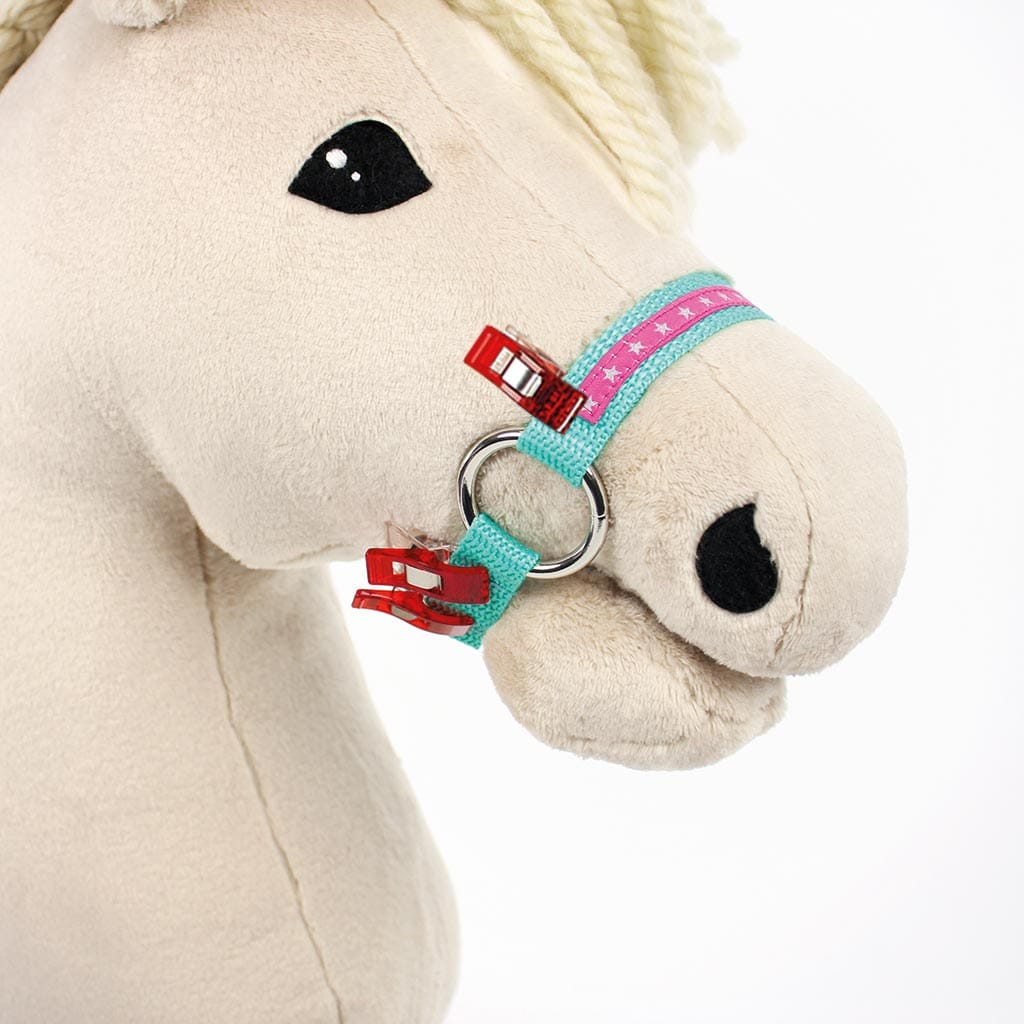
4. Check the fit
Put the halter on the horse and adjust the length of all straps. To put the halter on, place it on the horse’s forehead first. Then pull the noseband over the muzzle and guide the neck strap behind the ears.
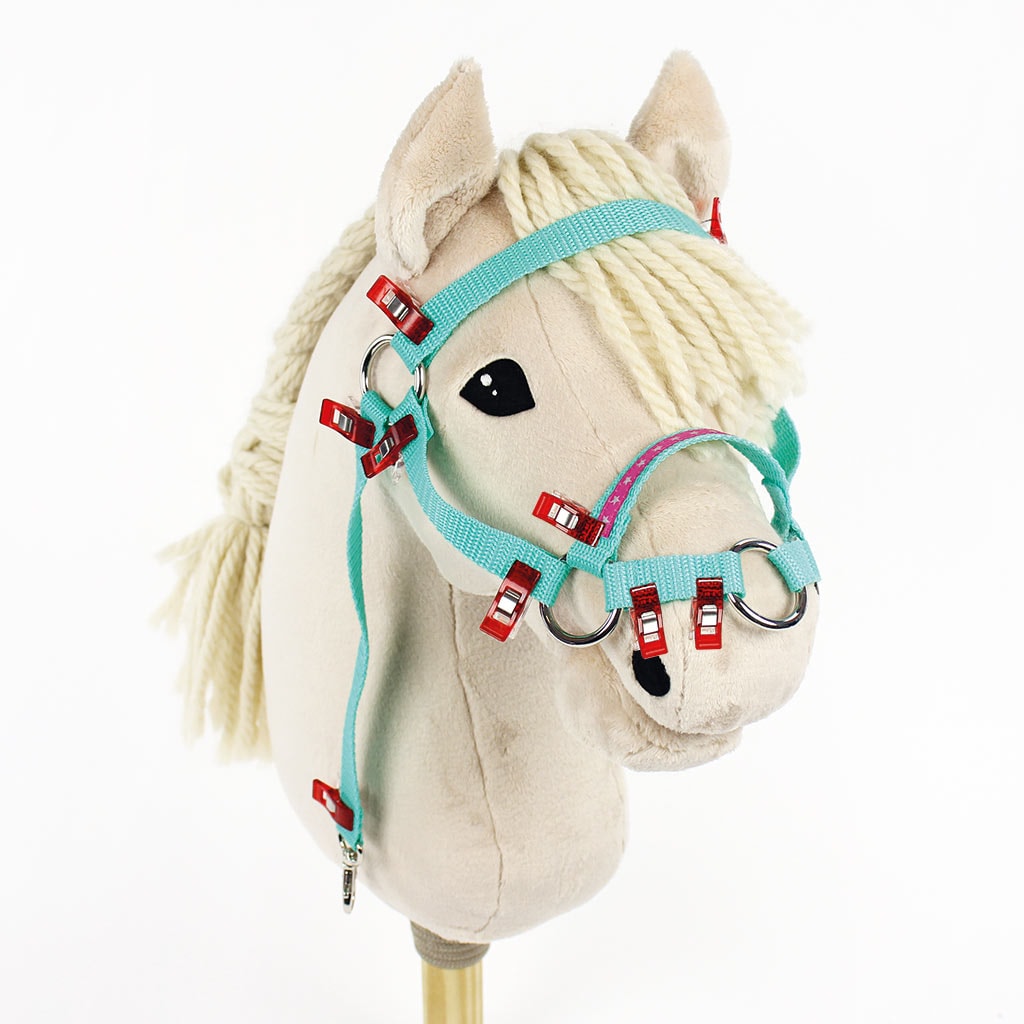
Next, lead the throat strap with the snap hook under the chin to the other side and hook it into the O-ring. Check that the O-rings on the neck strap sit just below the ears, the noseband sits high enough on the muzzle, and all straps lie flat. There should be a little bit of space so the halter is easy to put on and take off, while still sitting securely on the horse.
Now the loose end of the chin strap that hangs down needs to be attached. Wrap this loose end of the chin strap around the throat strap to form a loop. Secure it with a clip so the webbing is taut. The loop must not be too tight around the throat strap, it needs to stay movable!
7. Secure the loops
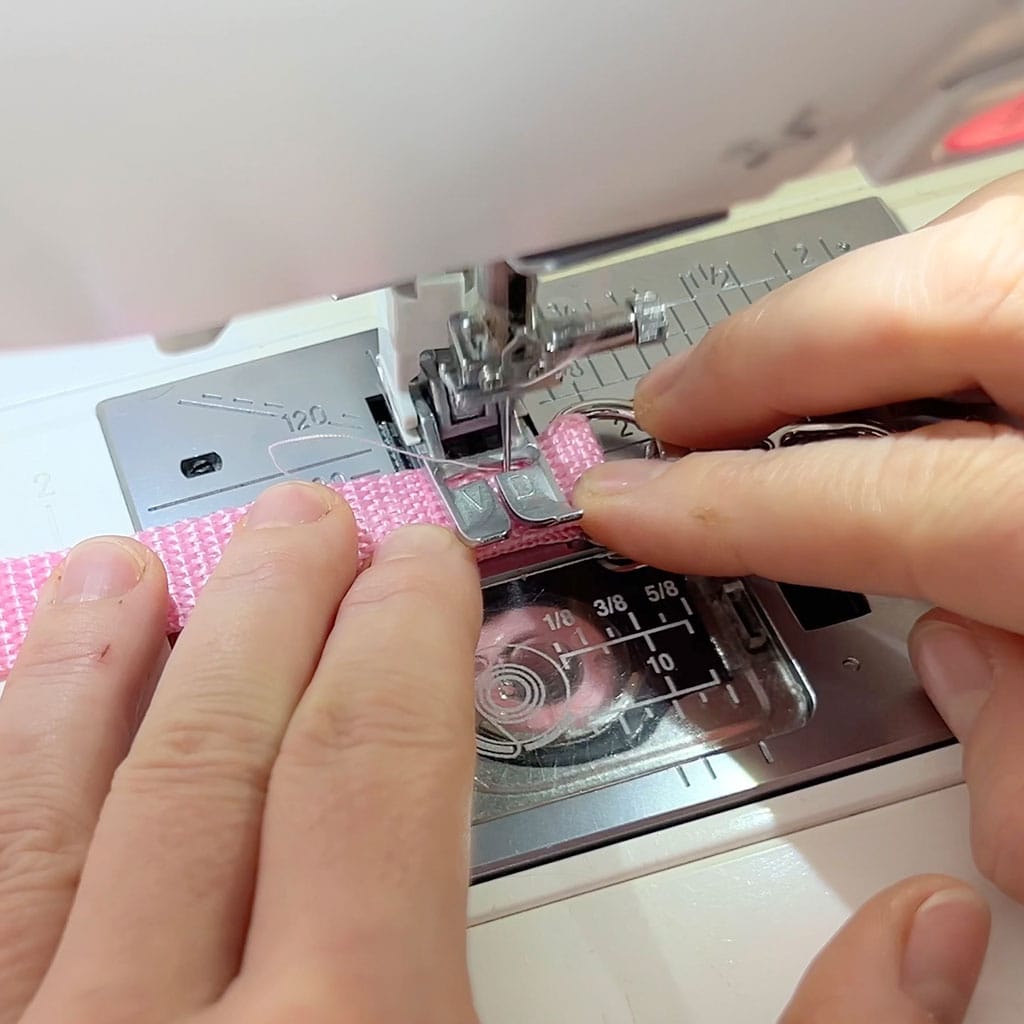
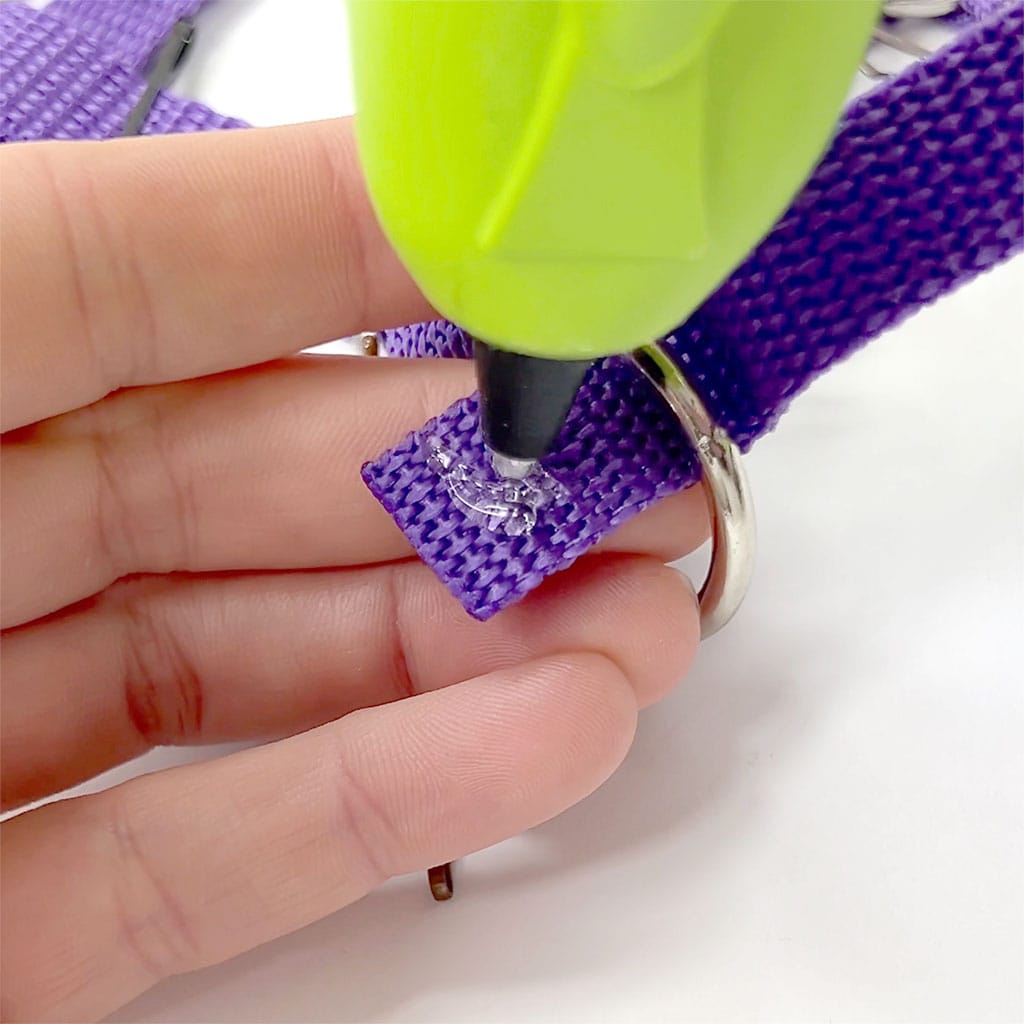
Once all straps are adjusted and the halter fits your Hobby Horse properly, carefully remove the halter while keeping all loop positions unchanged. If you have a sewing machine, sew the loops in place using a simple straight stitch, ideally in a matching thread color. Sew as close to the O-rings or snap hook as possible to keep everything neat and secure. If you don’t have a sewing machine, you can also glue the loops in place. Hot glue works very well with polypropylene bag webbing. If you’re using a different material, make sure the glue is suitable for it.
That’s it – your hobby horse halter is finished and ready to use 🎉
This Hobby Horse Halter DIY tutorial gives you a sturdy, adjustable halter that works perfectly on its own or as a base for lead ropes or reins.
If you’d like to continue, you can easily braid the straps of the halter for an extra pop of color, or make matching lead ropes or reins using the same materials.
Happy crafting! 🐴✂️
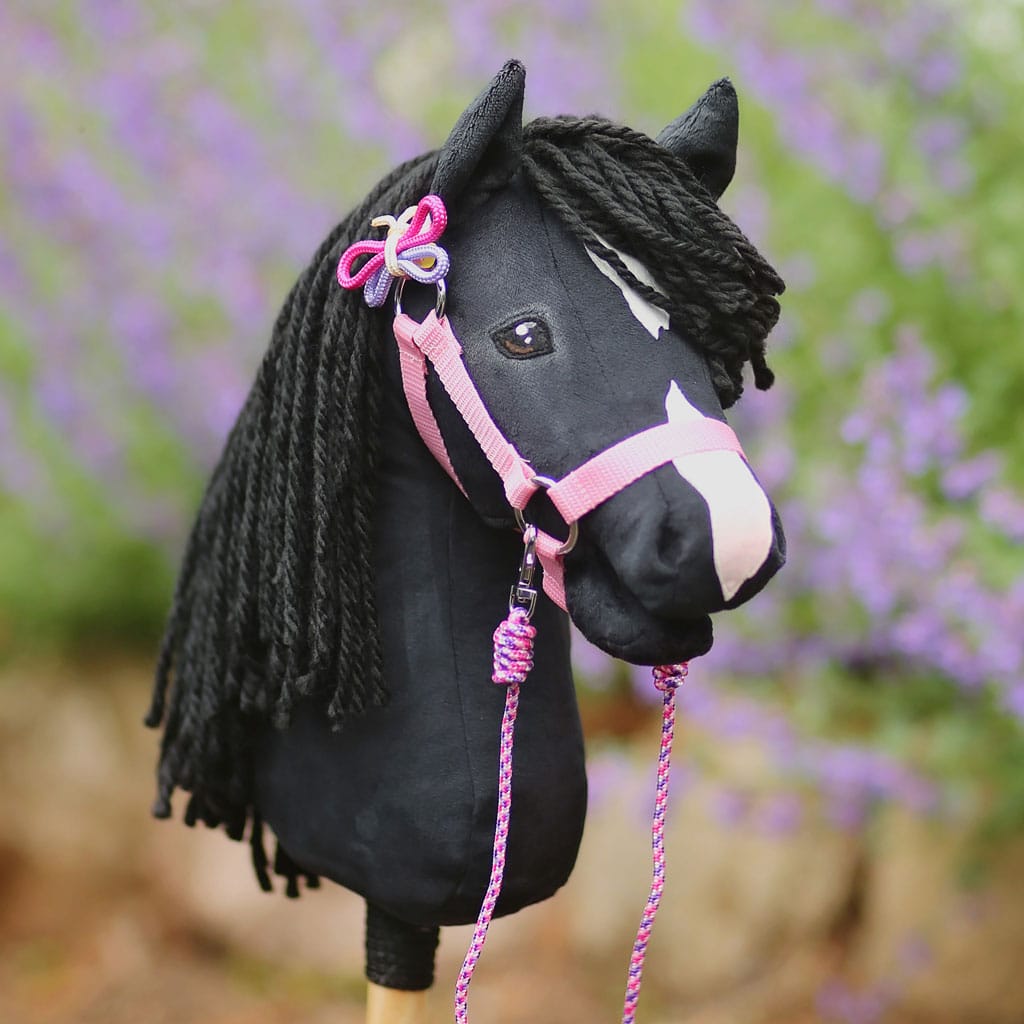
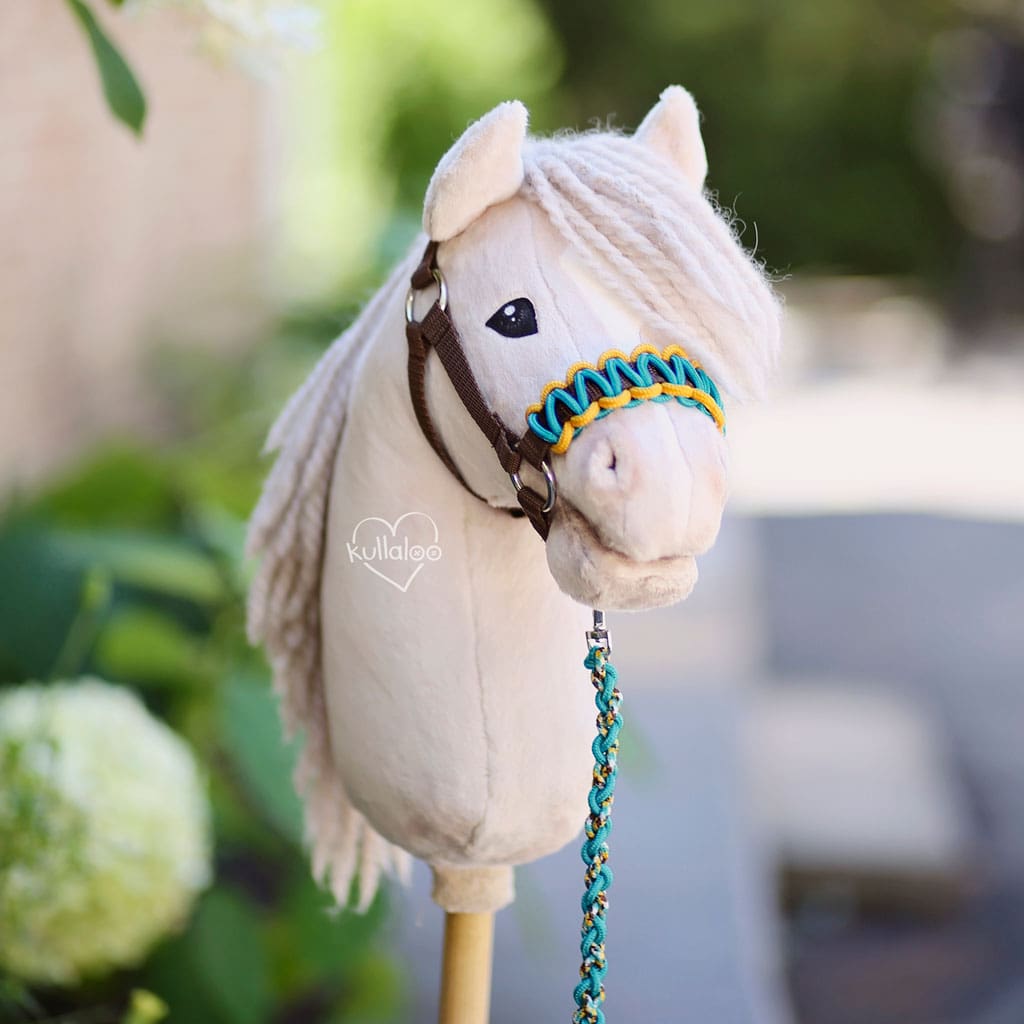
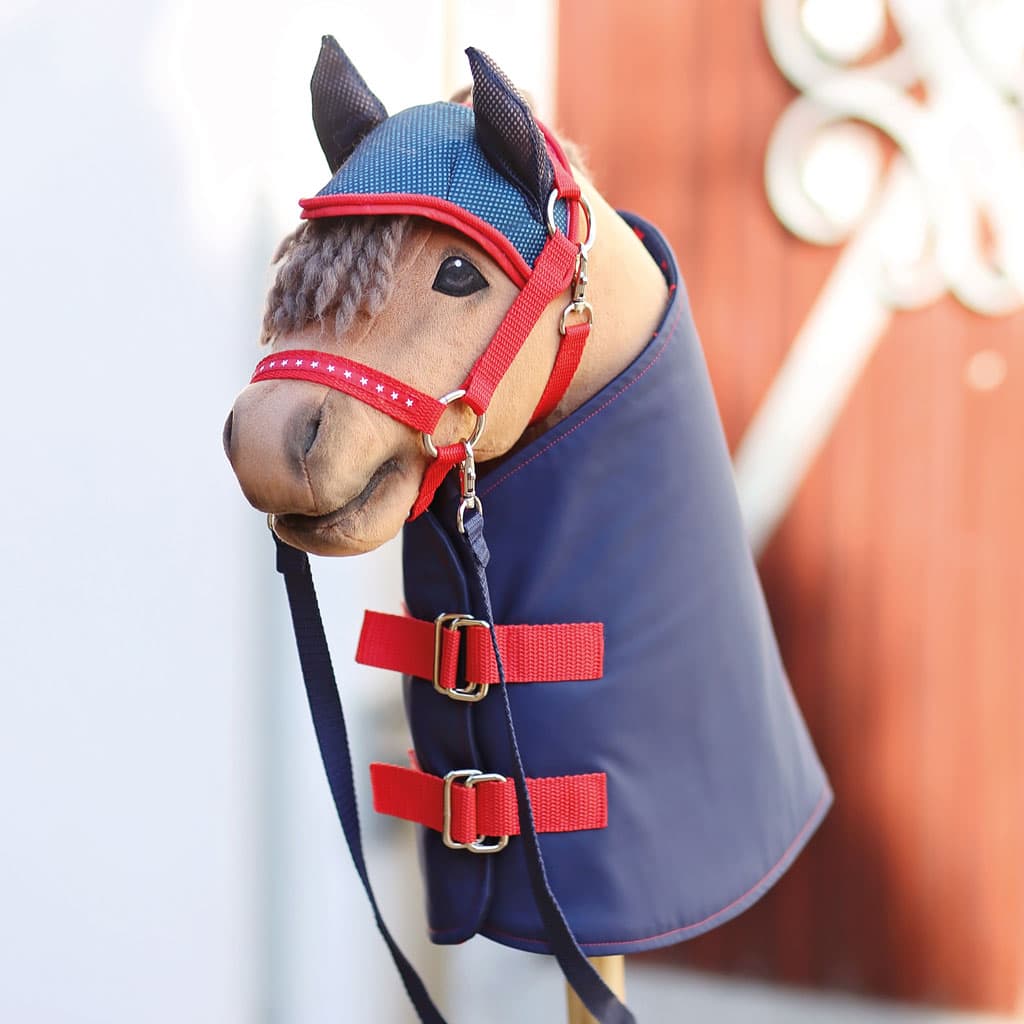
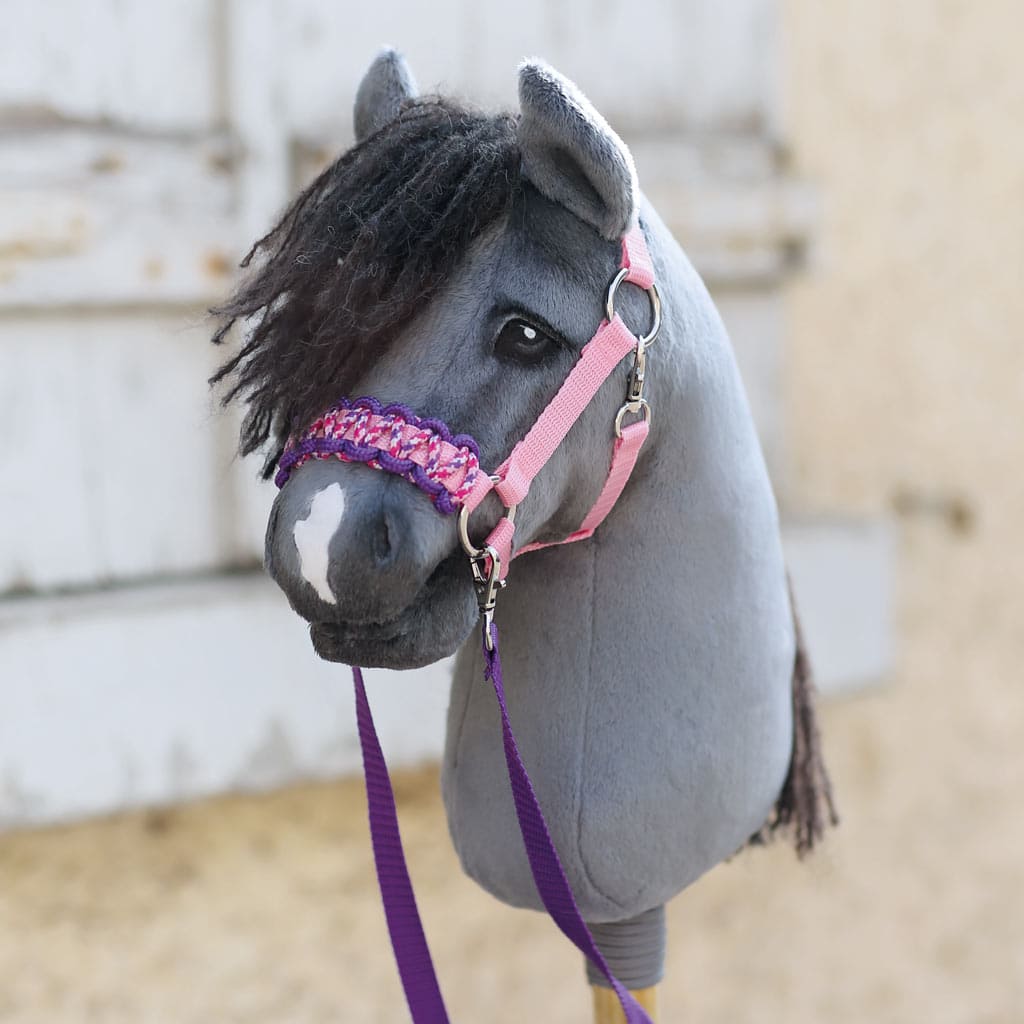
And just in case you need some inspiration, check out this gallery with lots of different hobby horse halters: