


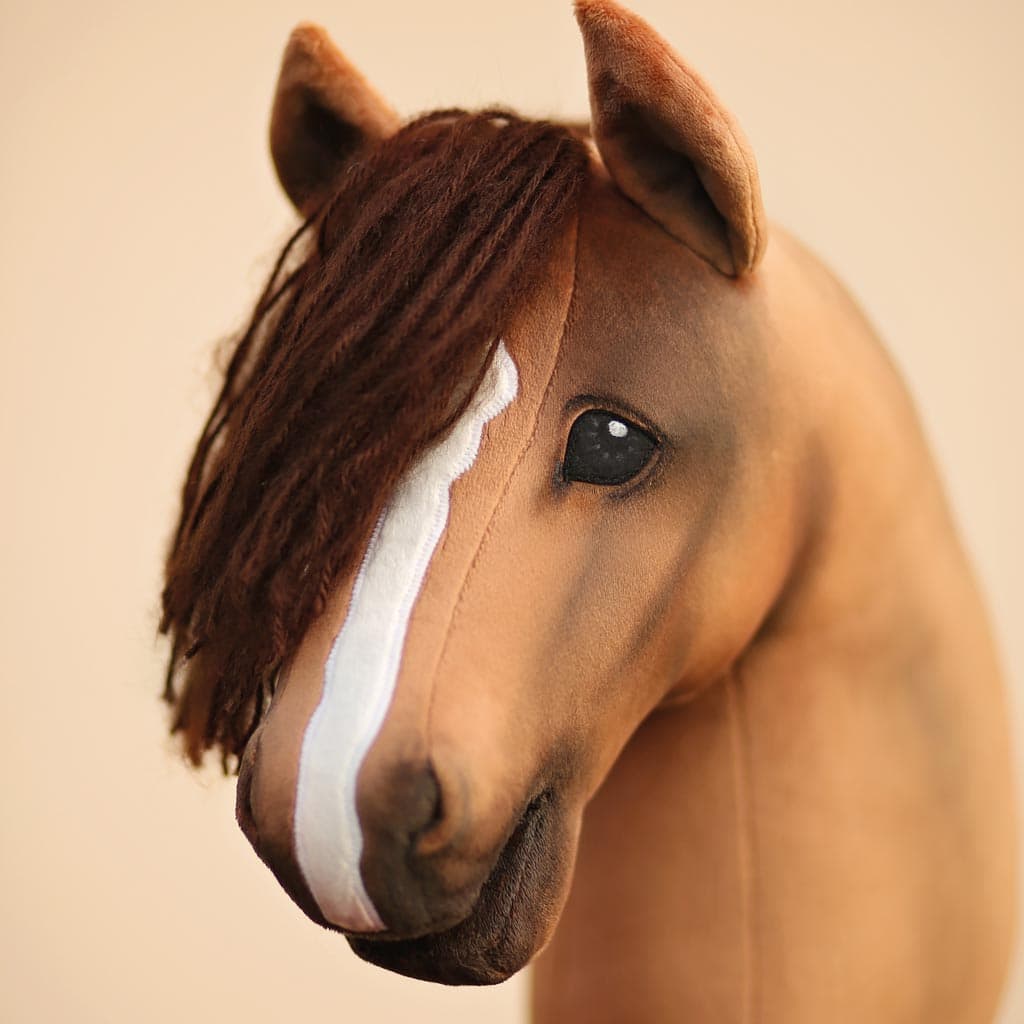
The eyes are known to be the mirror of the soul. This also applies to your self-sewn Hobby Horse: you can influence the expression and character of your horse very strongly with the eyes. So it’s worth investing time and care in Hobby Horse eye painting!


When it comes to the inner area of the Hobby Horse eyes, i.e. the iris, pupil and light reflections, you have various options for designing them. For example, you can hand embroider a simple point of light. Both in our Hobby Horse book and in the sewing instructions for Hobby Horse HOLLY we explain in detail how this works!


Alternatively, you can create the eyes with the appropriate cutting files for Hobby Horse “HOLLY” and iron them on, or embroider them directly onto the fabric with our embroidery designs. Cutting files and embroidery designs are also available for download in our Hobby Horse sewing book!
However, our favorite method is to hand paint the inside of a felt eye using fabric paint. This Hobby Horse eye painting is the most creative way to paint the details exactly how you want them!
Paint Hobby Horse Eyes: video tutorial
So that you can paint the eyes successfully, we have made a small video tutorial for you. This way we can show you step by step how the individual elements are painted. We also shade the area around the eyes to make them look even more realistic.
Tip: You can find more Hobby Horse video tutorials in this Youtube playlist!
Needed material & tools
It is best to use a high-quality fabric paint. We use “MUCKI fabric finger paint” or “Creall Tex fabric paint” as they are tested for harmful substances, but you can check what your local craft store has in stock. You will also need a thin, pointed brush so that you can paint on the small details precisely, a color mixing palette and of course the eye shape cut out of black felt.

Here are some options for the felt. We like to use stiff felt for facial elements of hobby horses and all our other plushies as it is usually much more durable than then soft felt. It also keeps its shape better. A little note: The following links are Amazon affiliate links. That means we might earn a small commission if you click and buy. Don’t worry – it doesn’t affect your price, but it helps us create even more Hobby Horse fun!


How to do it
It is best to work with a template. Coloring templates are included in the sewing instructions for Hobby Horse “HOLLY” and also in our Hobby Horse book. But you can also vary these or make up your own. Courageous painters can also paint freehand.
Put some paint on a mixing palette. Mix the color for the iris. It is best to start with the point of light and then build up the iris step by step around the pupil.


Depending on how much your felt absorbs the textile paint, you may have to apply a second coat of paint after it has dried. When the eyes are painted, dried and approved, they are sewn on to the fabric pieces for the Hobby Horse. Alternatively, you can also sew them by hand onto the finished Hobby Horse.
Finally, if you want, you can shade the area around the eyes with fabric paint. This gives creates an even more realistic look. It is best to use a brush and a small sponge for smudging.

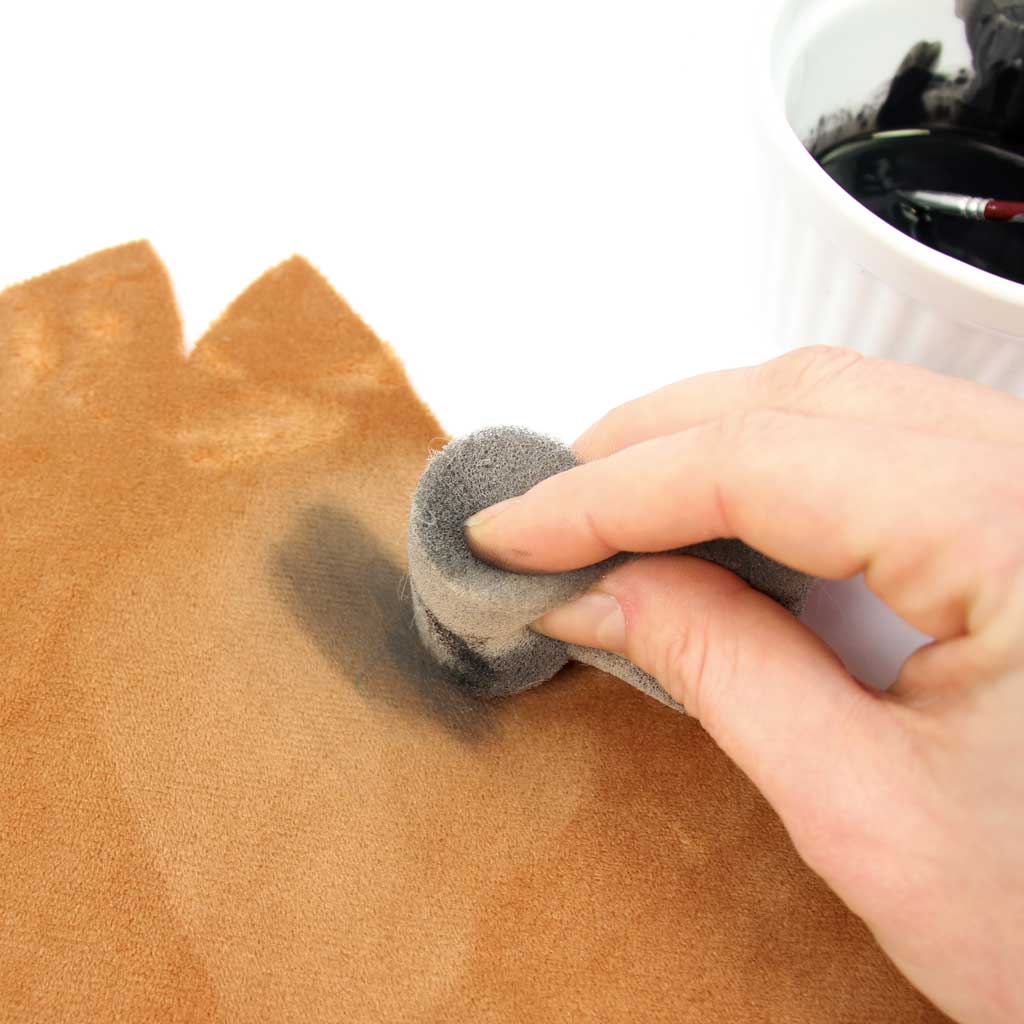

That’s it! Are you still a little bit insecure? Just practice painting the eyes until you are happy with the result. You can also try shading the plush on a scrap of fabric beforehand.
And another TIP: Of course, the whole thing works just as well for painting nostrils!