How do you make a rope halter for a hobby horse? Well, it’s actually pretty easy — and we promise, it’s lots of fun too! We’ll not only show you how to tie a halter with rope, but also share plenty of tips and tricks and even walk you through how to braid the noseband of a rope halter.
What are horse rope halters?
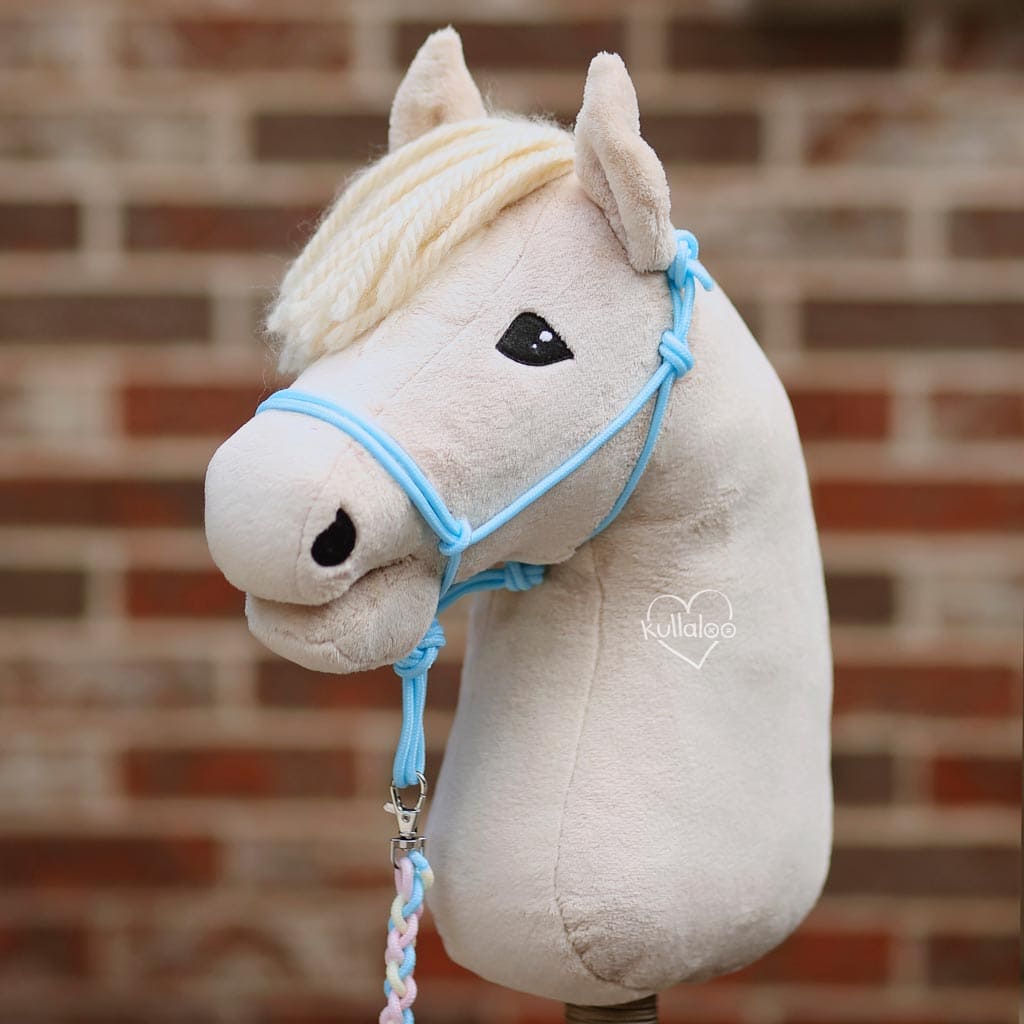
Rope halters are classic, functional, and especially popular for groundwork and horsemanship. They are made from a single piece of rope and a few simple knots, including the fiador knot, which forms the loops at the bottom of the halter for attaching a lead rope. With just a small amount of material, you can easily make a realistic rope halter for a Hobby Horse yourself.

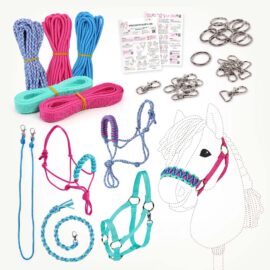
A quick side note: In this tutorial, we use round synthetic rope made of polypropylene (PP) with a diameter of 0.16″ / 4 mm, as included in our halter DIY kits. You’ll find approximate measurements for each section of the halter, designed to fit our Hobby Horse sewing patterns HOLLY and HOPE. If you’re working with a different horse, simply check each section directly on your horse and adjust the measurements as needed.
Tie Hobby Horse rope halter: video tutorial
Check out this video from our kullaloo Youtube channel on how to tie a halter from rope for a stick pony:
🧵 Materials you’ll need:
- Rope, like PP or paracord, with a diameter of about 5⁄32″ (4 mm), approx. 120″ (3 m)
We like to use PP rope or other synthetic rope for tying rope halters. It’s sturdy, less prone to dirt, and you can seal the cut ends with a lighter to prevent fraying.
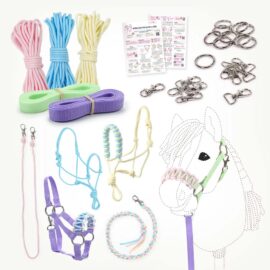
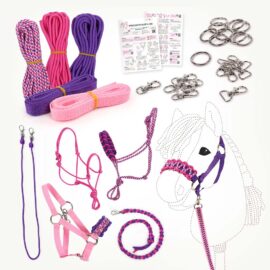
We offer several halter DIY kits that include all the materials you need to make halters and reins, including three different PP ropes in each kit for tying rope halters.
-
-18%
Hobby Horse Halter DIY Kit – Make a hobby horse Halters with Leads | Pastel
Original price was: USD $36.50.USD $29.90Current price is: USD $29.90. Add to cart -
-18%
Hobby Horse Halter & lead rope DIY Kit | Purple & Pink
Original price was: USD $36.50.USD $29.90Current price is: USD $29.90. Add to cart -
-18%
Hobby Horse Halter DIY Kit – Make Halters & Leads | Aqua & Pink
Original price was: USD $36.50.USD $29.90Current price is: USD $29.90. Add to cart
How to tie a halter with rope
1. Noseband
Cut a piece of rope about 120″ (3 m) long. If you’re using polypropylene (PP) rope, carefully seal the ends with a lighter to prevent fraying (if you’re a minor, ask an adult for help). Measure 47″ (120 cm) from one end and mark this point with a needle. Tie two loose knots in the rope, one 2 3/4″ (7 cm) to the left and one 2 3/4″ (7 cm) to the right of the needle mark. Do not tighten the knots yet! The section between them forms the noseband.


Place the needle at the top center of the hobby horse muzzle. Adjust the knots so they sit at muzzle height. Now bring both rope ends loosely under the chin and pin them together. Remove the halter from the hobby horse.


2. Fiador knot
From the needle mark, form two loops about 6 inches (15 cm) long. Then tie them together so the knot sits just below the pin. This creates the small double loop for attaching a lead, usually called a “fiador knot”. Put the halter back on and check that it can still be pulled easily over the muzzle. Adjust the fiador knot if needed.

3. Chin strap
Guide both rope ends from the chin loop to the center of the throat and pin them together. Remove the halter and tie a knot at the needle mark using both ropes. This knot forms the chin strap.


4. Throat strap
Put the halter back on and pin the knot to the throat so it cannot slip. Take the longer rope end and guide it to the right side of the head (when looking at the horse from the front). Form a loop toward the top of the head and pin it halfway between the throat and the top of the head.


Remove the halter and tie a knot at the pin point. This creates the loop that will later hold the neck strap.


5. Cheek straps
Put the halter back on. Pin both the throat knot and the new loop to the horse. Guide the rope from this loop bottom to top through the first noseband knot to form the first cheek strap. Bring it over the muzzle and pull it top to bottom through the second noseband knot. Tighten both noseband knots.


Bring the second rope end from the throat knot to the left side of the head. Lay it over the head behind the ears so it hangs down on the right side. This becomes the neck strap. It must be long enough to pass through the loop on the other side. Then guide the remaining rope end from the second noseband knot under the neck strap.


Tie it around the neck strap to form the second cheek strap.


6. Neck strap
Bring both rope ends over the head behind the ears to the other side. Pull them through the loop below the ear and tie a knot to fasten the halter. This knot should stay easy to open.


Trim the rope ends so they are the same length. If you want, you can secure them by carefully melting the ends together or by applying a small amount of glue.


That’s it, you now know how to tie a halter with rope!
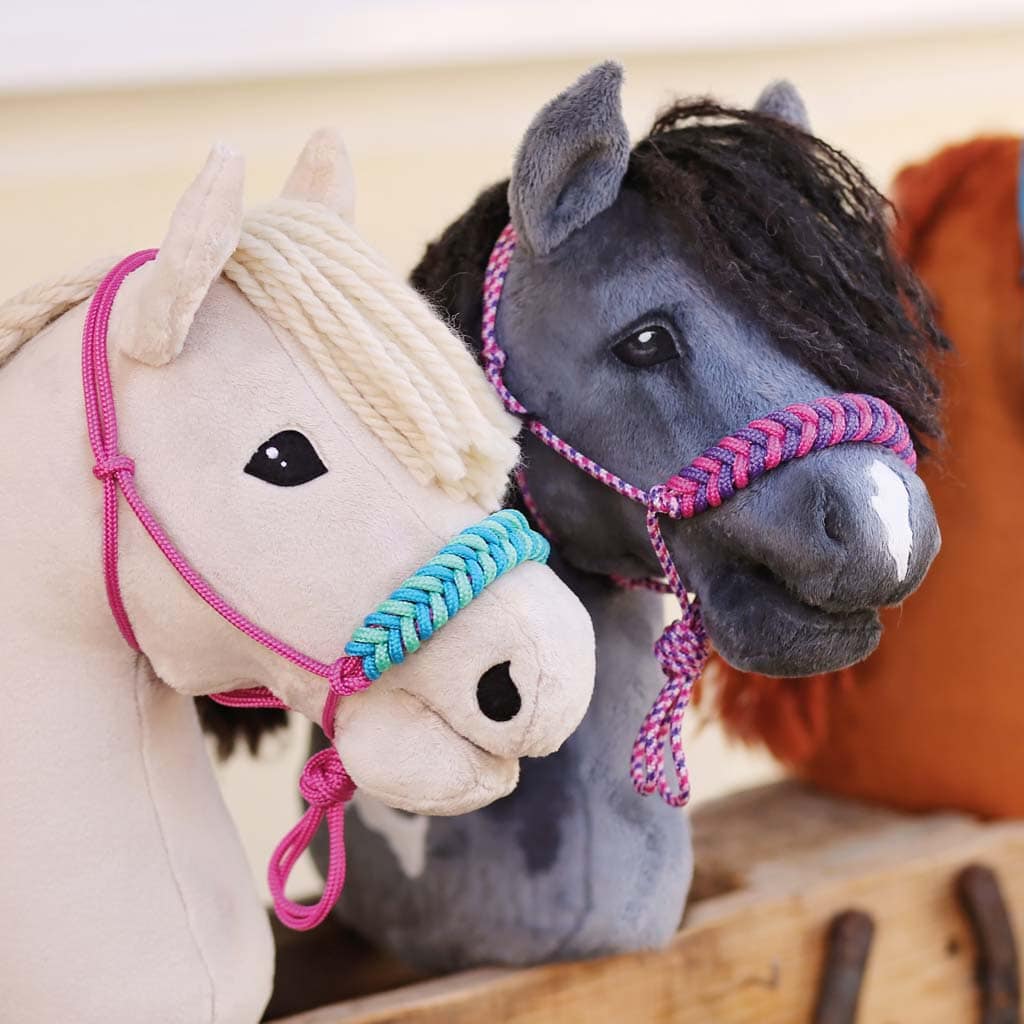
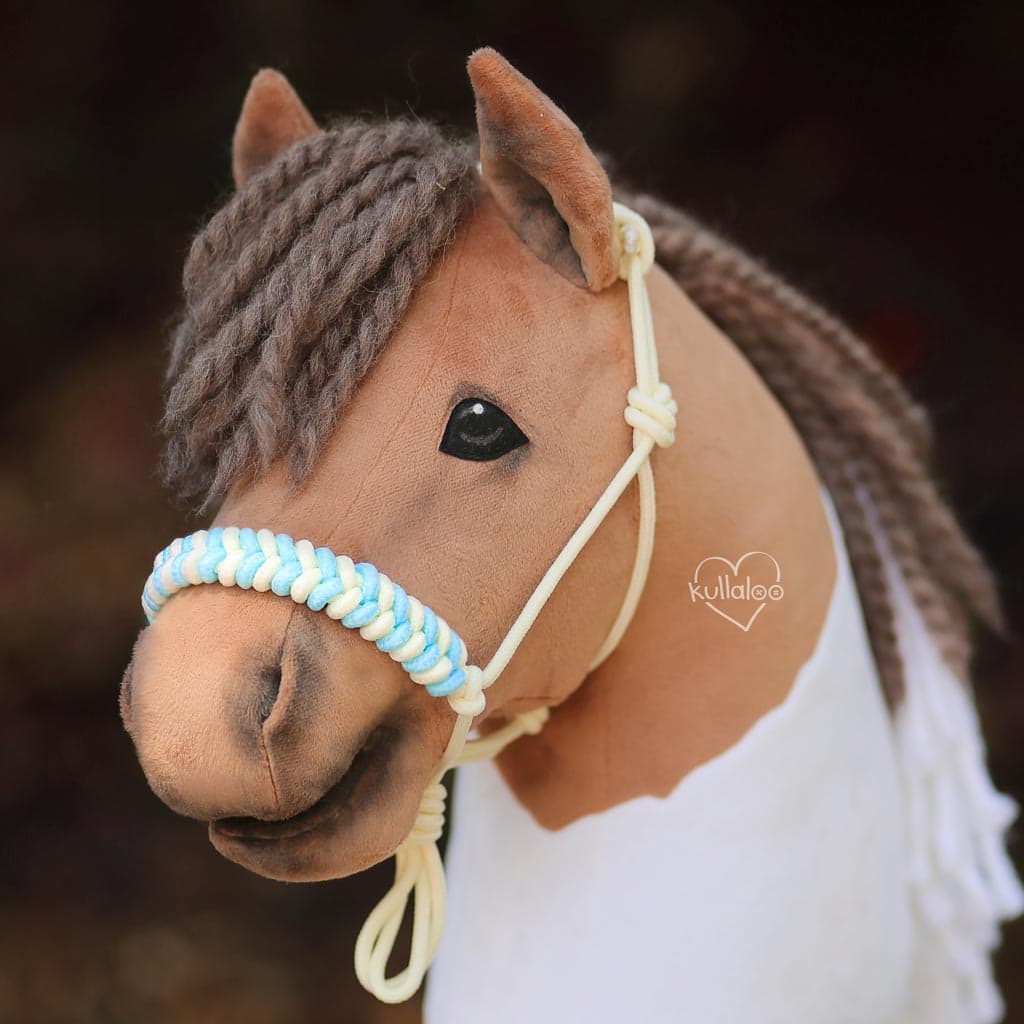
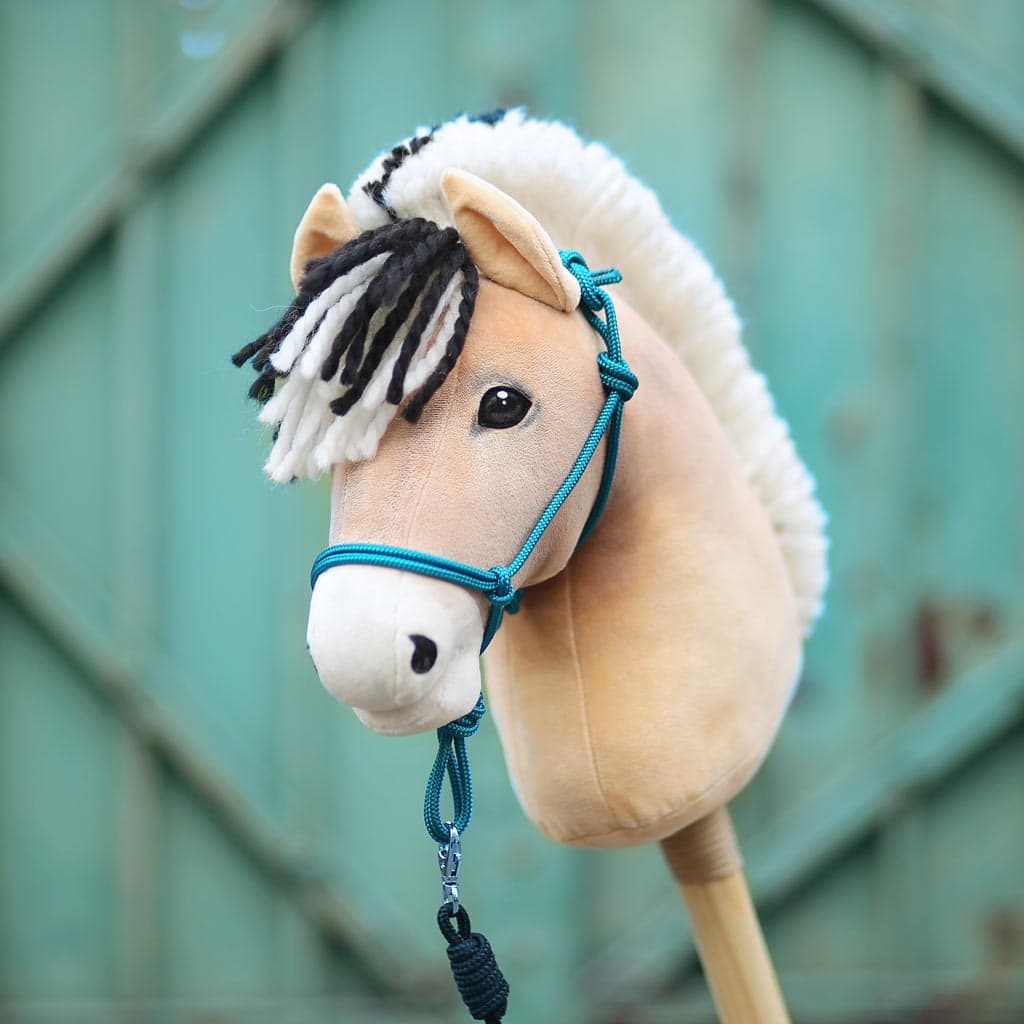
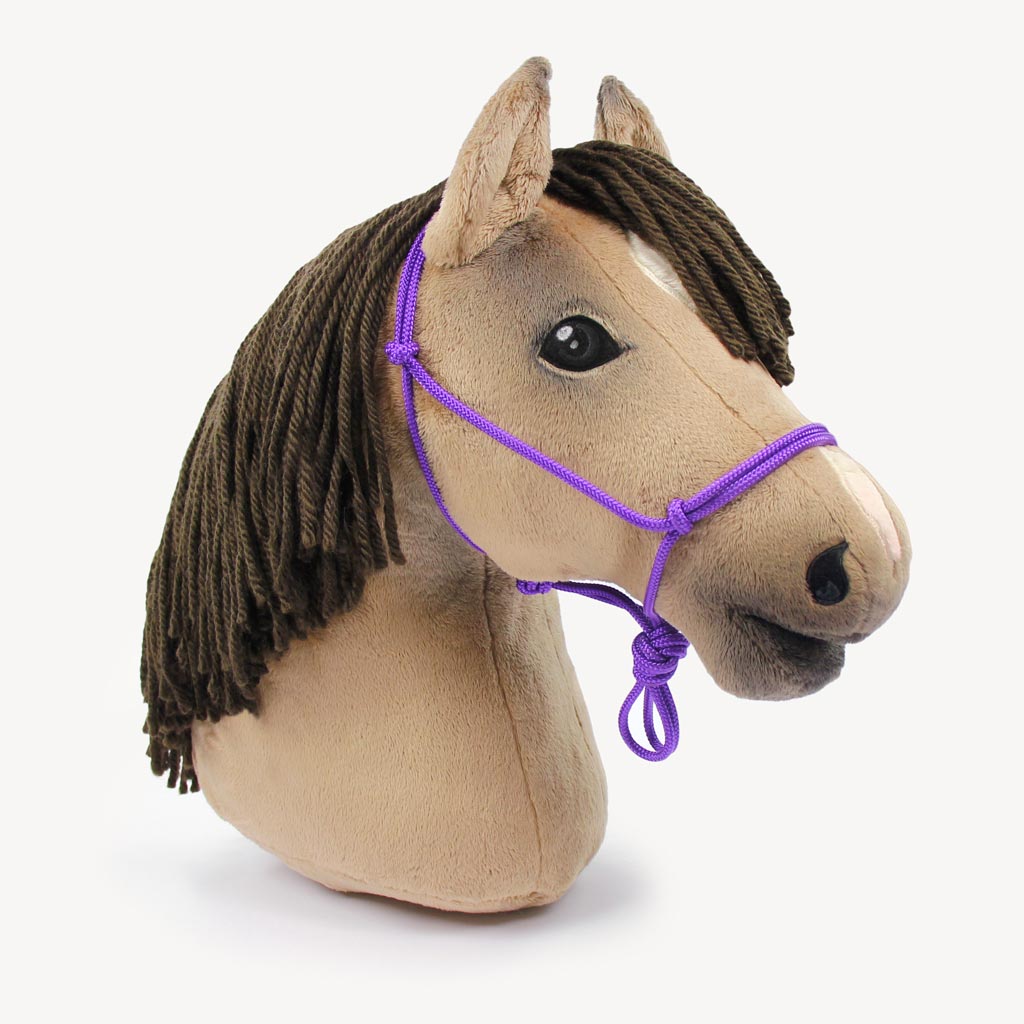
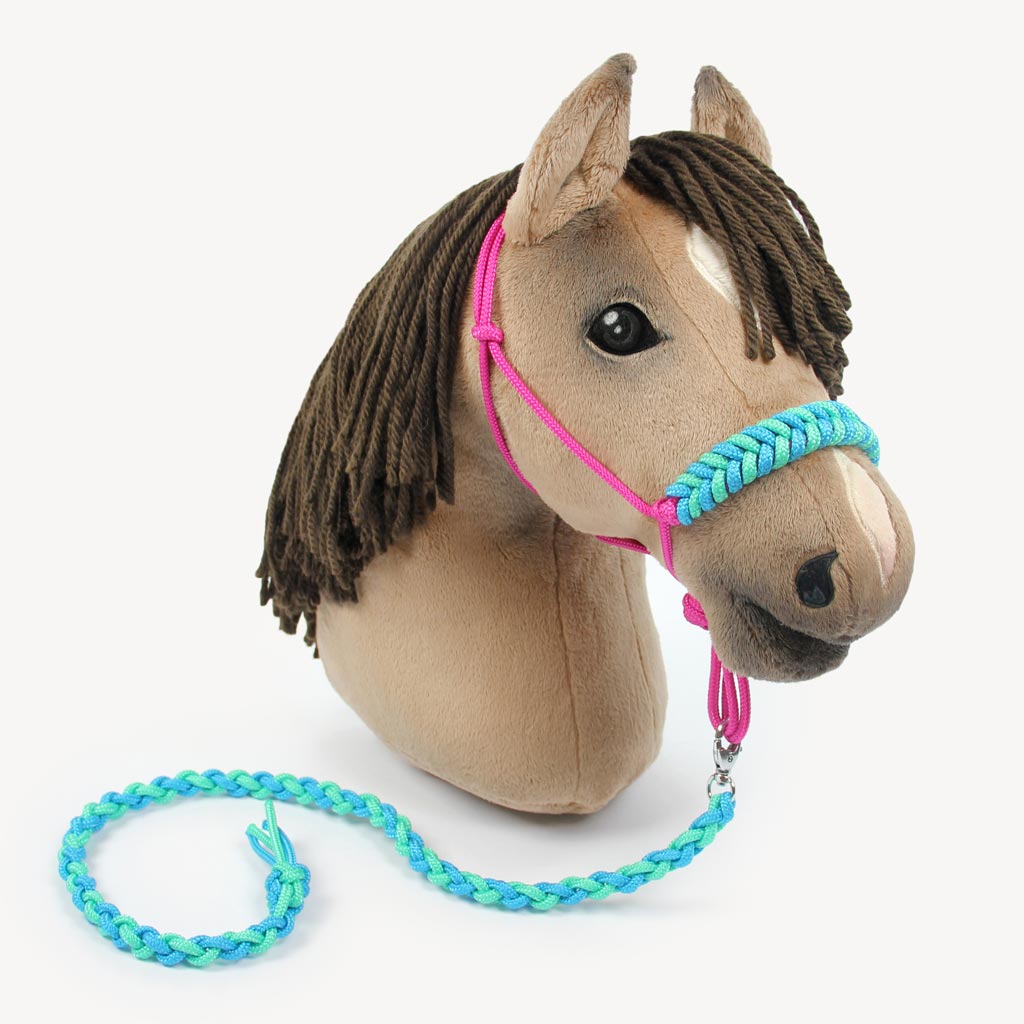
Below, you’ll find a few examples of finished rope halters in different colors and styles. Now that you know how to make a rope halter, you can take it one step further and learn how to braid the noseband for that extra pop of color. You’ll find the full tutorial right here.