


You want to make some Hobby Horse reins? Great choice! Reins make your stick pony look even more realistic and are a much needed accessory for riding and jumping! We have three different Hobby Horse reins DIY tutorials ready for you.
But before we start crafting, let’s clear up a little confusion that comes up all the time:
Reins actually belong to a bridle, not a halter. In the real horse world, a bridle is used for riding and includes a bit (or bit rings) where the reins attach. A halter, on the other hand, is used for leading and handling a horse, and it’s paired with a lead rope, not reins. So technically speaking:
🎠 Bridle → Reins (for “riding”)
🐴 Halter → Lead (for “leading”)
But hey – your Hobby Horse, your rules! 😉 Even though reins on a halter aren’t common in the real world, many Hobby Horse fans love the look (and let’s be honest, it’s adorable). So if you want to add reins to your halter, go for it! In this tutorial, we’ll show you how to make classic reins for a bridle as well as two “halter reins” for anyone who simply loves the style. If you wanna go with the the lead instead, check this lead rope DIY tutorial.


Hobby Horse reins video tutorial
Check out this video from our kullaloo Youtube channel on how to make three different types of reins for a Hobby Horse:
You can also jump right to the written instructions:
- How to make reins for a bridle
- How to make reins for a halter from bag webbing
- How to make reins for a halter from rope
Classic Hobby Horse reins DIY tutorial for a bridle
🧵 Materials you’ll need:
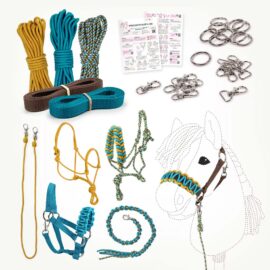
- Strap material (cut from a long faux leather piece like from our bridle DIY kit or ready-made leather strap), about 3/8-5/8″ (1–1.5 cm) wide, 35″ (90 cm) long
- 2 snap hooks with D-shaped eye
- 2 rivets or glue
- Optional: small straps for rein stops, about 1/4″ × 2″ (0.7 × 5 cm), 4 pieces
We offer a couple of different bridle DIY kits that contain all the needed materials to craft your reins:
-
-18%

DIY Hobby Horse bridle kit in black with silver metal supplies incl. instructions
Original price was: USD $36.50.USD $29.90Current price is: USD $29.90. Add to cart -
-22%
 Out of stock
Hobby Horse tack DIY kit for making a black stick horse bridle ◆GOLD EDITION◆
Original price was: USD $31.90.USD $25.00Current price is: USD $25.00. Read more -
 Out of stock
Hobby Horse bridle DIY kit in brown with silver metal supplies incl. instructions
USD $29.90 Read more
Adding rein stops to your leather Hobby Horse bridle
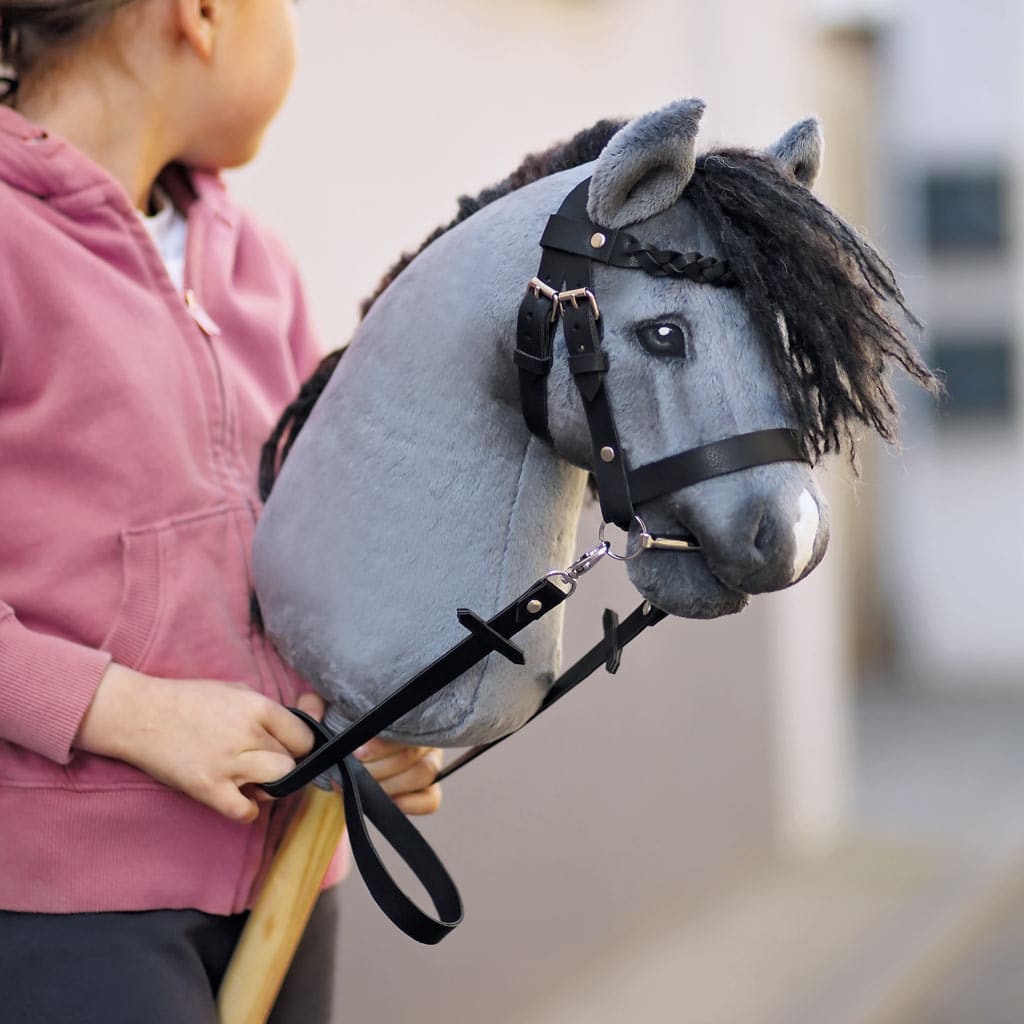
Rein stops are small strips placed a few inches below the snap hooks. On real horse tack, they keep a martingale from slipping. Here’s what they look like on a hobby horse:


You can also leave your reins without rein stops, both versions work great! Check out the pictures below for examples of reins without them:


Hobby Horse reins DIY tutorial step 1: Attach the snap hooks
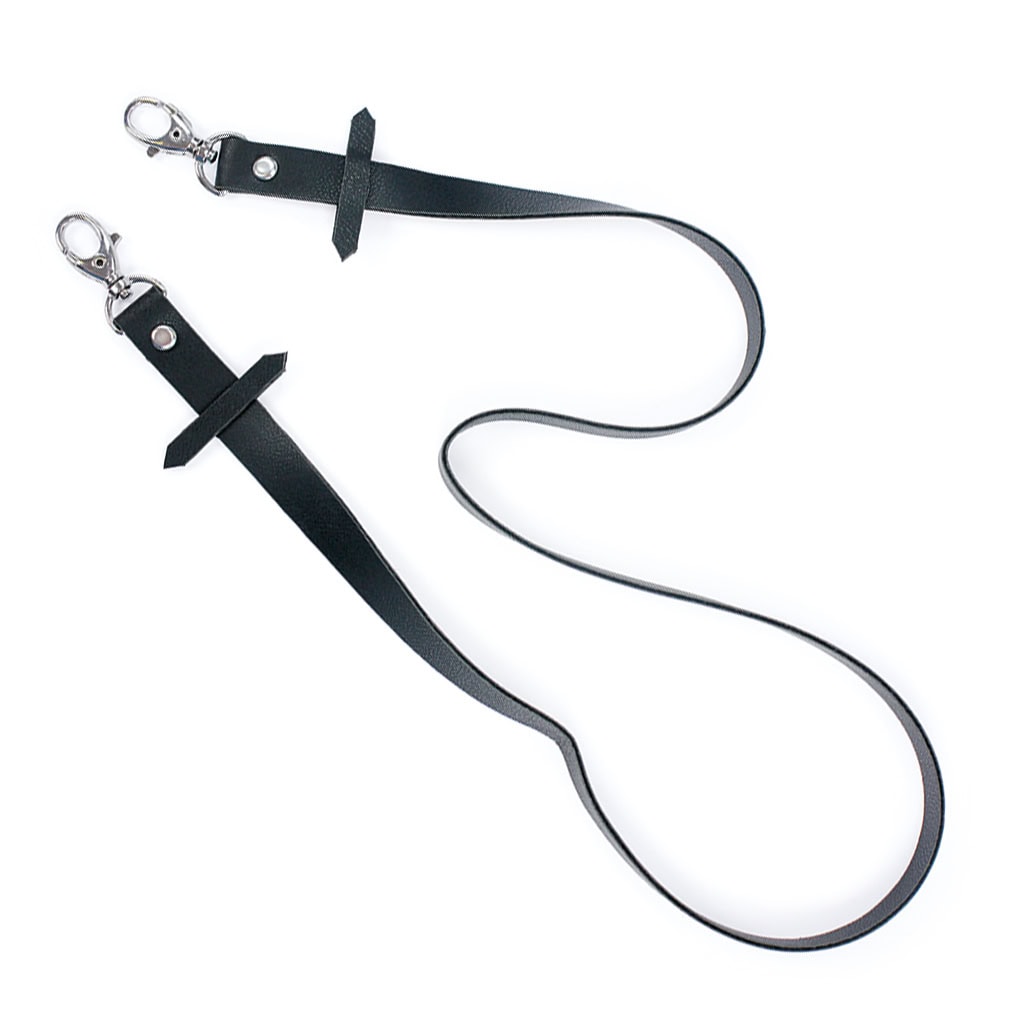
Cut your strap to about 35″ (90 cm) in length. Slide a snap hook onto each end and fold the strap end back about 1¼” (3 cm) to form a small loop. Punch a hole through both layers and secure it with a rivet. If you don’t have rivets, you can also glue the layers together firmly. For a polished look, trim the ends of the loops into a neat point.


Hobby Horse reins DIY tutorial step 2: Add the rein stops (optional)
Cut four small straps, each about 2″ (5 cm) long and 1/4″ (0.7 cm) wide. Tip: You can use leftover strap pieces and just cut them in half lengthwise. Put a small amount of glue in the center of one strap. Attach it at a right angle to your rein, about 2″ (4–5 cm) below the snap hook.


Apply glue to a second small strap and press it directly on top so the rein is sandwiched between both pieces. Trim the ends of the glued straps into little points and repeat for the other side.


And that’s it! 🎠 Now your reins are ready to attach. Simply clip the snap hooks into the rings on each side of your bridle’s bit (those are the small metal rings that sit near the hobby horse’s mouth area). If you’re using a bitless bridle, attach them to the side rings of the noseband instead.
How to make halter reins from bag webbing
🧵 Materials you’ll need:
- Bag webbing, about 5/8″ (1.5 cm) wide, 35″ (90 cm) long
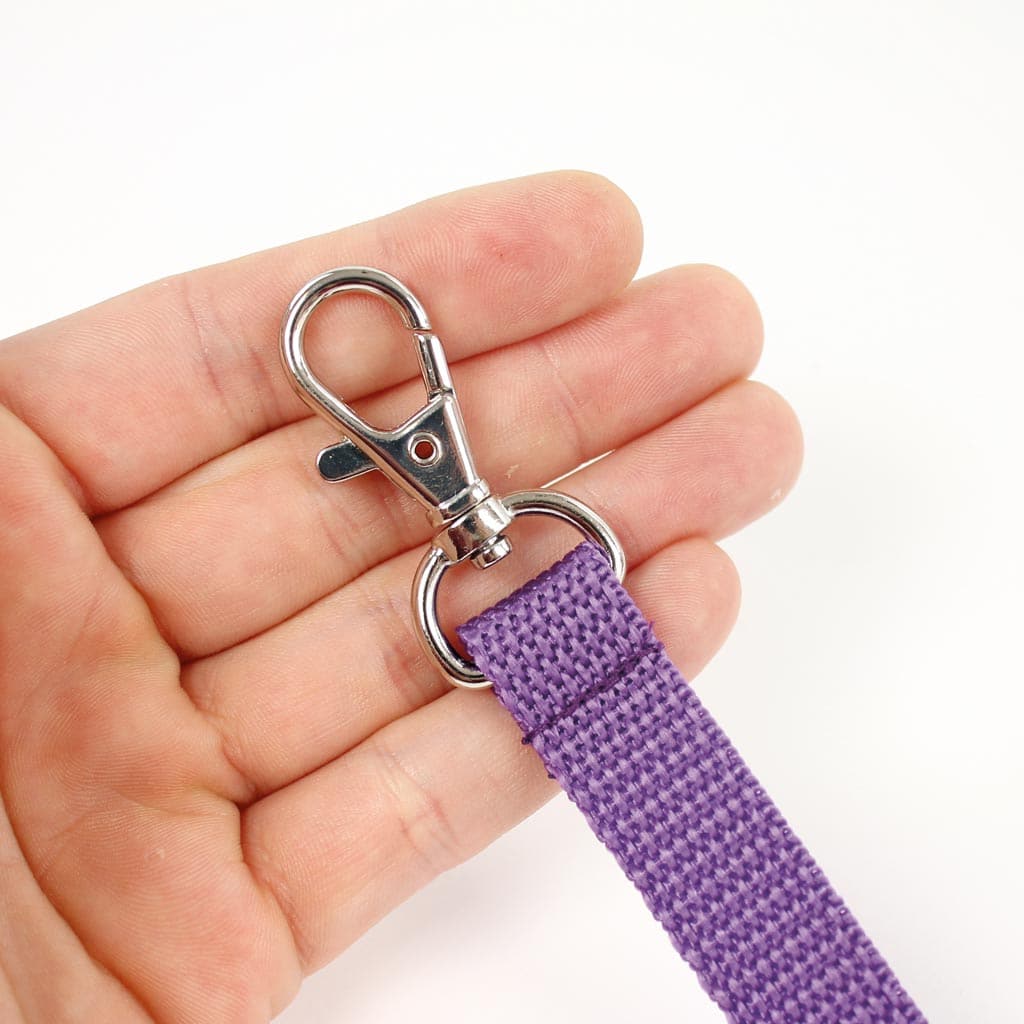
- 2 snap hooks with D-shaped eye
- Sewing machine (straight stitch) or strong craft glue
We like to use PP bag webbing or any other synthetic webbing for halter reins. It’s sturdy, easy to sew, and you can seal the cut ends with a lighter to prevent fraying. If you prefer cotton webbing, make sure to serge or zigzag the ends after cutting. The perfect width for hobby horse reins is about 5/8″ (1.5 cm).
We offer a couple of different halter DIY kits that contain all the materials you need to craft halters and reins.
-
-18%
How to make a hobby horse halter DIY Kit – Make Halters & Leads | Teal & Yellow
Original price was: USD $36.50.USD $29.90Current price is: USD $29.90. Add to cart -
-18%
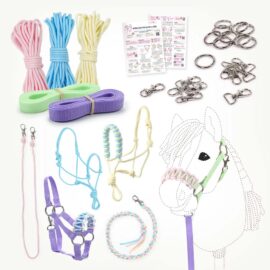
Hobby Horse Halter DIY Kit – Make a hobby horse Halters with Leads | Pastel
Original price was: USD $36.50.USD $29.90Current price is: USD $29.90. Add to cart -
-18%
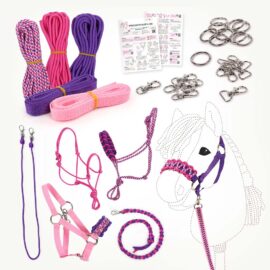
Hobby Horse Halter & lead rope DIY Kit | Purple & Pink
Original price was: USD $36.50.USD $29.90Current price is: USD $29.90. Add to cart
Just a quick note: because real halters don’t usually have reins attached, these kits don’t include enough material for a halter and reins made from the same color of webbing. You’d need about one extra yard (or meter) of each webbing for that. What you could do is make one pair of reins from one webbing color and use the other color for the halter. Or – what we like to do – make two halters from the webbing and use the ropes to create reins instead. (See the tutorial in the next chapter!)
Hobby Horse Halter reins DIY tutorial
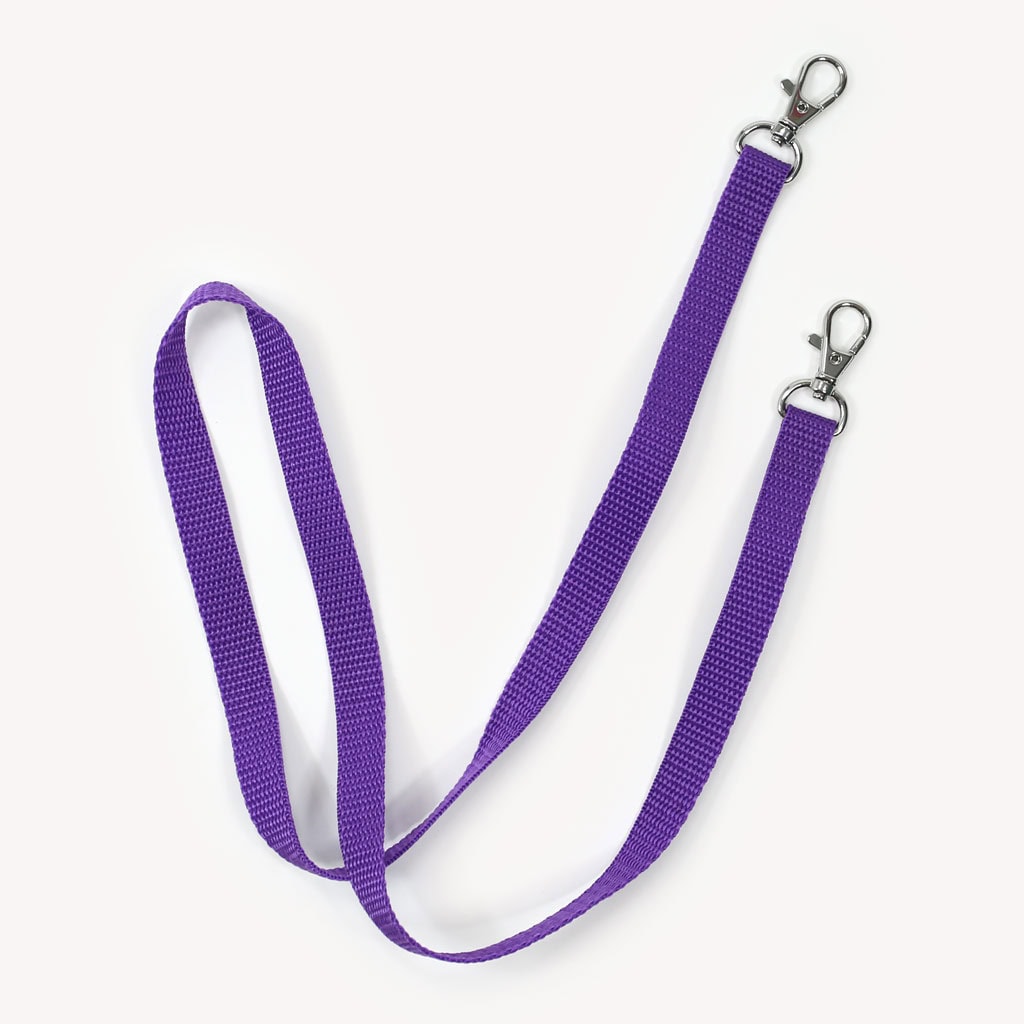
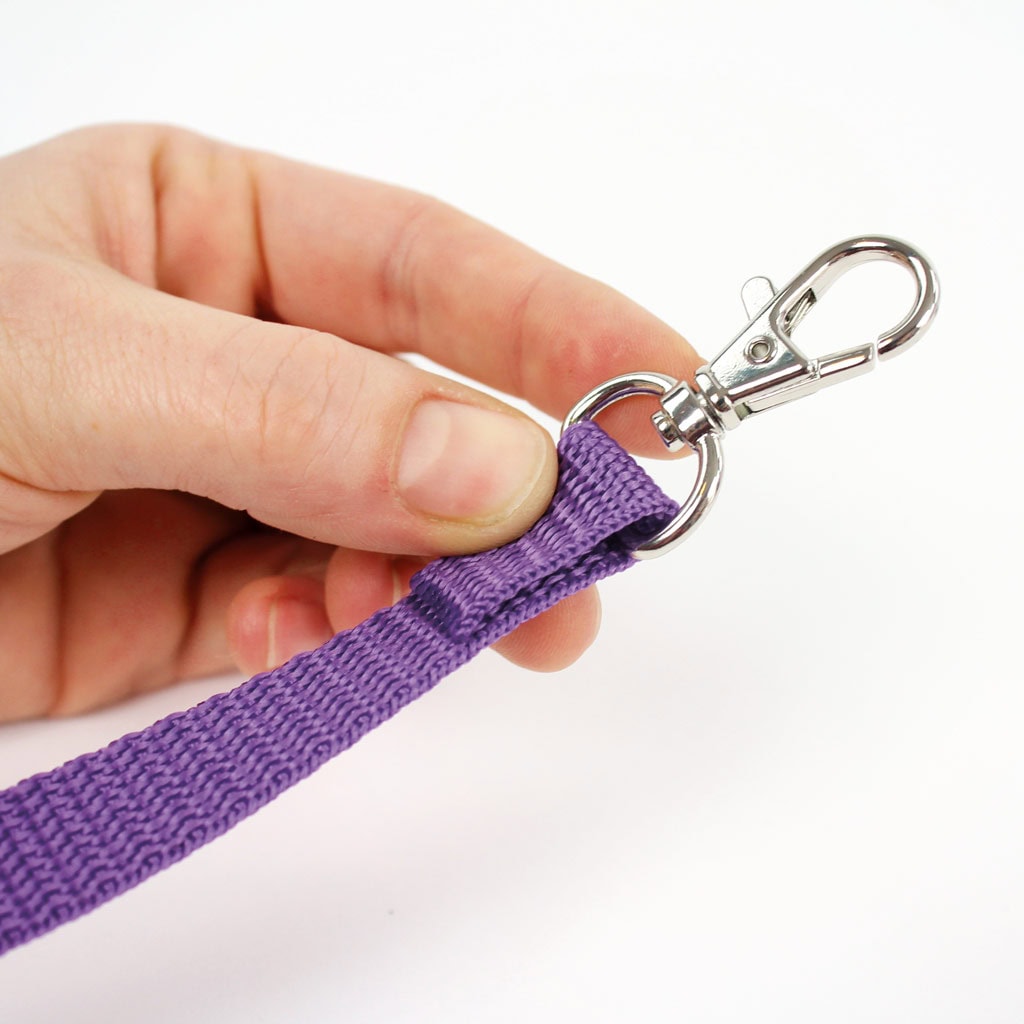
Cut a 35″ (90 cm) long piece of webbing for your reins. If using synthetic webbing, seal the open ends carefully with a lighter to prevent fraying. Thread one snap hook onto each end of the webbing. Fold the webbing back about 3/4″ (2 cm) to form a loop holding the snap hook. Secure the loop with a straight stitch on your sewing machine. Alternatively, you can use a strong craft glue designed for fabric. Repeat for the other end of the webbing.
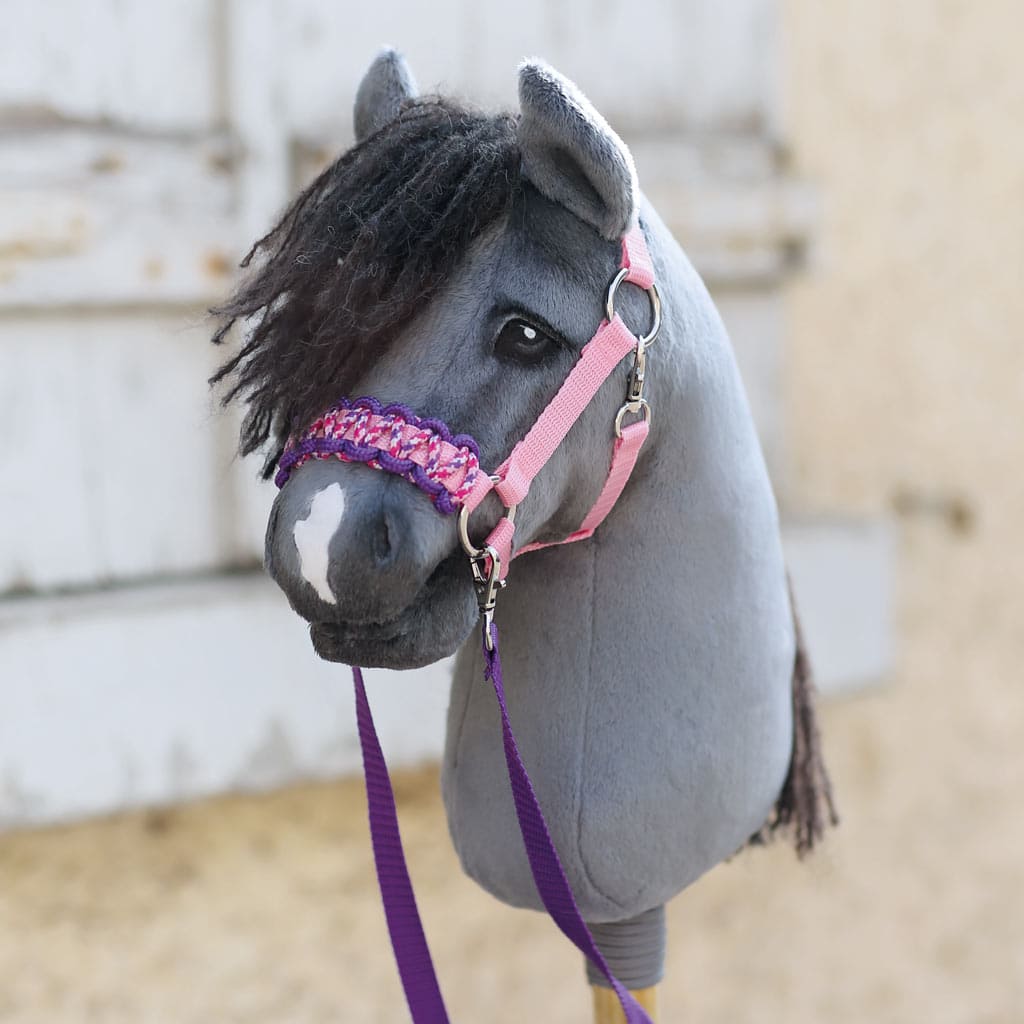
Attaching the reins to the halter
Once finished, your reins are ready to attach! On a stable halter, clip the snap hooks into the side rings on the noseband. On a rope halter, you can attach the snap hooks directly to the loops underneath the chin.


Keep in mind that real halters don’t usually have reins attached. But since Hobby Horses love creative freedom, you can absolutely add them if you like the look or want a fun “riding halter” style!
How to make halter reins from rope
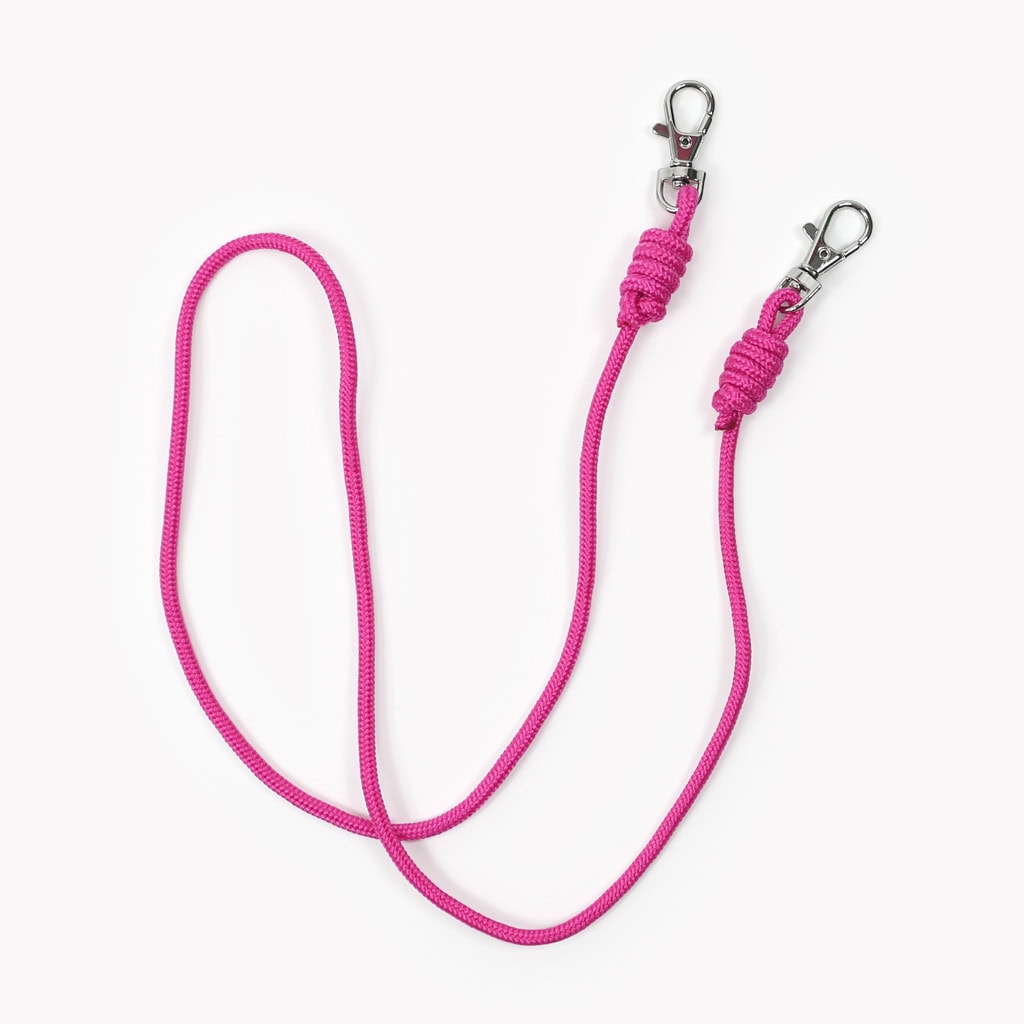
You can also make pair of reins for your halter from rope. We recommend using a PP or paracord rope with a diameter of about 5⁄32″ (4 mm) – it’s sturdy, soft, and easy to handle.
🧵 Materials you’ll need:
- Rope, like PP or paracord, with a diameter of about 5⁄32″ (4 mm), approx. 60″ (150 cm)
- 2 snap hooks with round eyes
DIY Hobby Horse reins from rope tutorial
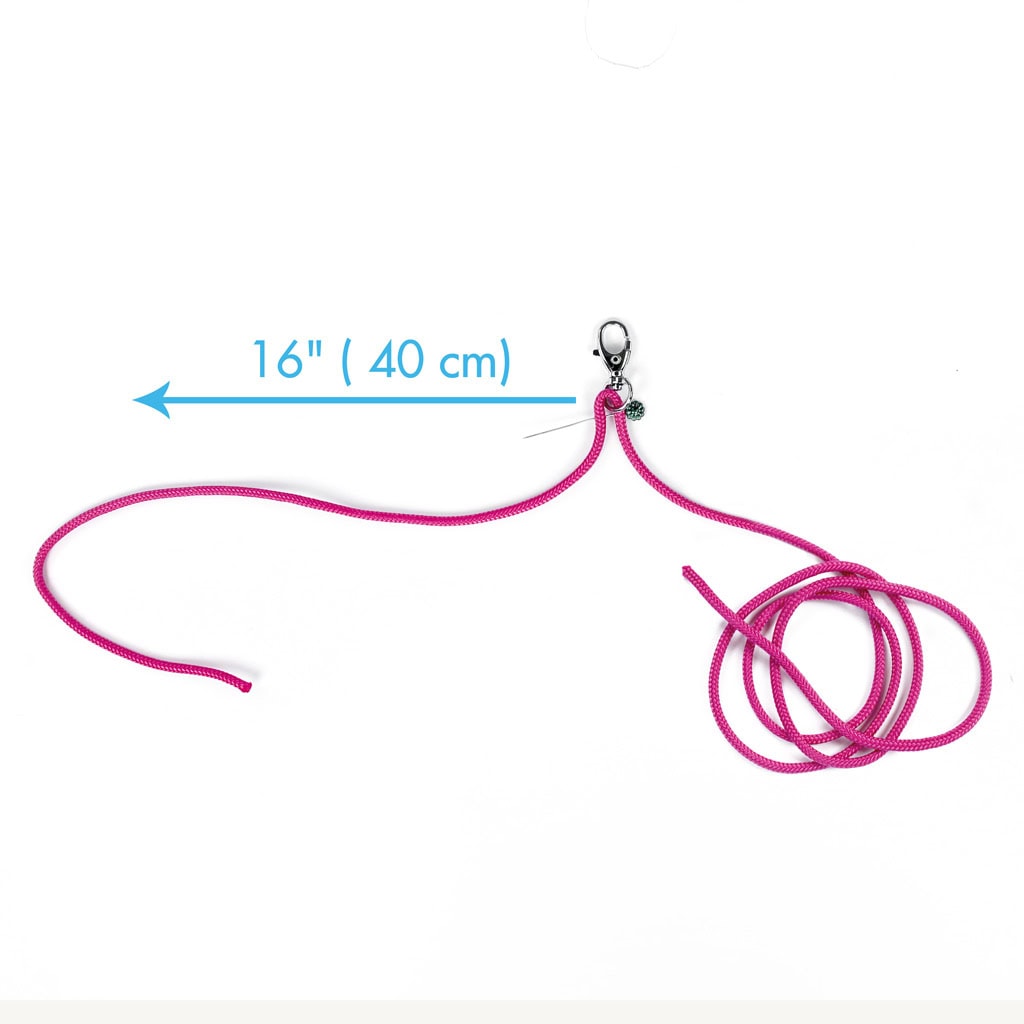
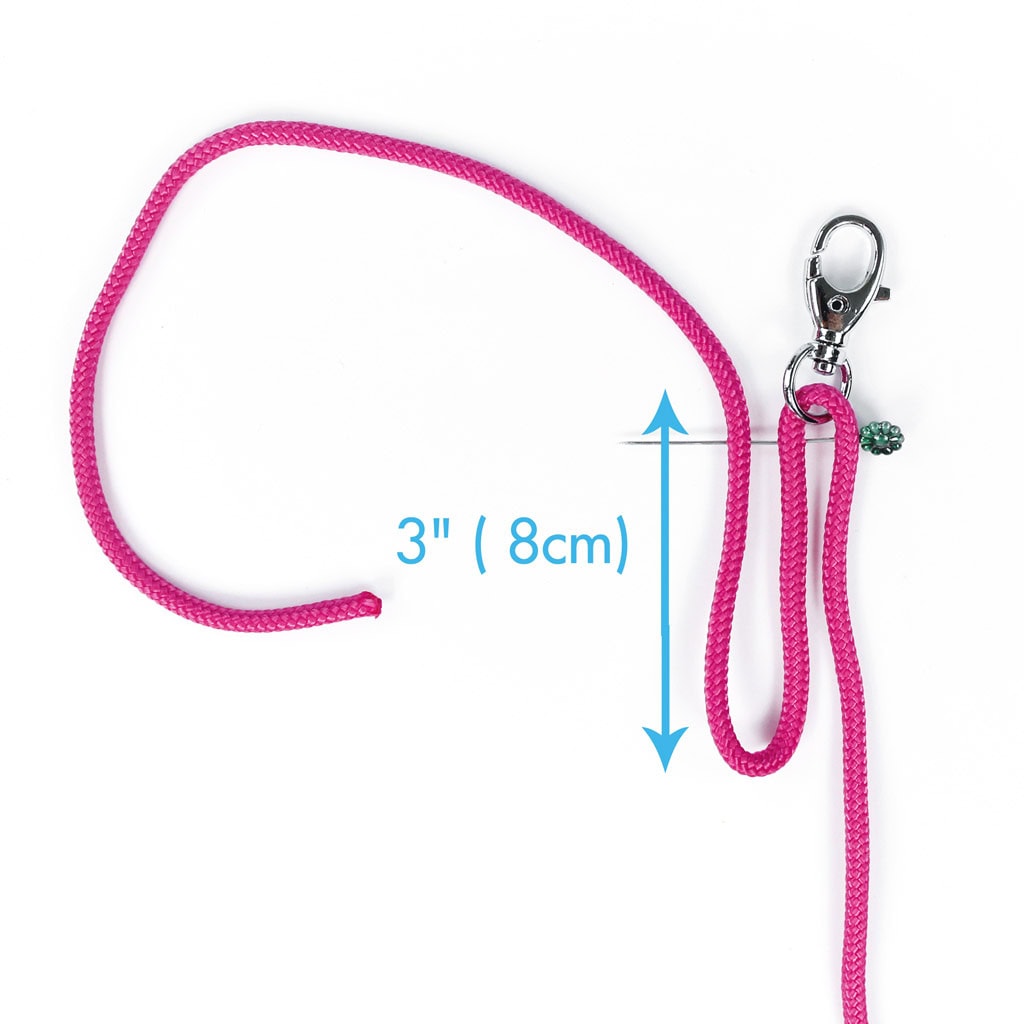
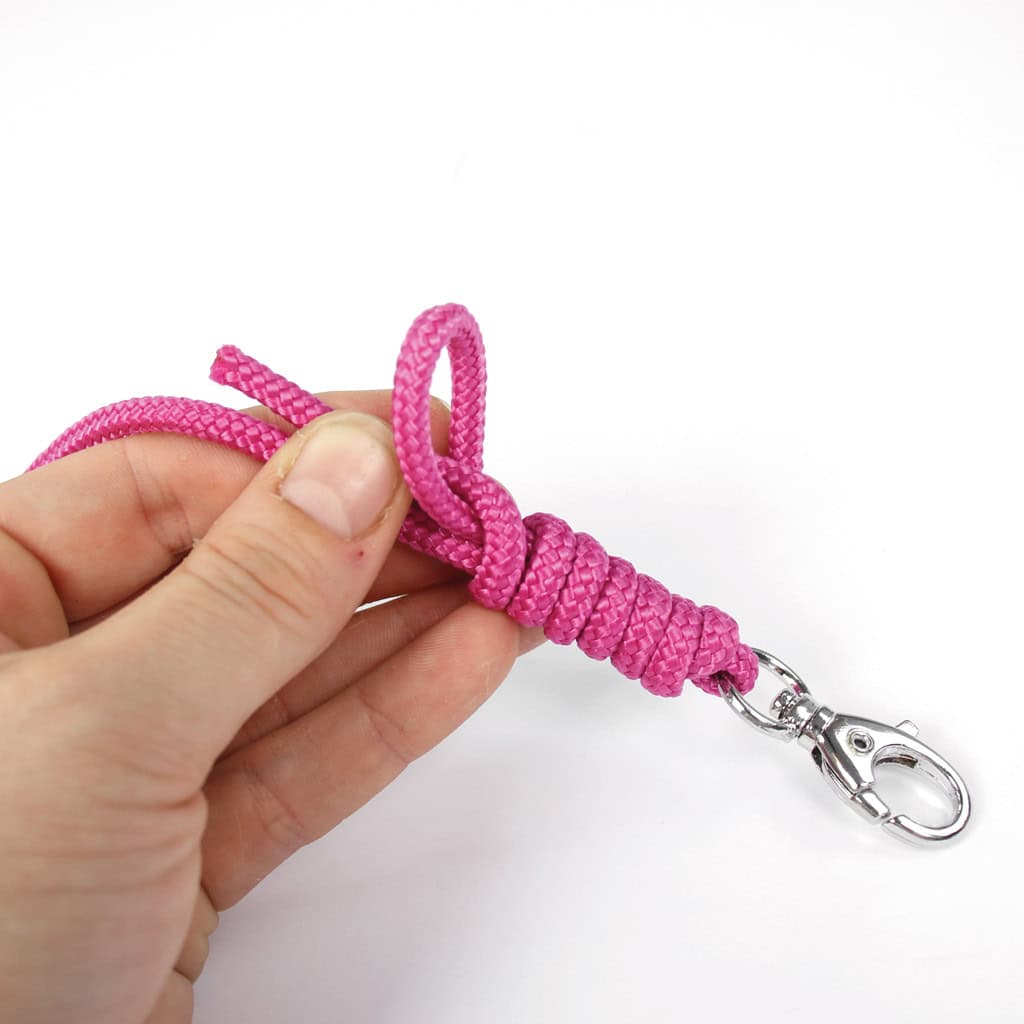
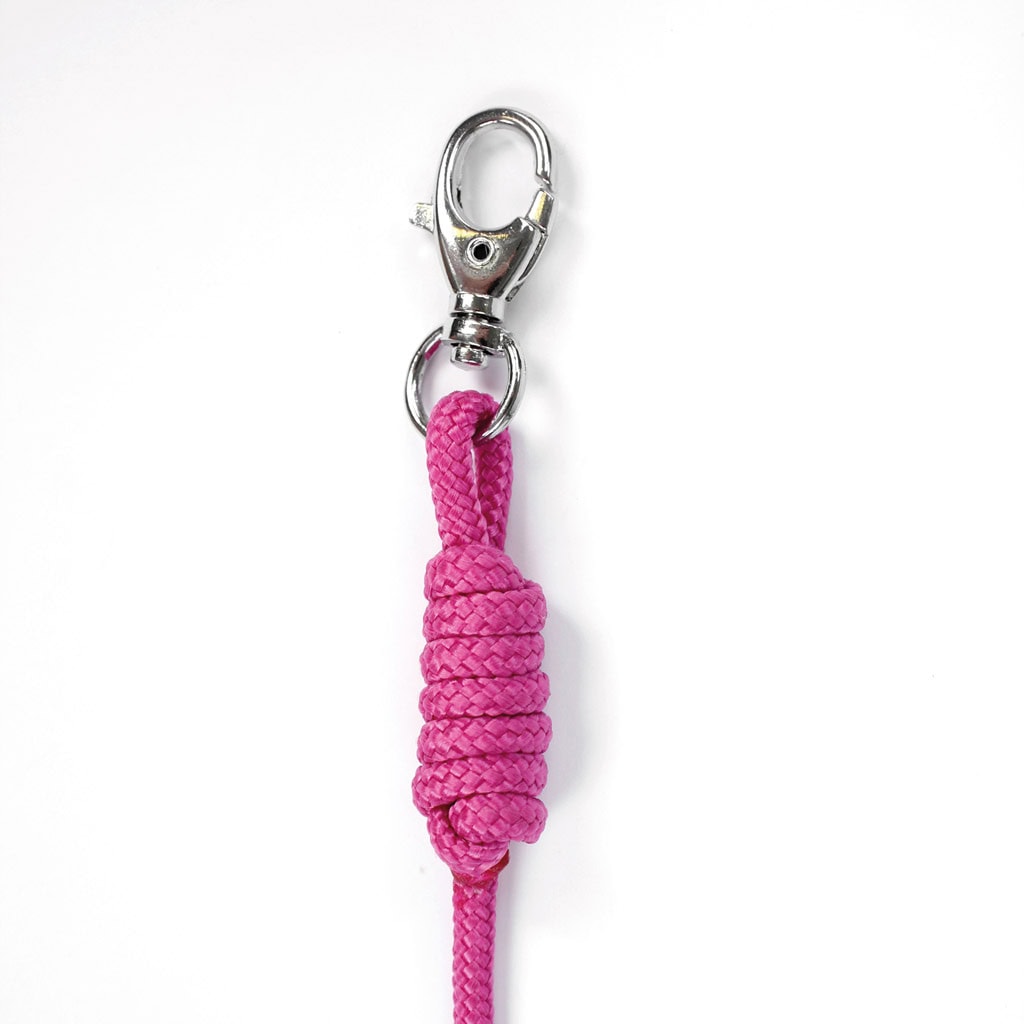
Cut a 60″ (150 cm) long piece of rope. This length makes a rein about 30–35″ (75–90 cm) long once both ends are knotted. If using PP rope, seal both rope ends with a lighter to prevent fraying. Slide one snap hook onto the rope and position it about 16″ (40 cm) from one end. Use a sewing pin or clip to temporarily hold the two rope strands together just below the snap hook. Now create a loop: Lay both rope strands straight down from the snap hook. Then bend the shorter end upward again after about 3″ (8 cm), forming a small loop that runs back toward the snap hook.
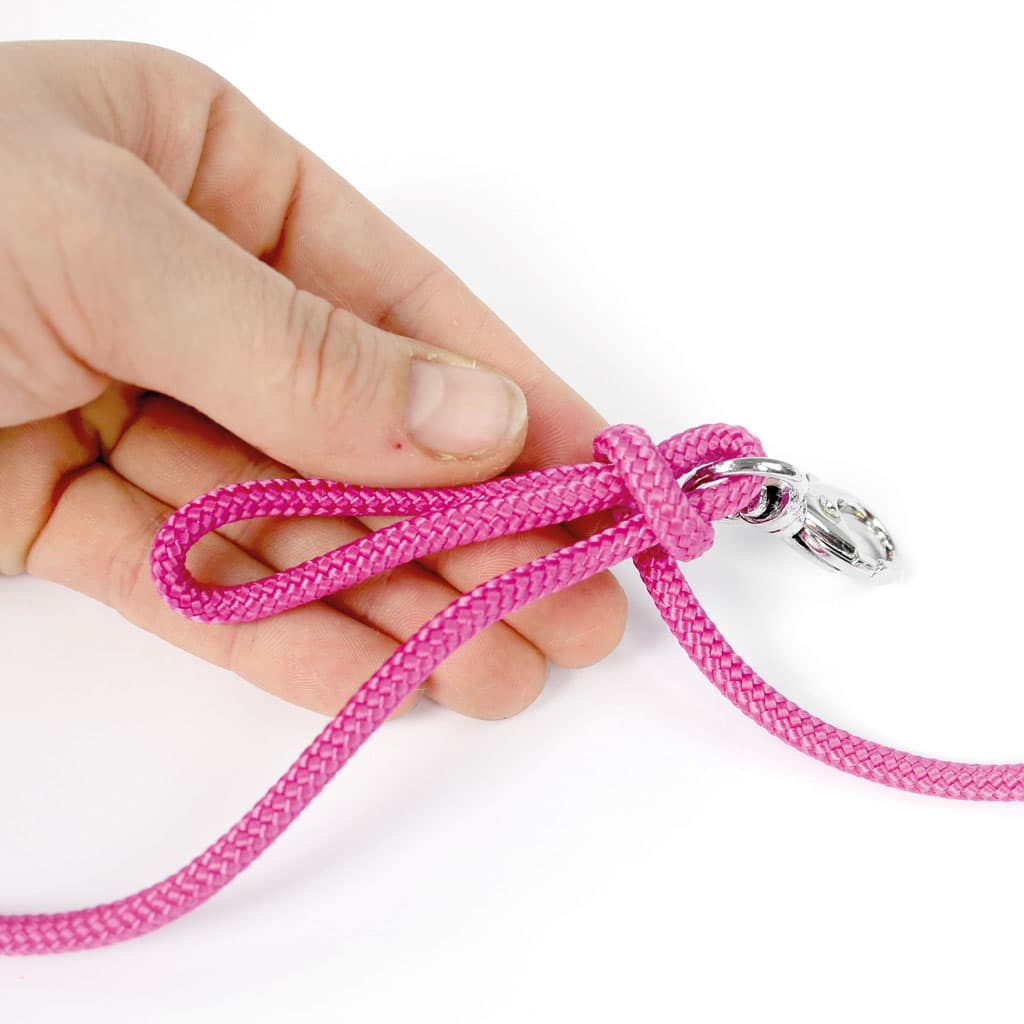
Hold all three sections of rope (the two long strands plus the short end that forms the loop) just below the snap hook between your thumb and finger. With your other hand, start wrapping the shorter rope end around all three strands, beginning right under the snap hook. Continue wrapping until about 2″ (5 cm) of the shorter end remains. You should now see a small bit of the lower loop sticking out at the bottom (about 1–2″ / 3–5 cm long).
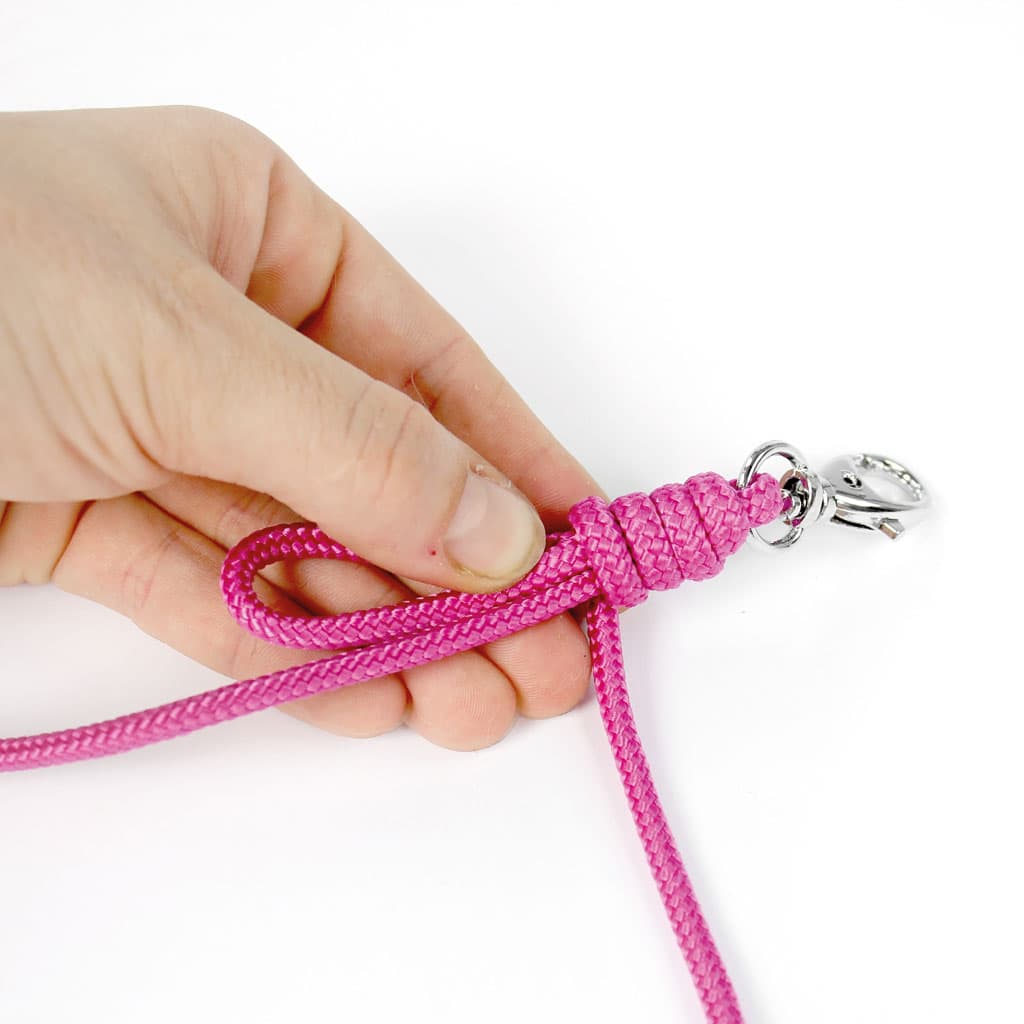
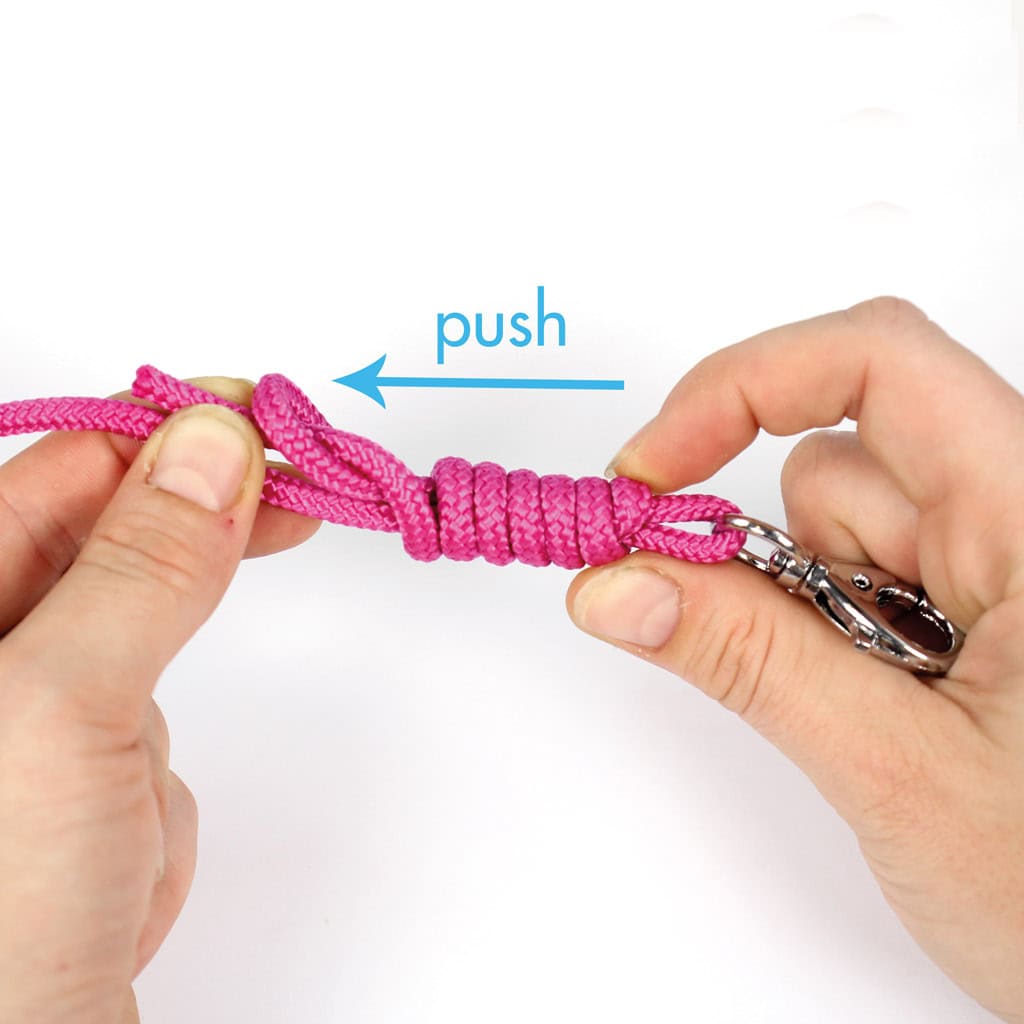
Now thread the remaining short end through that small lower loop. Then hold the short end and the long rope with your fingers and push the wrapped section towards it with the other hand. As you push, the bottom loop will shrink, pulling the end of the rope inside the wrap and securing it. Keep pushing until it feels tight and smooth.

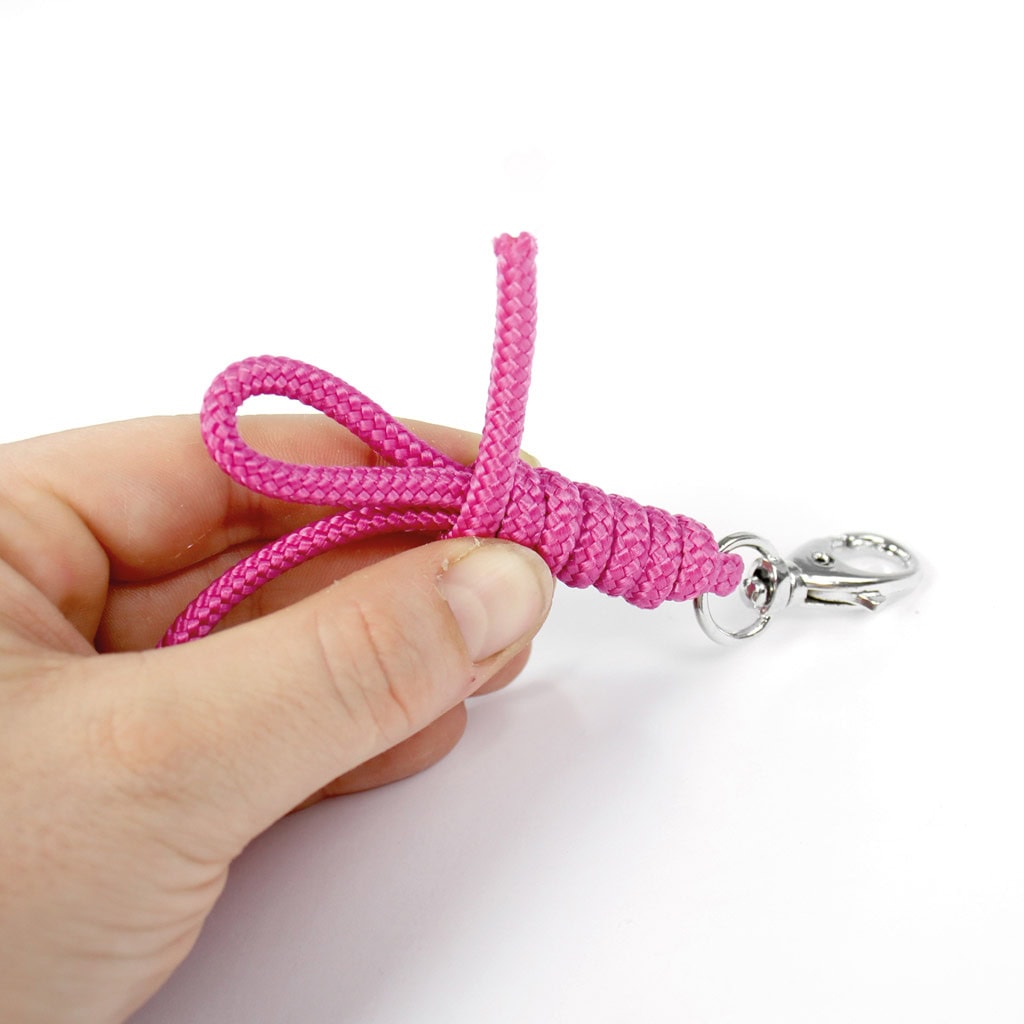
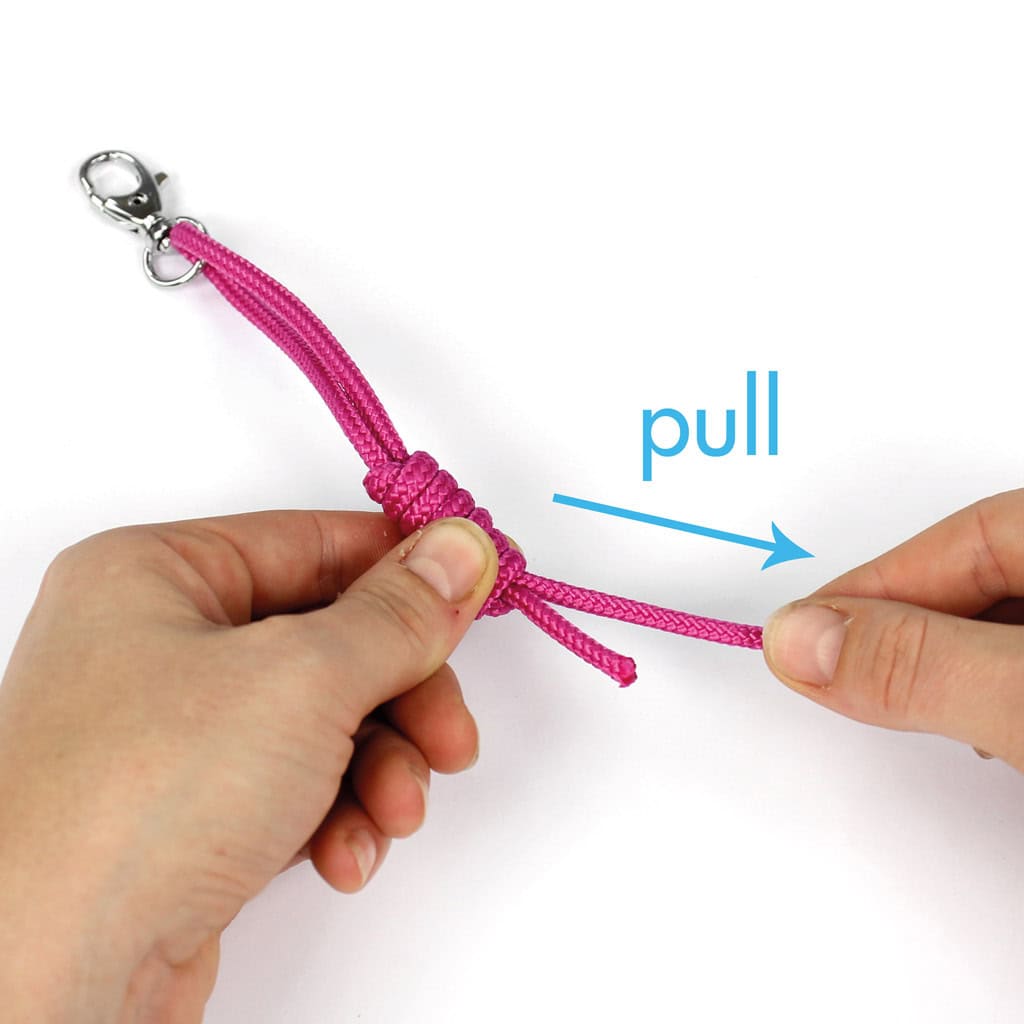
Finally, pull on the long rope to make the upper loop (where the snap hook sits) smaller. A loop height of about ½–1″ (2–3 cm) looks neat and holds well.
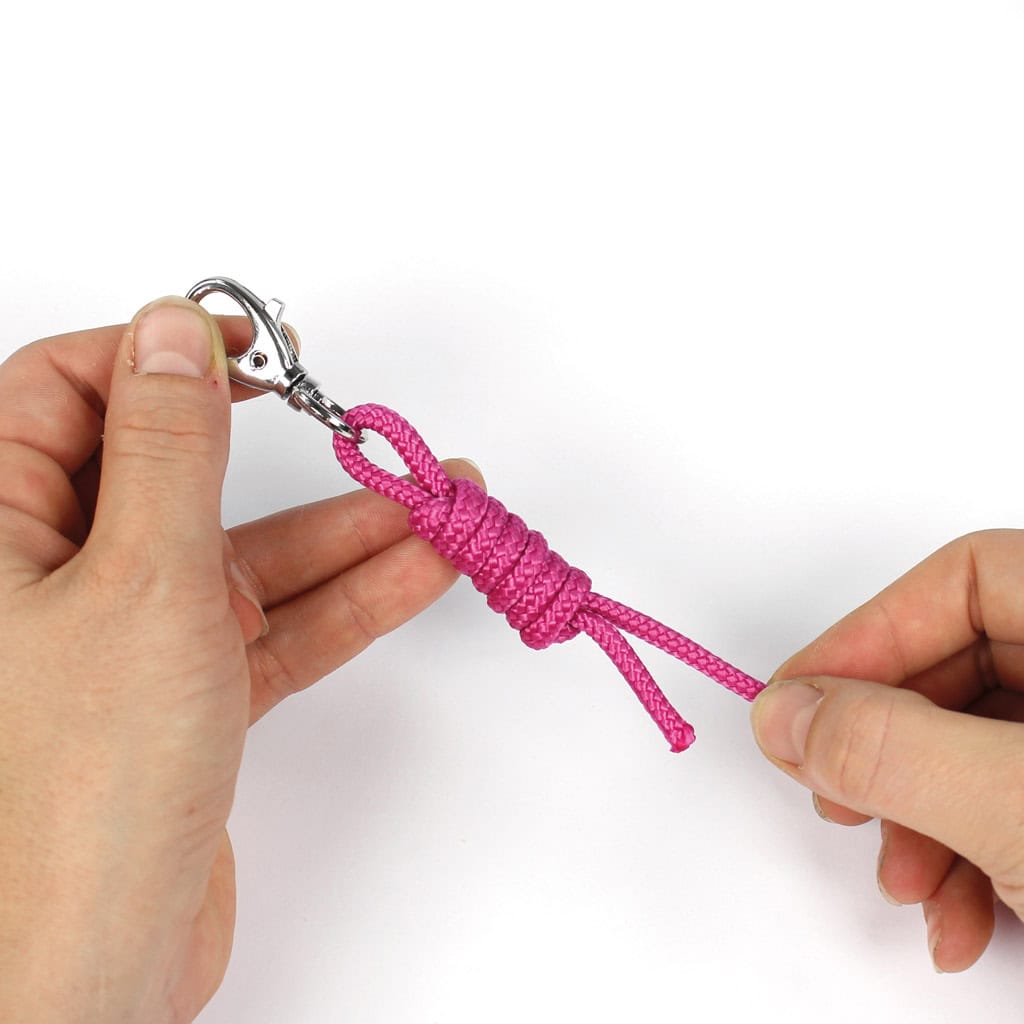
Repeat the same steps for the other end of the rope to attach the second snap hook.
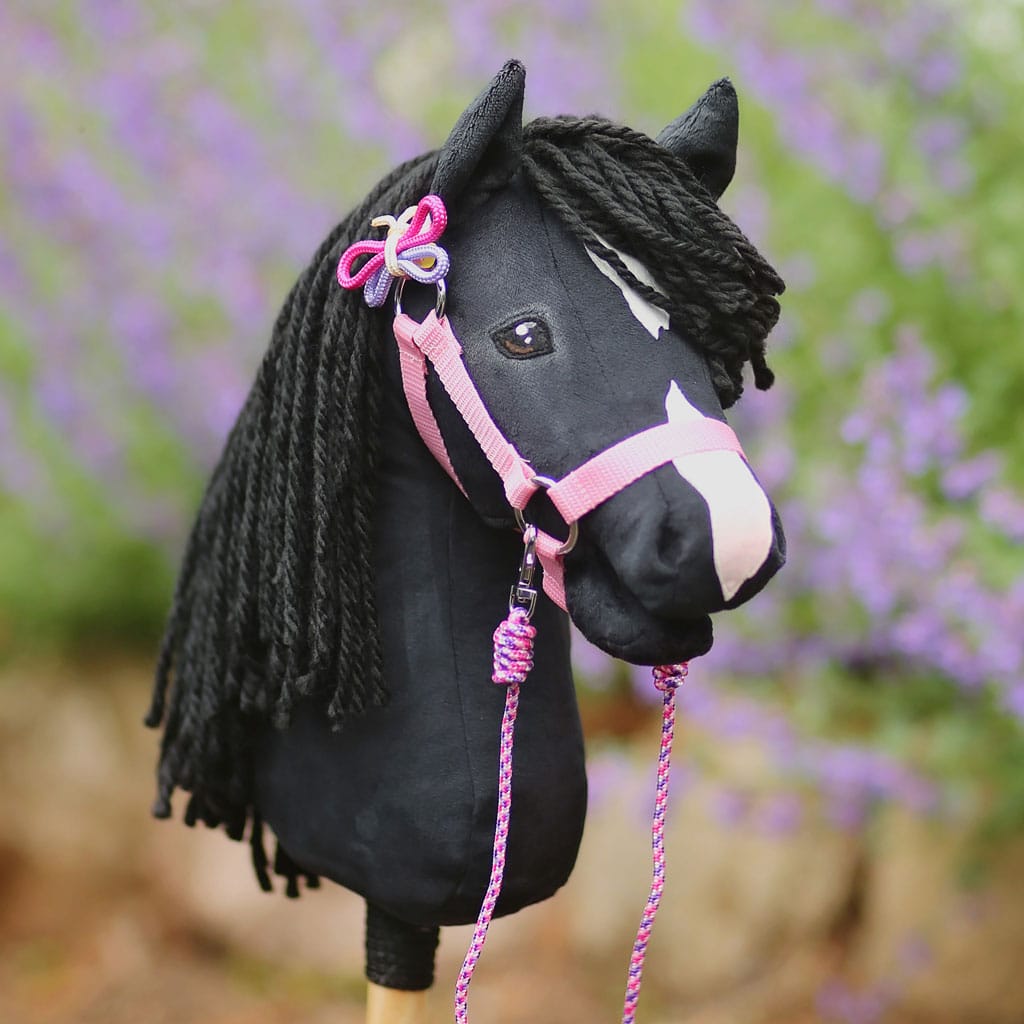
Attaching your reins
Clip each snap hook into the side rings of your halter or into the loops on a rope halter.

