


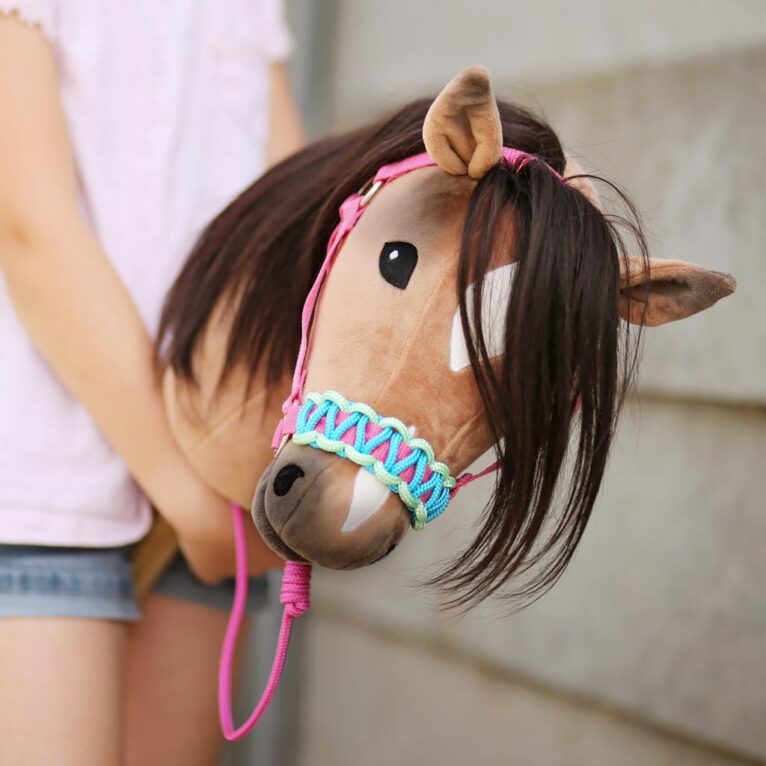
Looking for simple ways to make your own Hobby Horse lead ropes? In this guide, you’ll find four easy DIY ideas using rope or bag webbing, perfect for beginners, great for using up leftovers, and easy to customize with colors. For the rope versions, we like to use polypropylene rope because it’s sturdy and not prone to dirt, but you can also use paracord or any other type of rope. The bag webbing is usually polypropylene as well, but cotton webbing or even ribbon works just fine, too.

Hobby Horse lead ropes video tutorial
Check out this video from our kullaloo Youtube channel on how to make 4 different types of leads for a Hobby Horse:
You can also jump right to the written instructions:
- Simple lead from rope
- Lead from rope using a hangman’s knot
- Simple lead from bag webbing
- Round braided lead from rope
🧵 Materials you’ll need:
- Rope, like polypropylene rope or paracord
- Bag webbing or ribbon, about 3/8-5/8″ (1–1.5 cm) wide
- Snap hooks, with round eye for leads made from rope or with D-shaped eye for leads made from bag webbing or ribbon
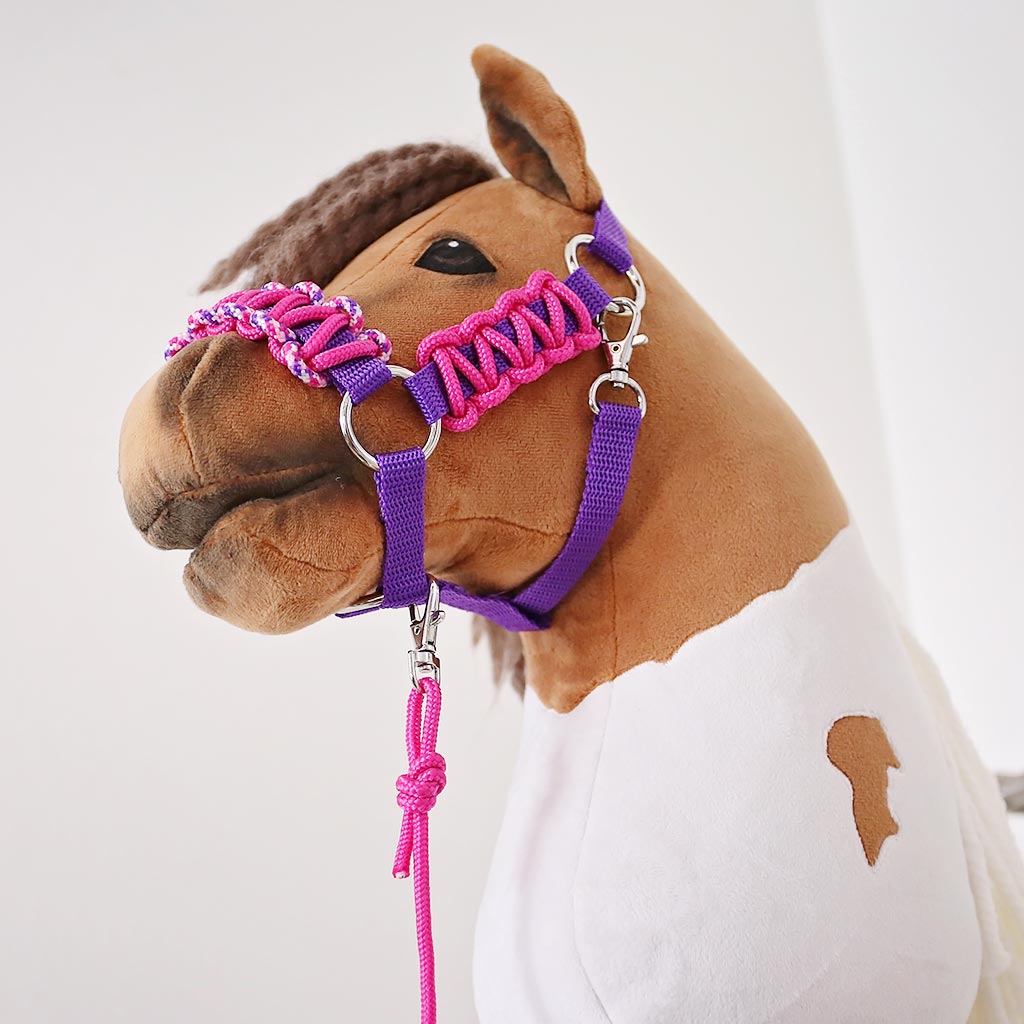
We offer a couple of different bridle DIY kits that contain all the needed materials to craft some leads:
-
-18%
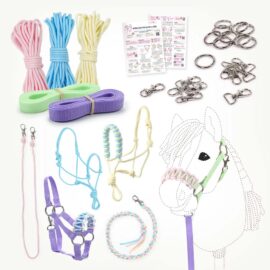
Hobby Horse Halter DIY Kit – Make a hobby horse Halters with Leads | Pastel
Original price was: USD $36.50.USD $29.90Current price is: USD $29.90. Add to cart -
-18%
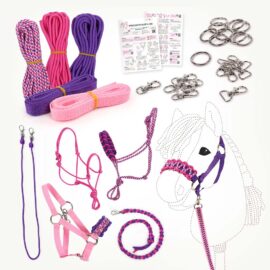
Hobby Horse Halter & lead rope DIY Kit | Purple & Pink
Original price was: USD $36.50.USD $29.90Current price is: USD $29.90. Add to cart -
-18%
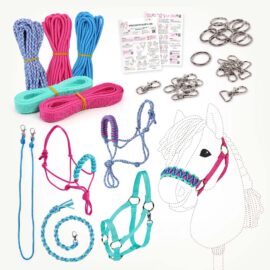
Hobby Horse Halter DIY Kit – Make Halters & Leads | Aqua & Pink
Original price was: USD $36.50.USD $29.90Current price is: USD $29.90. Add to cart
Simple lead from rope
This is the quickest and easiest version – perfect if you just need a functional lead rope!
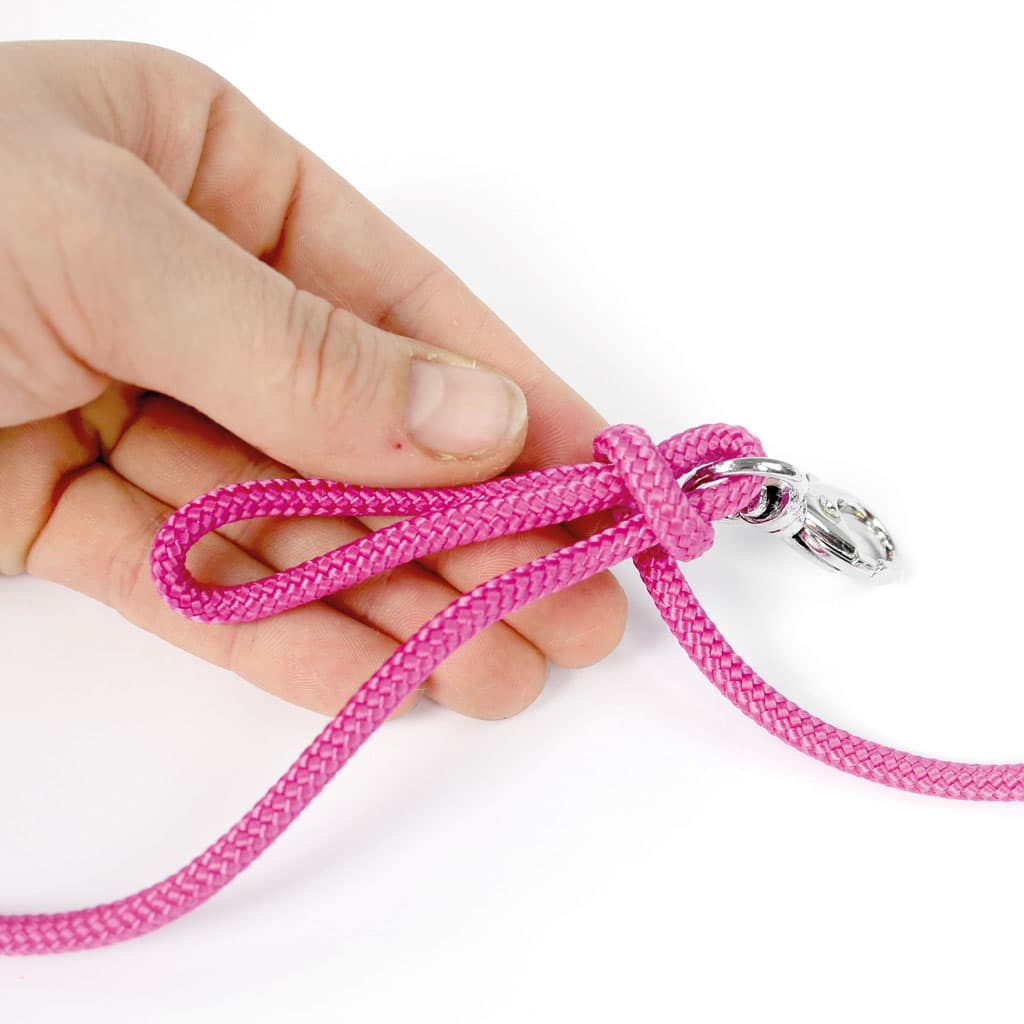
Cut a piece of rope to 28″ (70 cm). If you’re using polypropylene rope, carefully seal both ends with a lighter (minors should ask an adult for help). Thread one end of the rope through a snap hook with a round eye and secure it with a simple knot. Pull the knot tight.
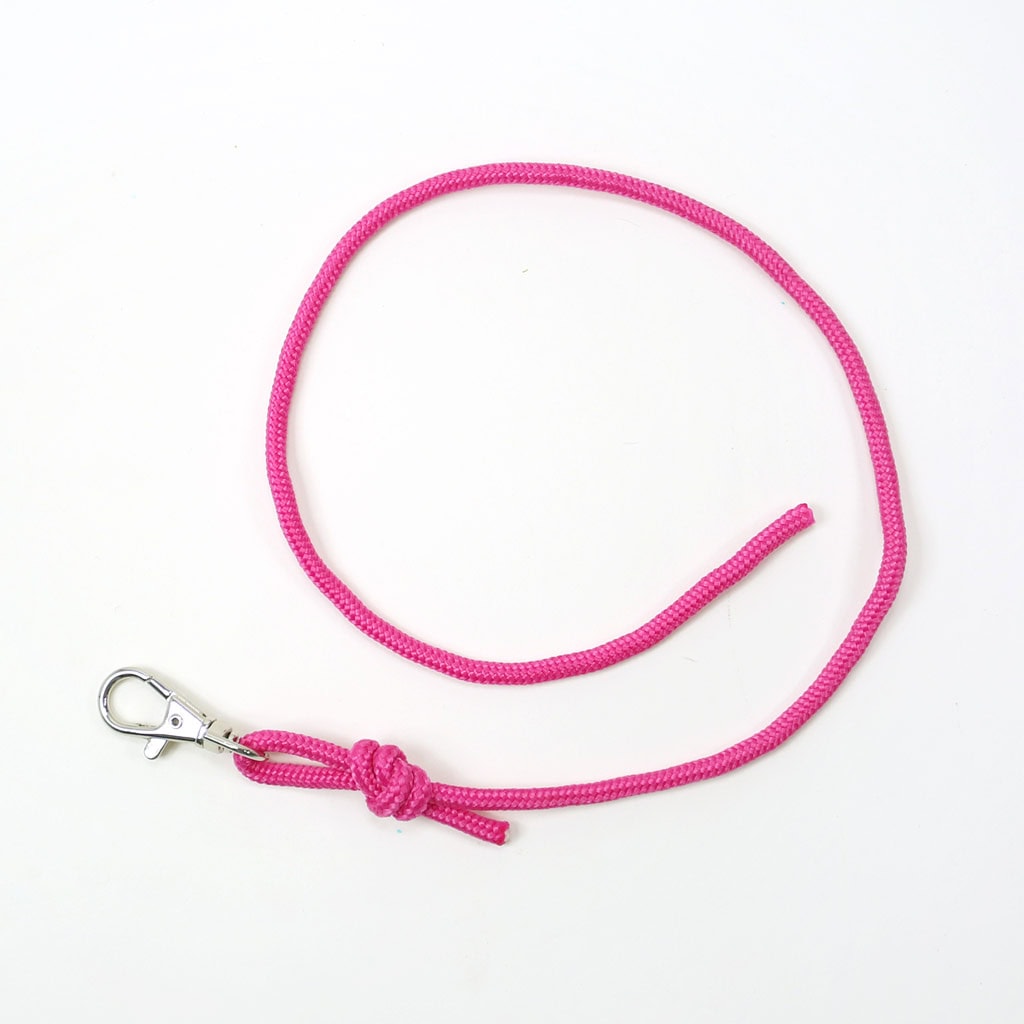
That’s it – your basic Hobby Horse lead rope is ready to use. You can now hook it into the halter!
How to make a lead with a rope using a hangman’s knot
This version looks a bit more polished and decorative, but is still easy to make once you know the steps.
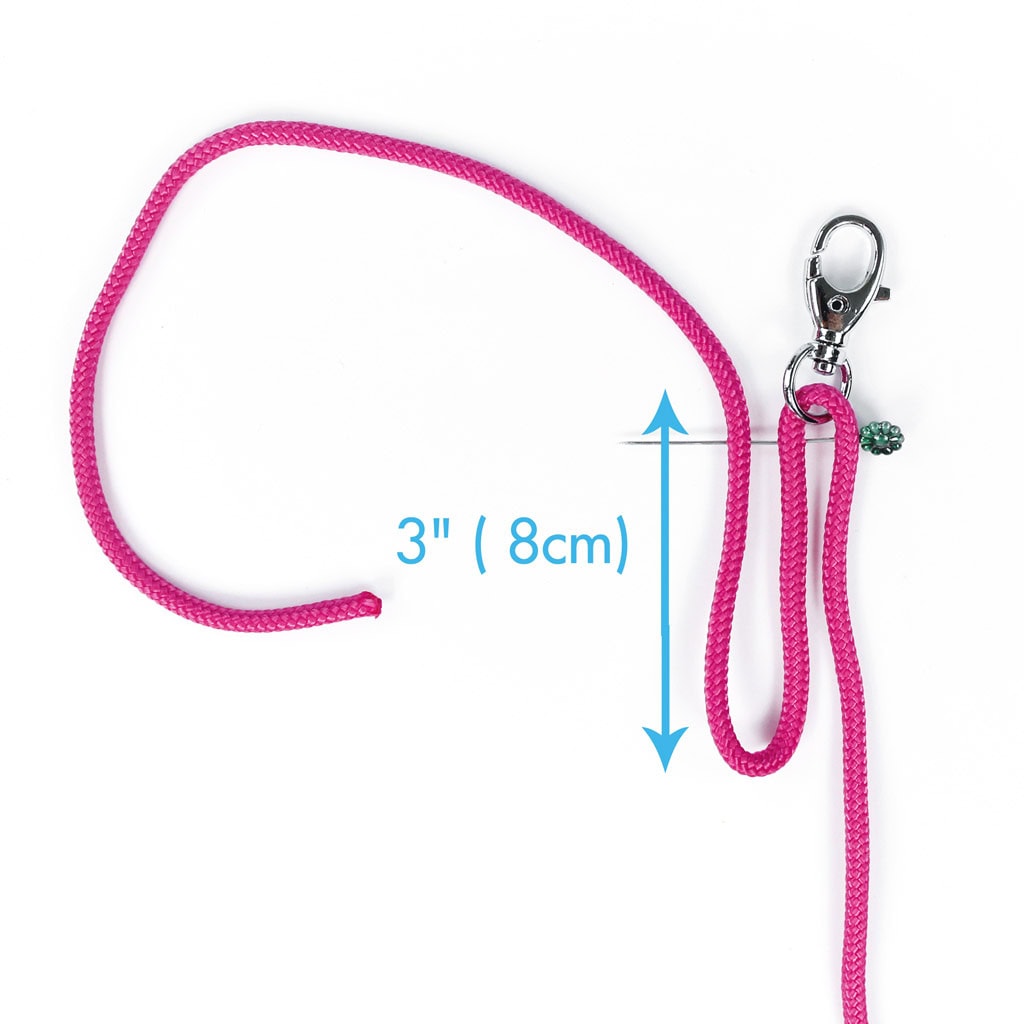
Cut a 40″ (100 cm) piece of rope. If using PP rope, seal both ends with a lighter to prevent fraying. Slide a snap hook with a round eye onto the rope and position it about 16″ (40 cm) from one end. Secure the two rope strands just below the snap hook with a pin or clip. Then lay both strands straight down. After about 3″ (8 cm), bend the shorter end back up to form a small loop pointing toward the snap hook. Hold all three strands just below the snap hook. Wrap the shorter end tightly around all three strands, starting directly under the snap hook, until about 2″ (5 cm) of the short end remains. A small loop should still be visible at the bottom.
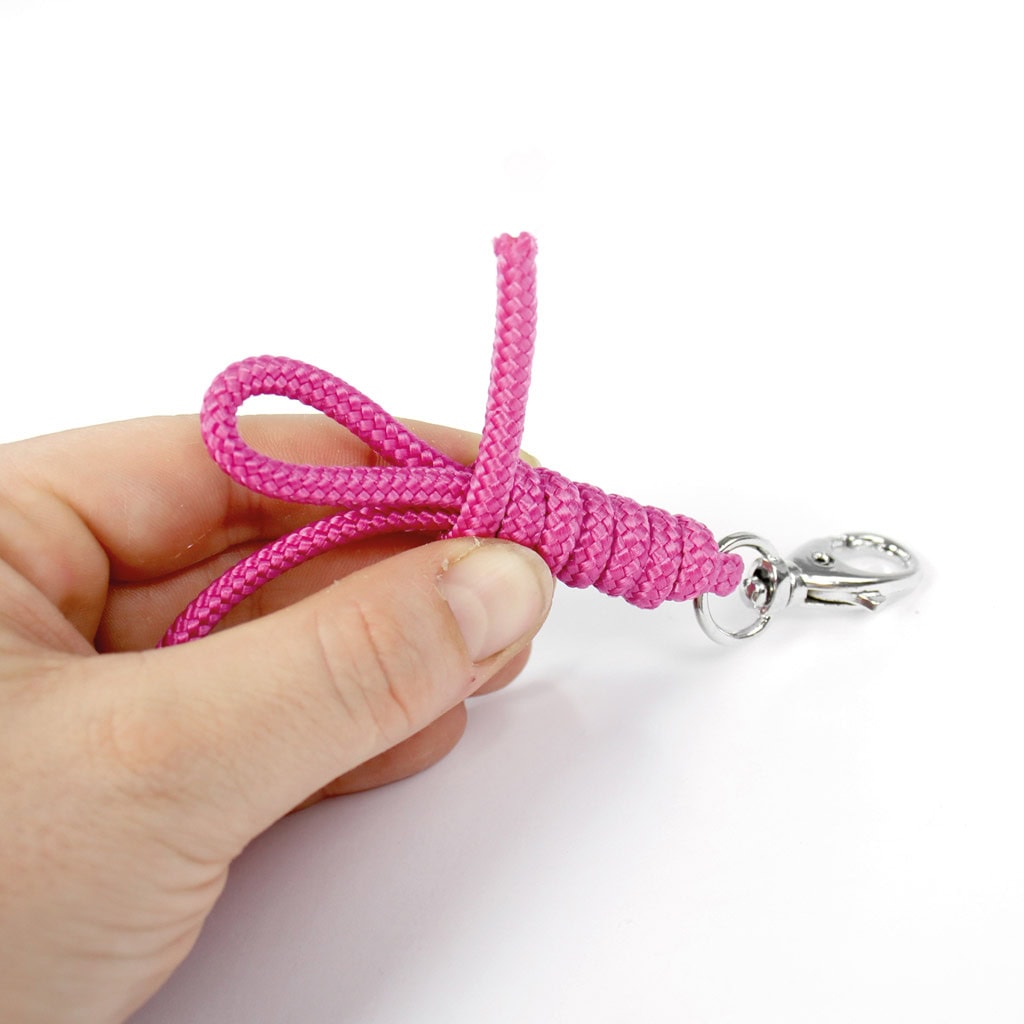
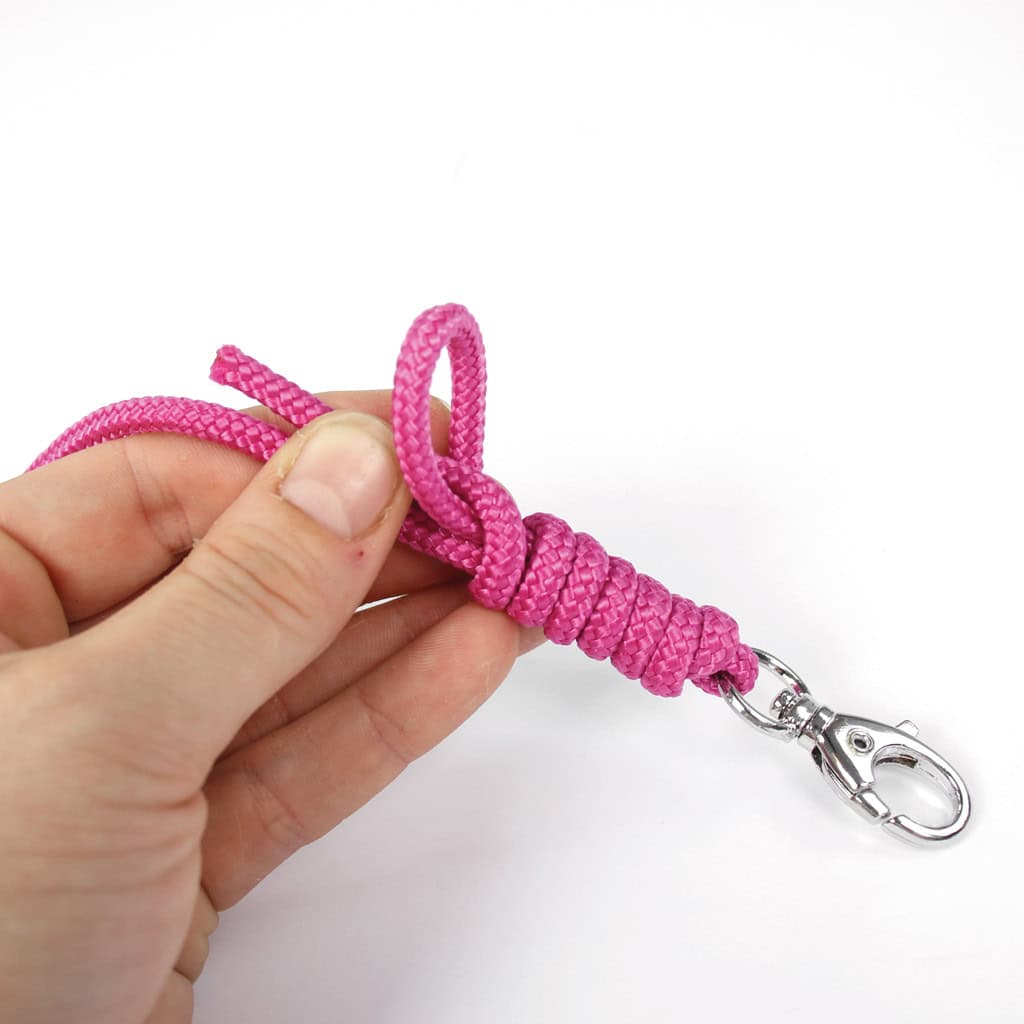
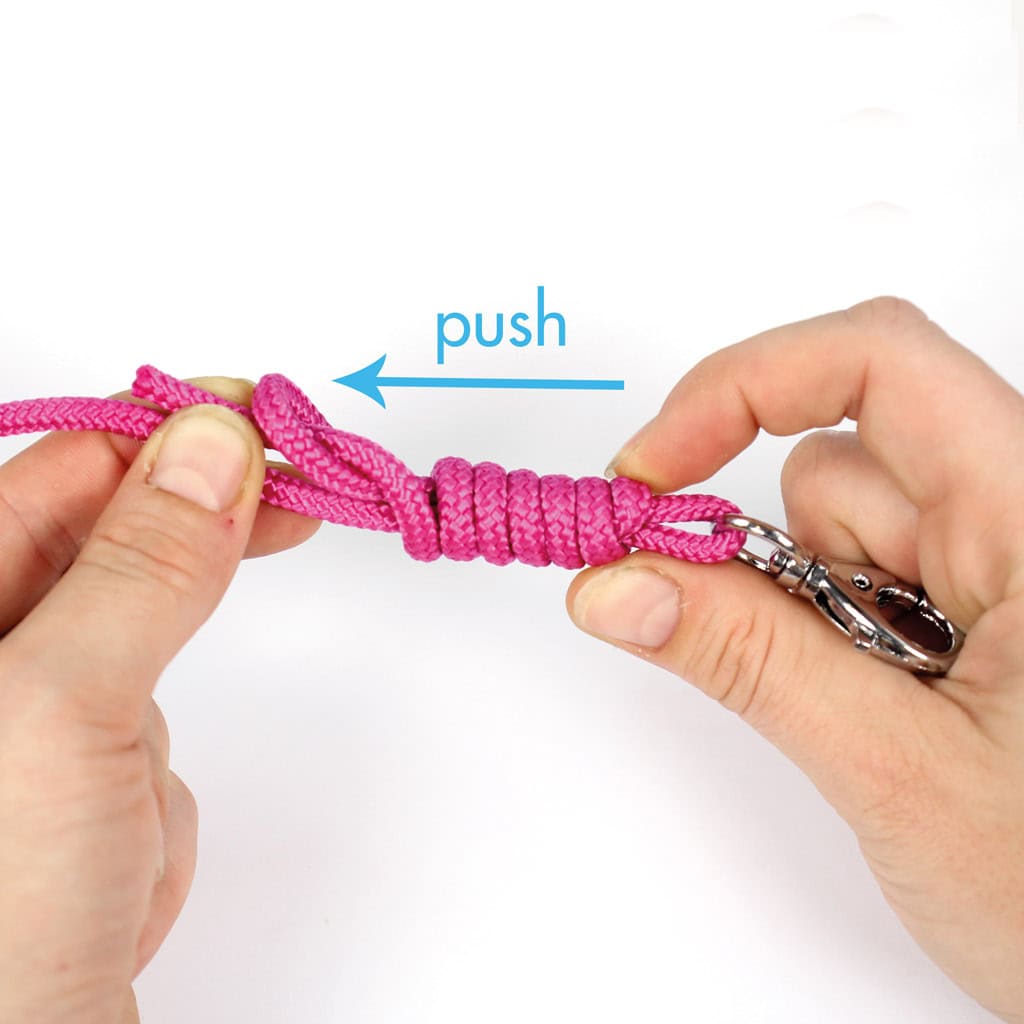
Now thread the remaining short end through that small lower loop. Then hold the short end and the long rope with your fingers and push the wrapped section towards it with the other hand. As you push, the bottom loop will shrink, pulling the end of the rope inside the wrap and securing it. Keep pushing until it feels tight and smooth.

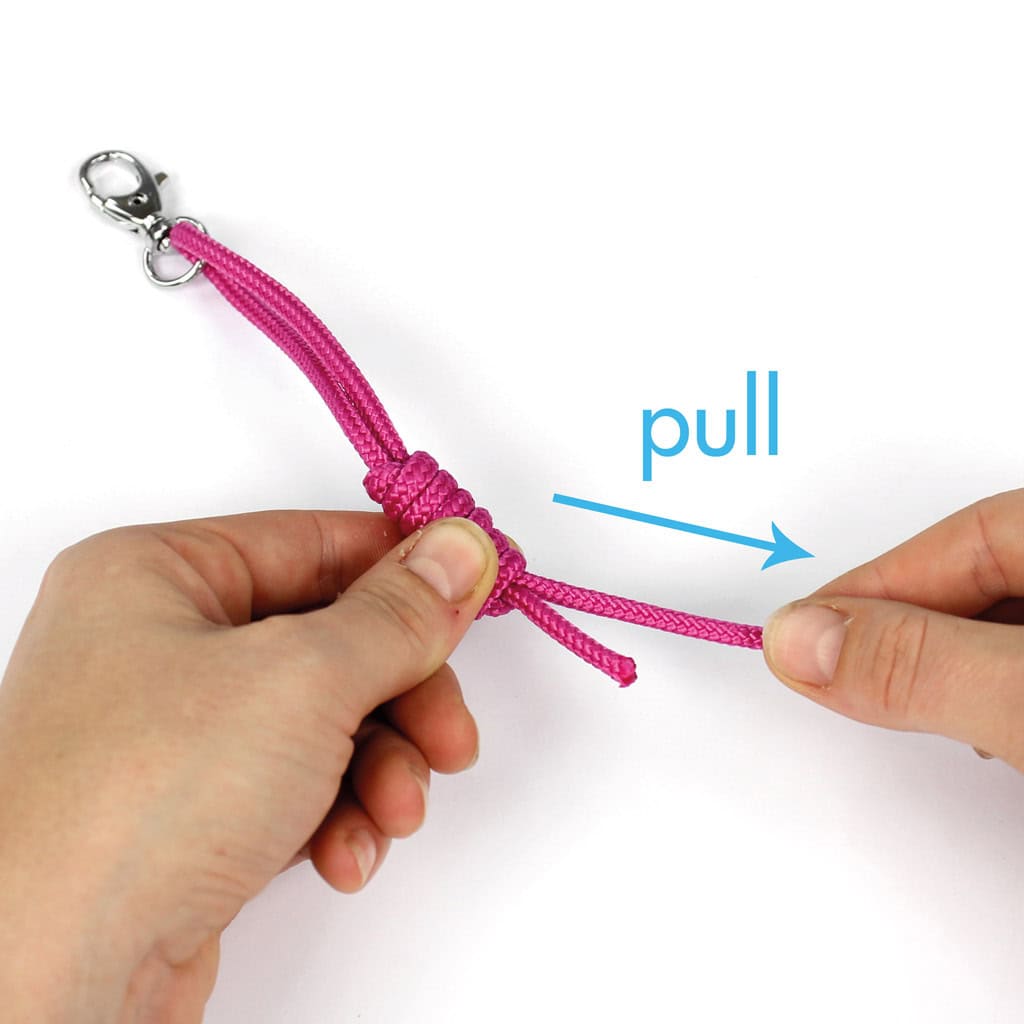
Finally, pull on the long rope to make the upper loop (where the snap hook sits) smaller. A loop height of about ½–1″ (2–3 cm) looks neat and holds well.
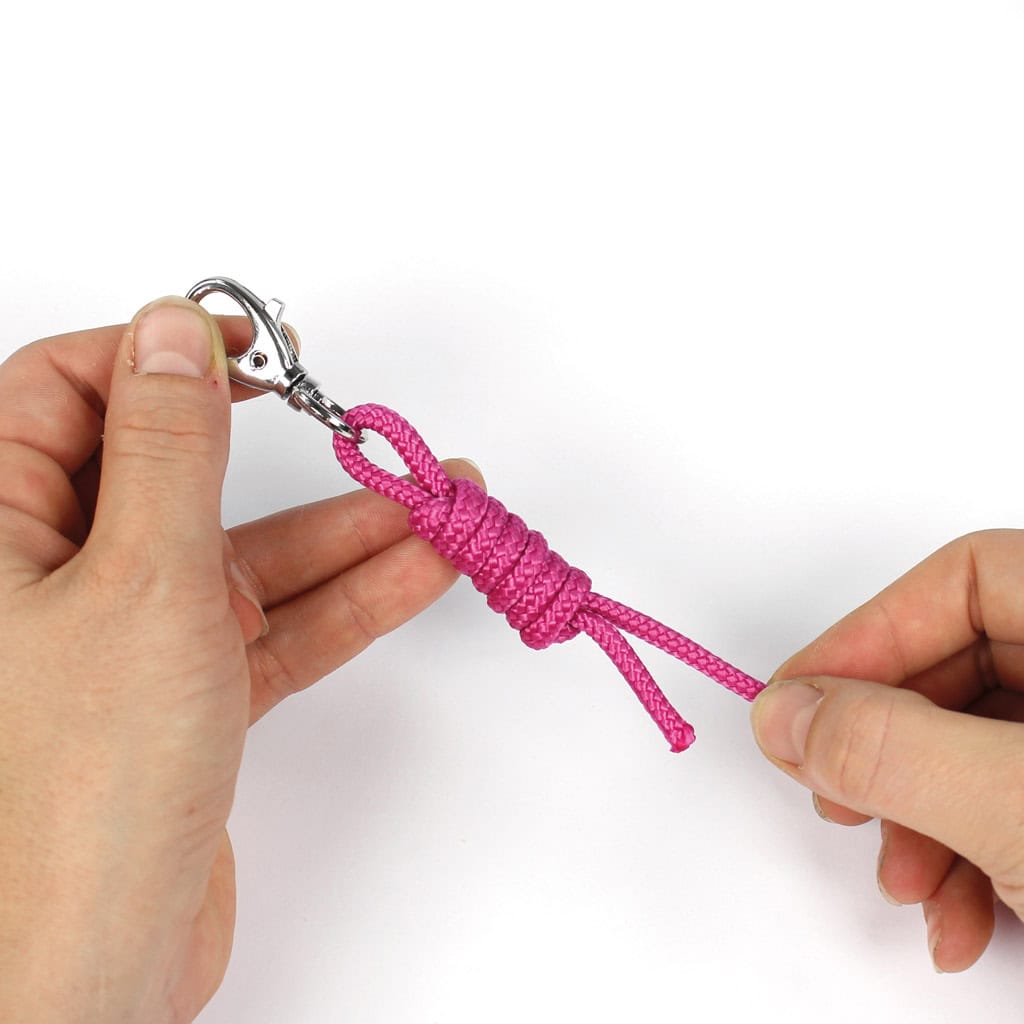
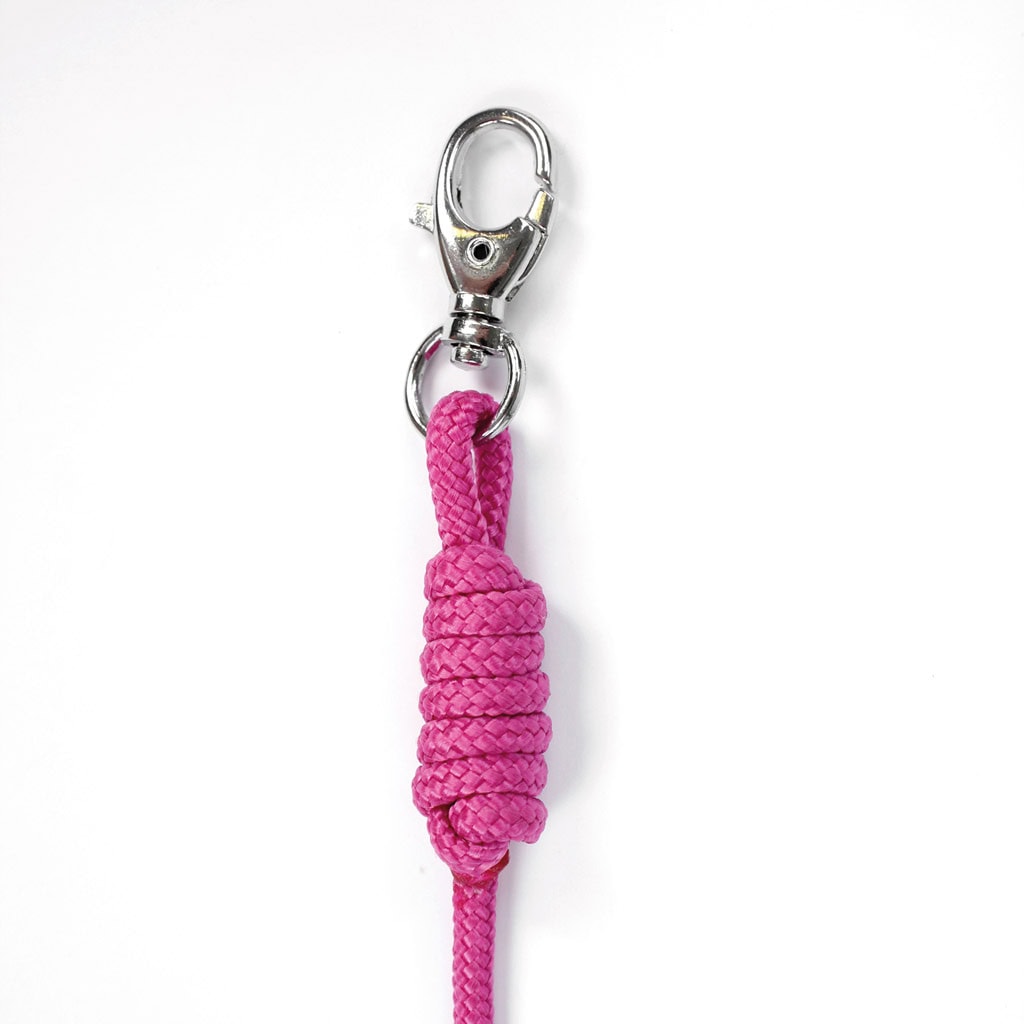
And that’s it – you’ve successfully tied a hangman’s knot! 🥳
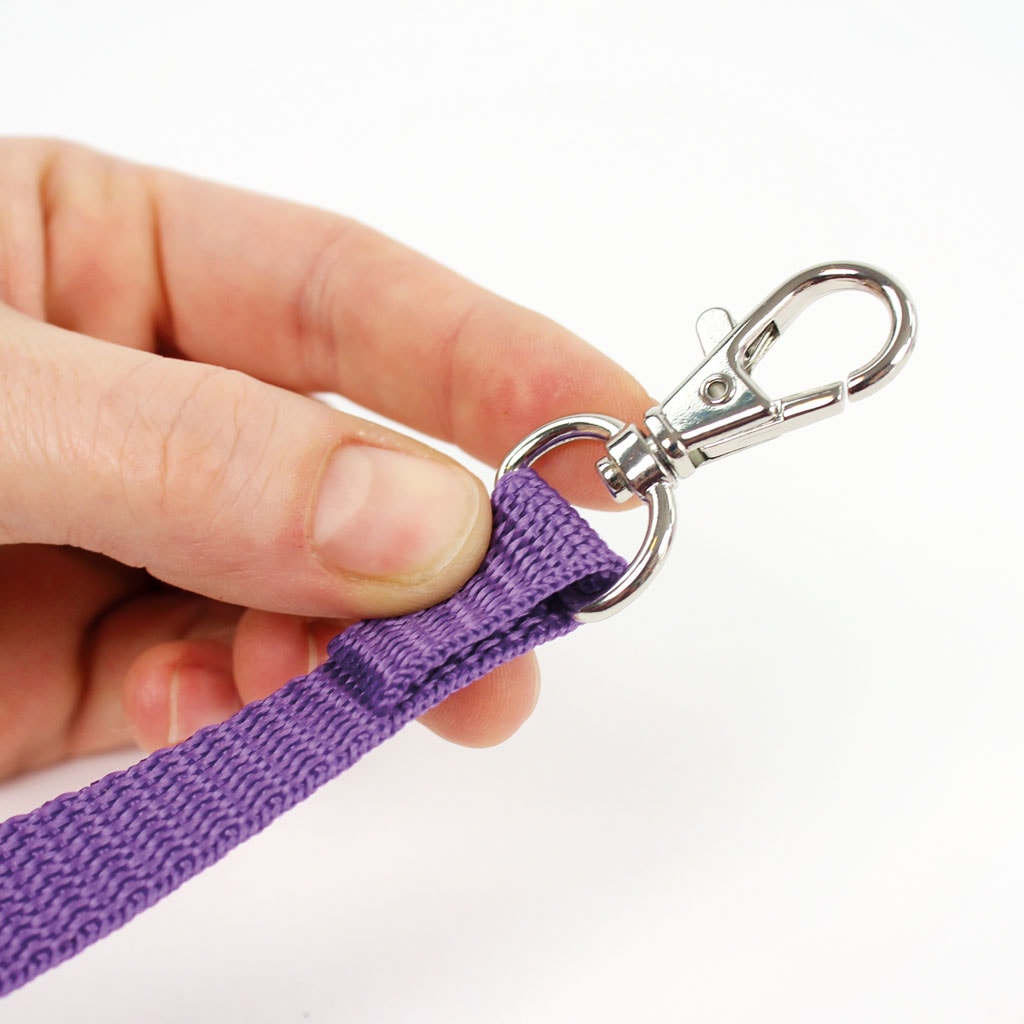
Simple lead from bag webbing
This is a great way to use leftover bag webbing or ribbon!
Cut a piece of webbing at least 12″ (30 cm) long. You can go longer – up to 40″ (1 m) – if you want a longer lead. If the webbing is polypropylene, carefully seal the ends. If you want, you can decorate the webbing by sewing on ribbon or using a decorative stitch along the length. Then thread a snap hook with a D-shaped eye onto one end. Fold the webbing back to create a 1″ (2 cm) loop and secure it with a straight stitch or strong glue.
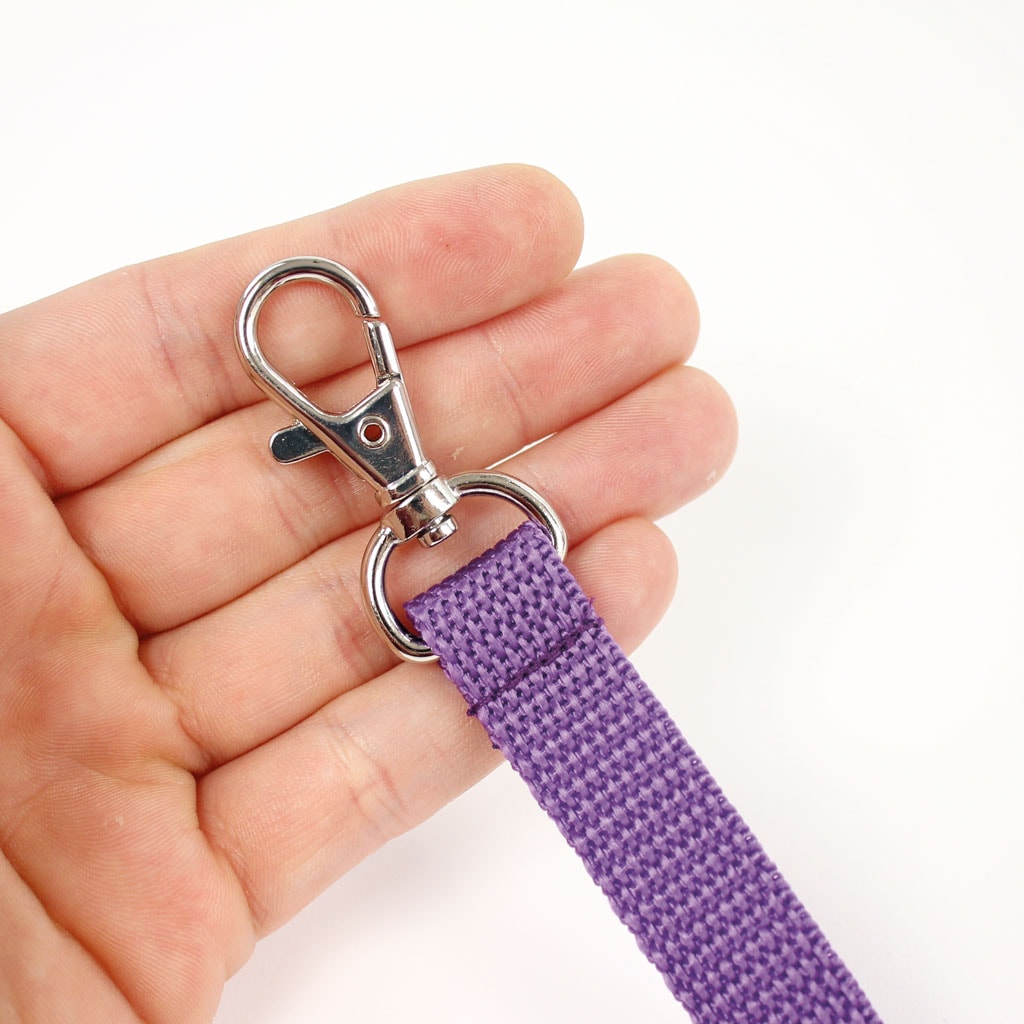

You can also add a larger hand loop at the other end if you like.
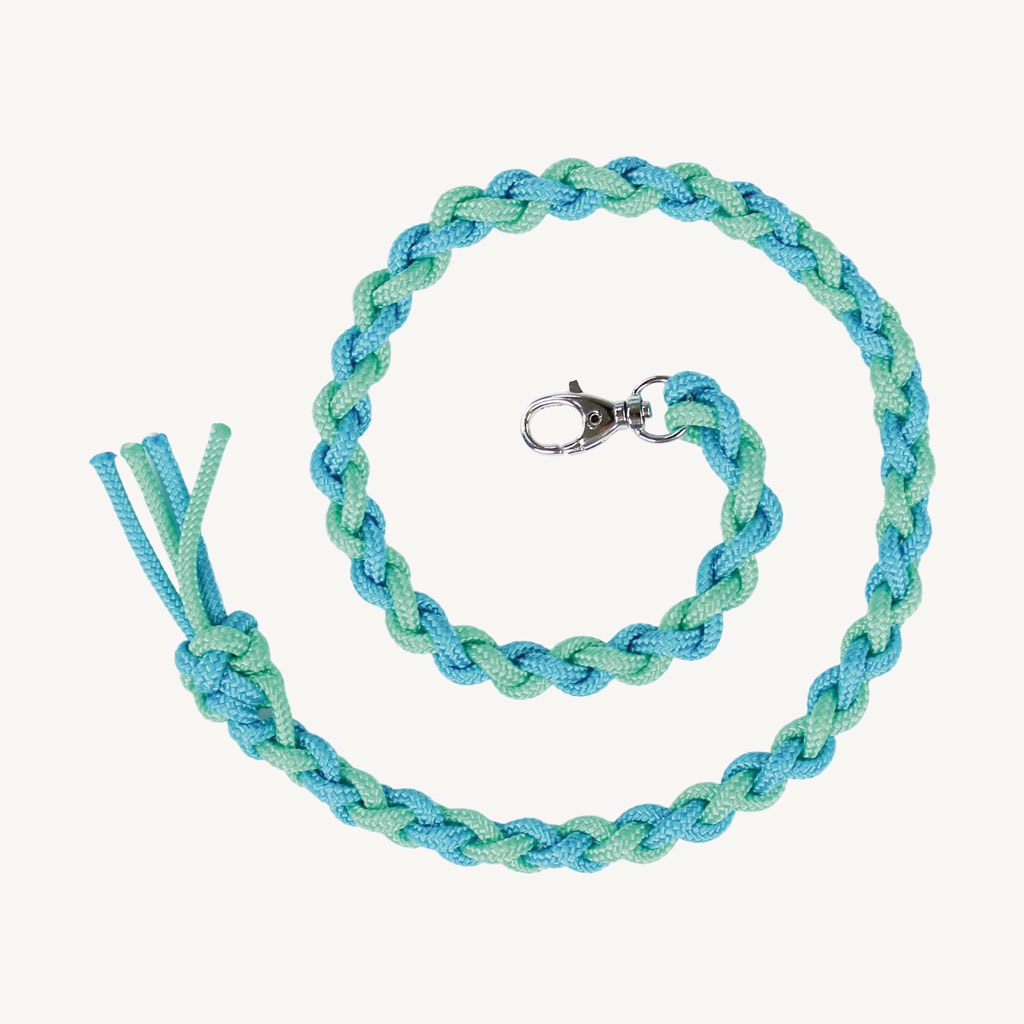
How to make a round braided lead rope
This is the most decorative option and a real favorite if you love colorful braids.
Cut two ropes, each 80″ (2 m) long. This will give you a finished lead rope of about 24″ (60 cm).
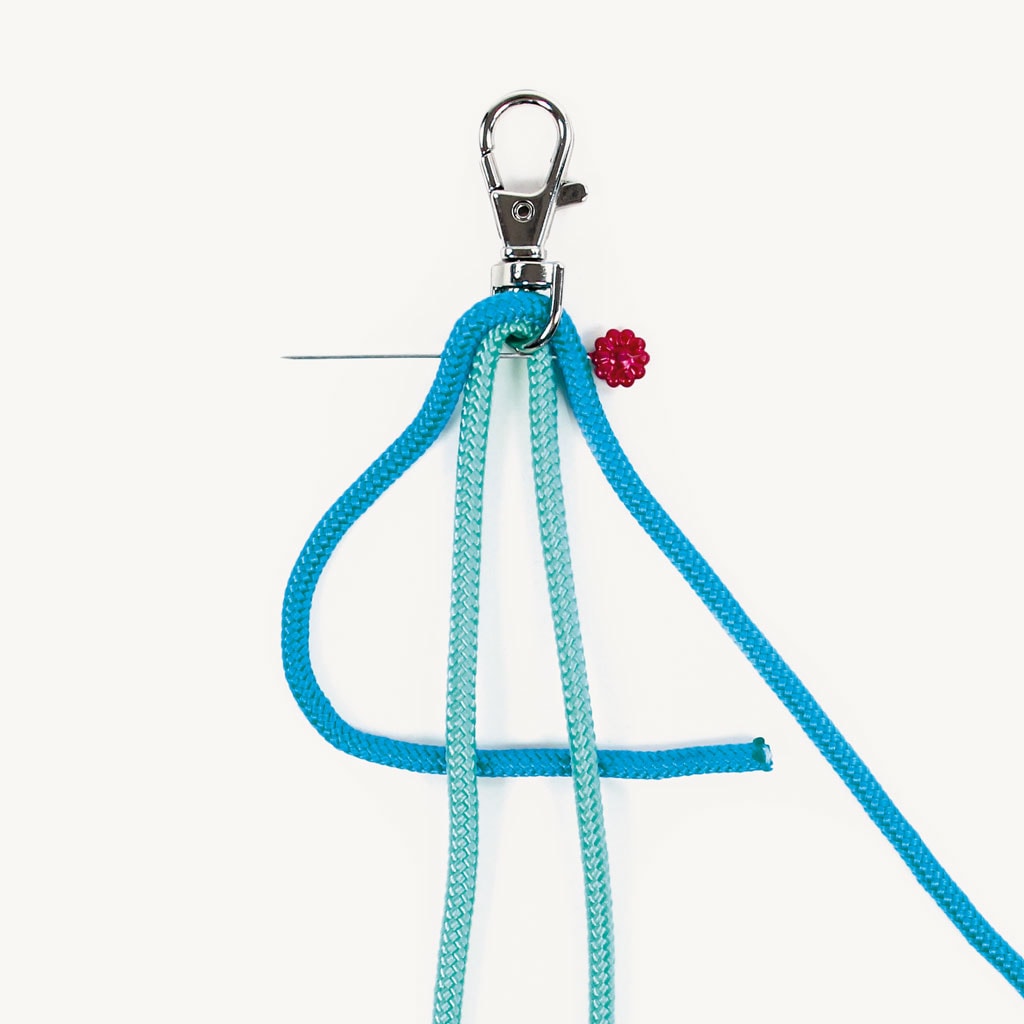
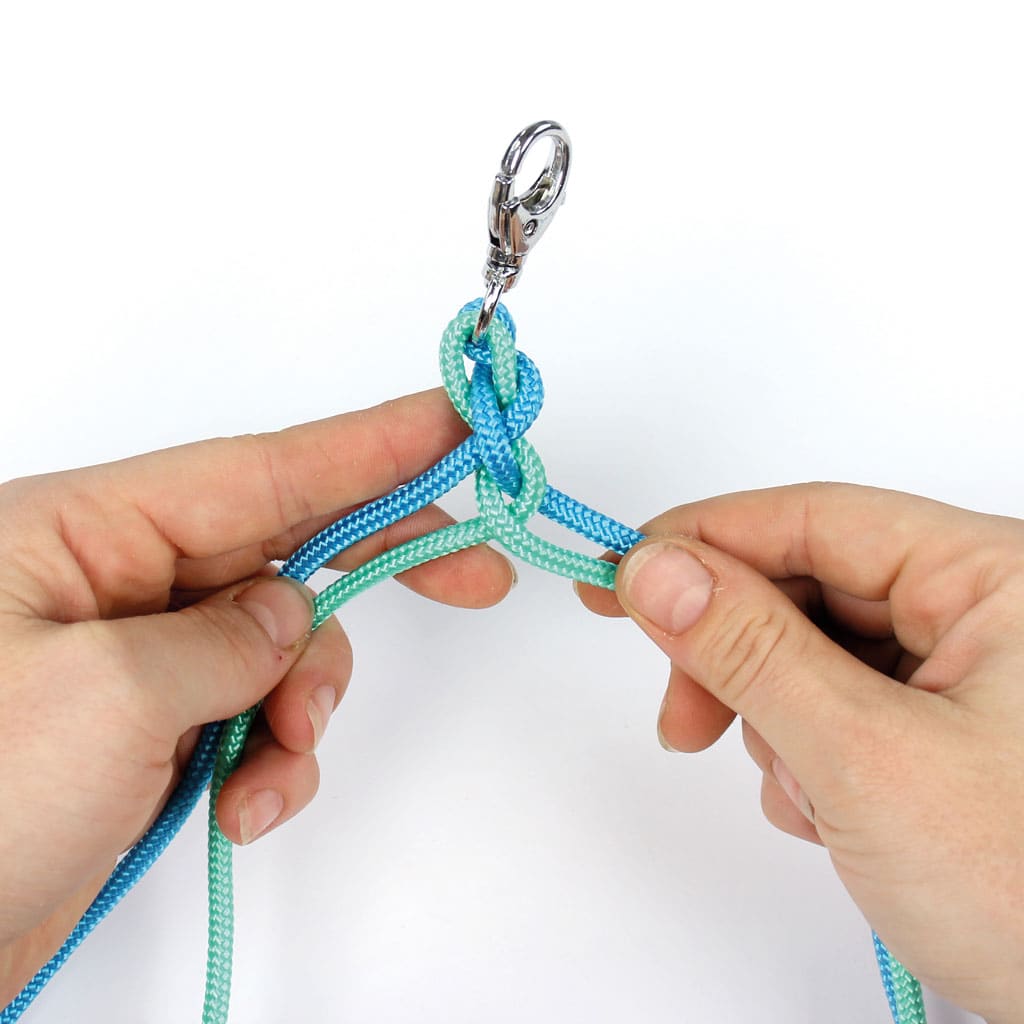
Slide a snap hook onto both ropes and position it exactly in the middle. Secure the ropes just below the snap hook with a pin so nothing can slip. For easier braiding, arrange the ropes in the order color 1 – color 2 – color 2 – color 1, so the two middle strands are the same color.


Braiding always follows the same rule: under two, back over one.
Start with the left outer rope. Guide it under the two middle ropes and back over the right middle rope.
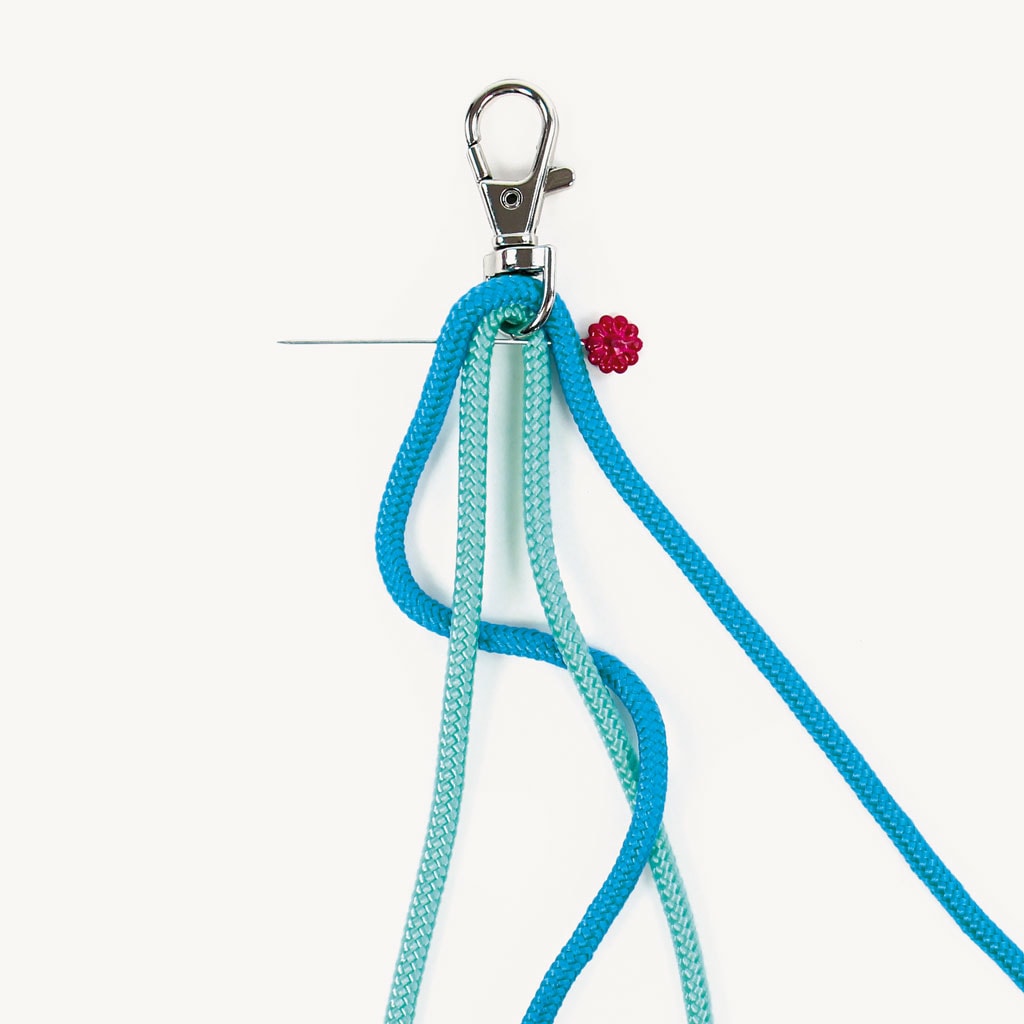
Next, take the right outer rope, guide it under the two middle ropes and back over the left middle rope. Then pull tight and remove the pin.
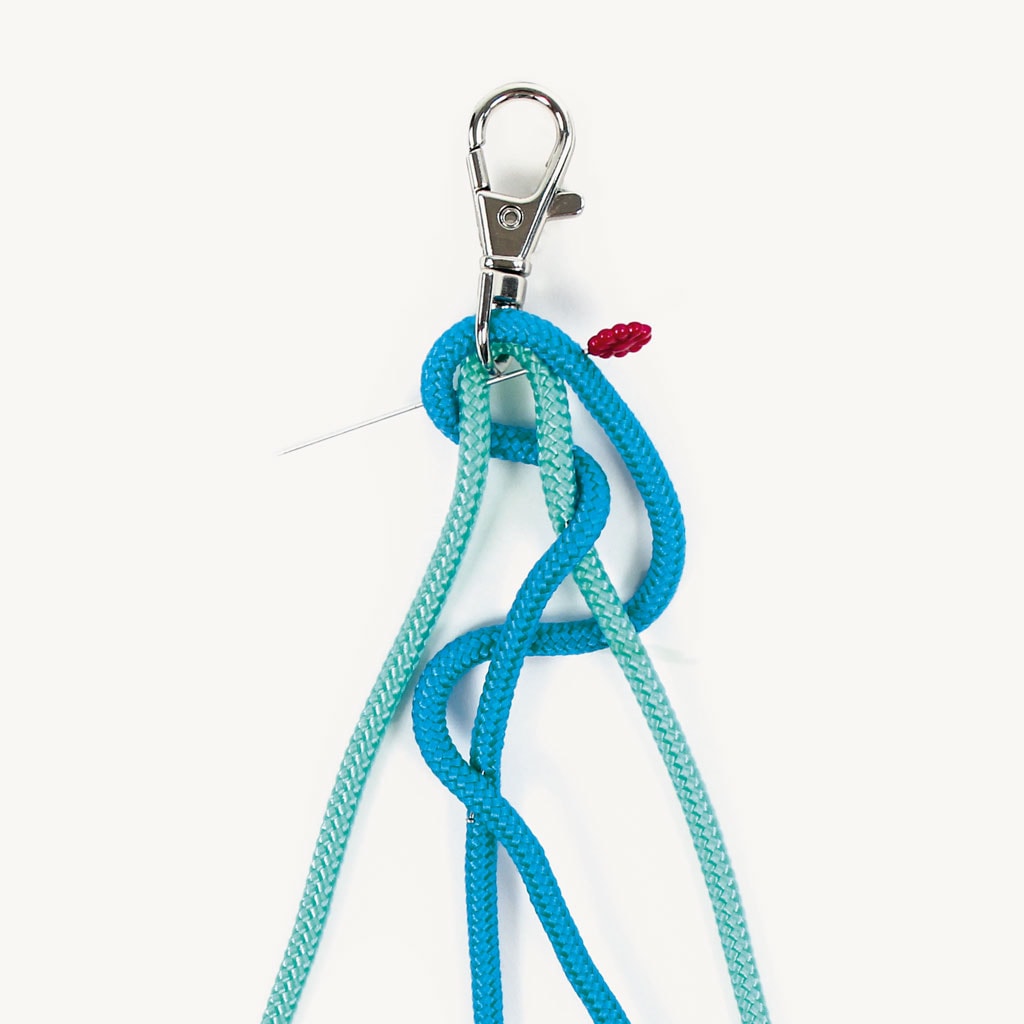

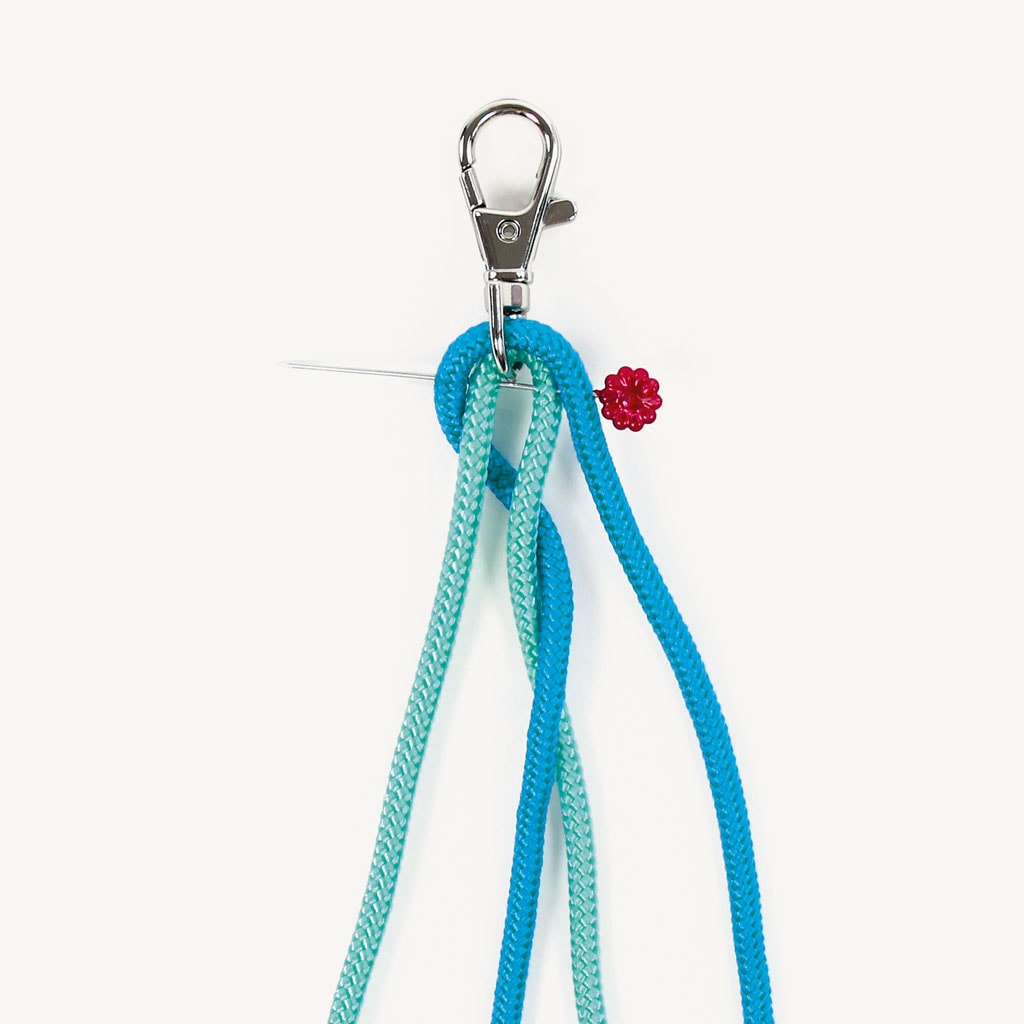
Repeat this pattern, always starting on the outside and alternating left and right, until the loose ends are about 8″ (20 cm) long. It helps to say the rule out loud while braiding: under two, back over one.
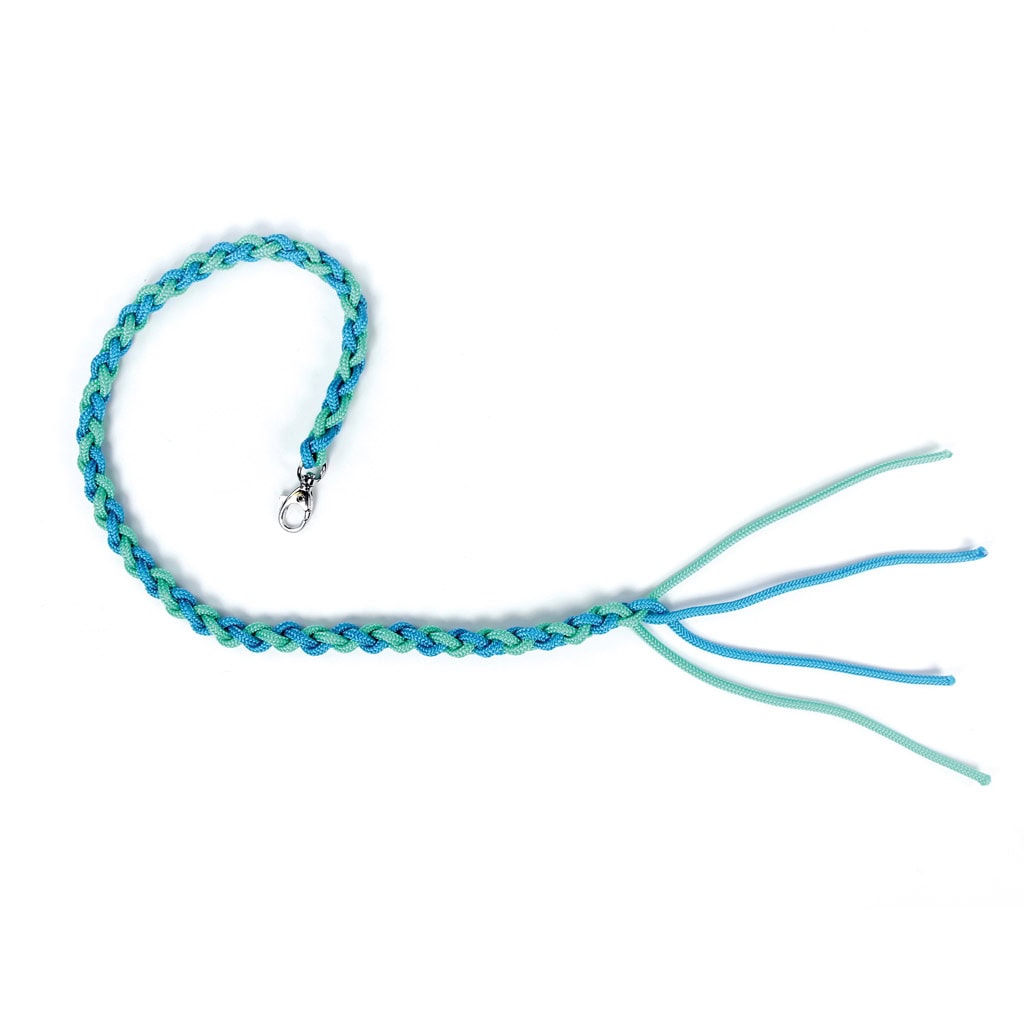
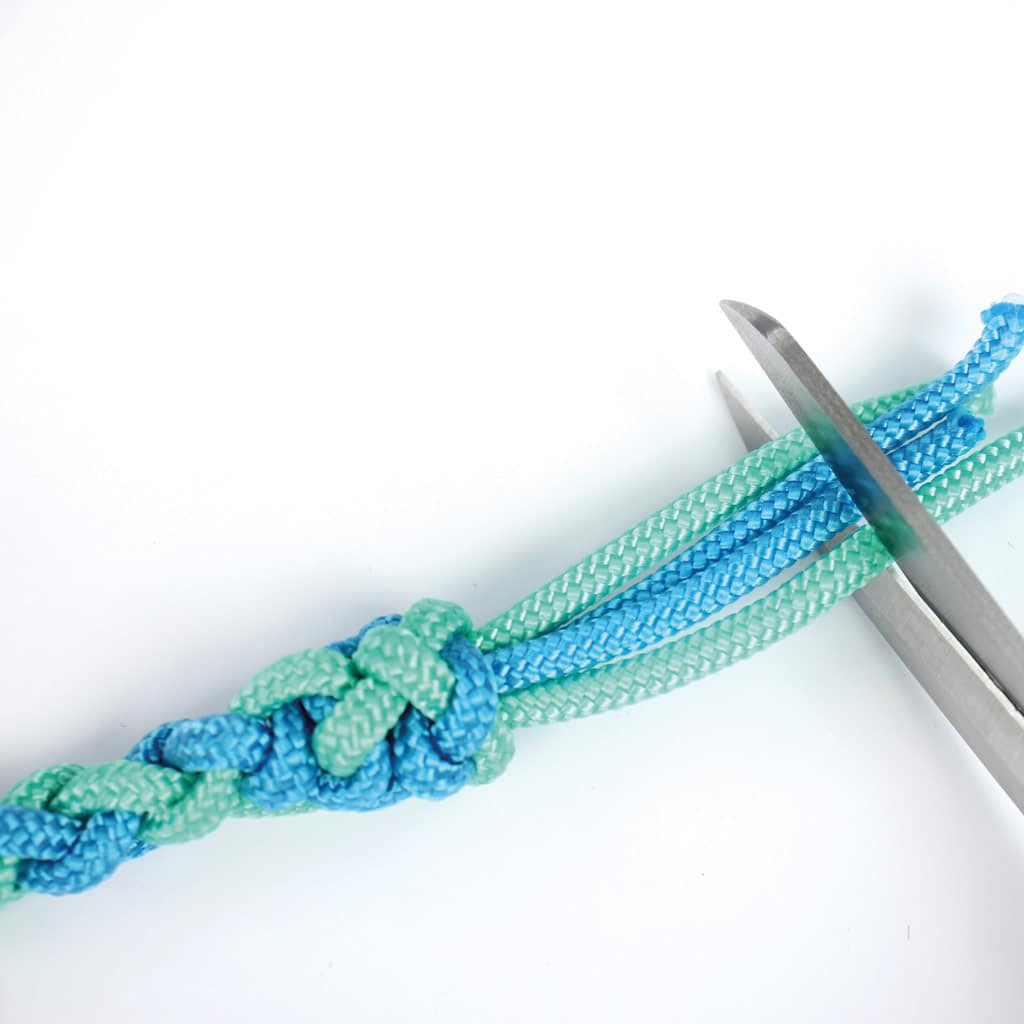
To finish, either tie all four ends together with a simple knot, or check out the video tutorial above to see how to make a neat and less bulky finishing knot. Trim the ends to the same length and seal them with a lighter or a bit of glue to prevent fraying.

And that wraps up our four DIY lead rope ideas! If you’re in the mood to keep crafting, make sure to check out our other hobby horse DIY tutorials as well – from halters and reins to matching accessories. They’re all designed to mix and match, so you can create a complete Hobby Horse setup that fits your style perfectly.
Have fun experimenting, and happy crafting! 🐎✨